


This is the best creamy hummus recipe, and it comes together in just 20 minutes. With canned chickpeas and 2 expert techniques I picked up from Israeli chefs, you'll get smooth, flavorful, authentic hummus that rivals any restaurant version. It’s easy and delicious, and the reviews prove: you’ll never want to buy store-bought again.
In this article you'll learn
- The way to make ultra creamy hummus using canned chickpeas and two smart techniques.
- Why a quick boil with baking soda softens the chickpea skins and creates a smooth, restaurant-style texture.
- How blending the ingredients while they’re still warm helps everything emulsify for a rich, silky result.
- Storage and make-ahead tips so you can prep it early and keep things simple for snacking or entertaining.
Generated with AI and experts from the Tara Teaspoon team.
When it comes to dips and appetizers, hummus is one of my go-tos! Don't get me wrong, I'll never turn down Baba Ganoush or a really good Guacamole, but the creamy texture and nutty flavor of hummus is extra satisfying.
There’s an Israeli restaurant up the street from me here in New York City that makes the creamiest hummus I’ve ever had. I love the way it scoops perfectly with warm pita bread and crunchy veggies; it really hits the spot.
I kept trying to find a store-bought version that came close, and after way too many grainy tubs with odd ingredients, like soybean oil and potassium sorbate, I gave up. I knew it was time to make my own restaurant-quality creamy hummus recipe.
The secrets to smooth, restaurant-style hummus
If you've ever wondered how to make hummus creamy, you're not alone. I set out to discover how the best Israeli chefs make it by studying their techniques and traditions.
I found that many authentic hummus recipes call for you to soak the beans overnight and hand-peel the skins off before blending. Think of the labor! I knew I needed a hack that didn't require extensive garbanzo bean soaking and peeling.
After researching several methods and testing them in my own kitchen, I created this hummus recipe from canned chickpeas (no overnight soaking or peeling required!). It's both authentic and incredibly creamy.
The good news is this life-changing recipe is surprisingly easy to make with just 3 expert tips:
- Use canned chickpeas
- Cook the beans in baking soda
- Blend everything together while it's hot
Yep, that's it! Keep reading for more reasons this is the best hummus recipe:
- Easy to make: It's made simply with 8 real ingredients in a saucepan and food processor. You'll be enjoying your hummus in just 20 minutes with minimal clean up.
- Loved by all: The texture and flavor of this hummus is so good that even self-proclaimed hummus-haters will be converted. Both kids and adults love it!
- Versatile: This method gives you restaurant-style hummus that’s perfect with warm pita and crisp vegetables, or as a base for bowls and spreads. Use it to meal prep, and serve it as an appetizer, snack, or side dish.
Jump to:
- In this article you'll learn
- The secrets to smooth, restaurant-style hummus
- Ingredients for the best hummus recipe
- How to make this creamy hummus recipe
- Tara's top tips
- How to cook dried chickpeas
- Equipment
- Favorite variations
- Storage and reheating
- FAQ
- More flavorful appetizers and dips
- 📖 Full Recipe
- 💬 Comments & Reviews
This hummus recipe is incredible! I haven't purchased hummus from a store since I came across this recipe. It's easy and the results are so yummy.
- Jen
Ingredients for the best hummus recipe
Before gathering your ingredients, check out these tips to help you find everything you'll need for this Mediterranean dish. See recipe card for quantities.
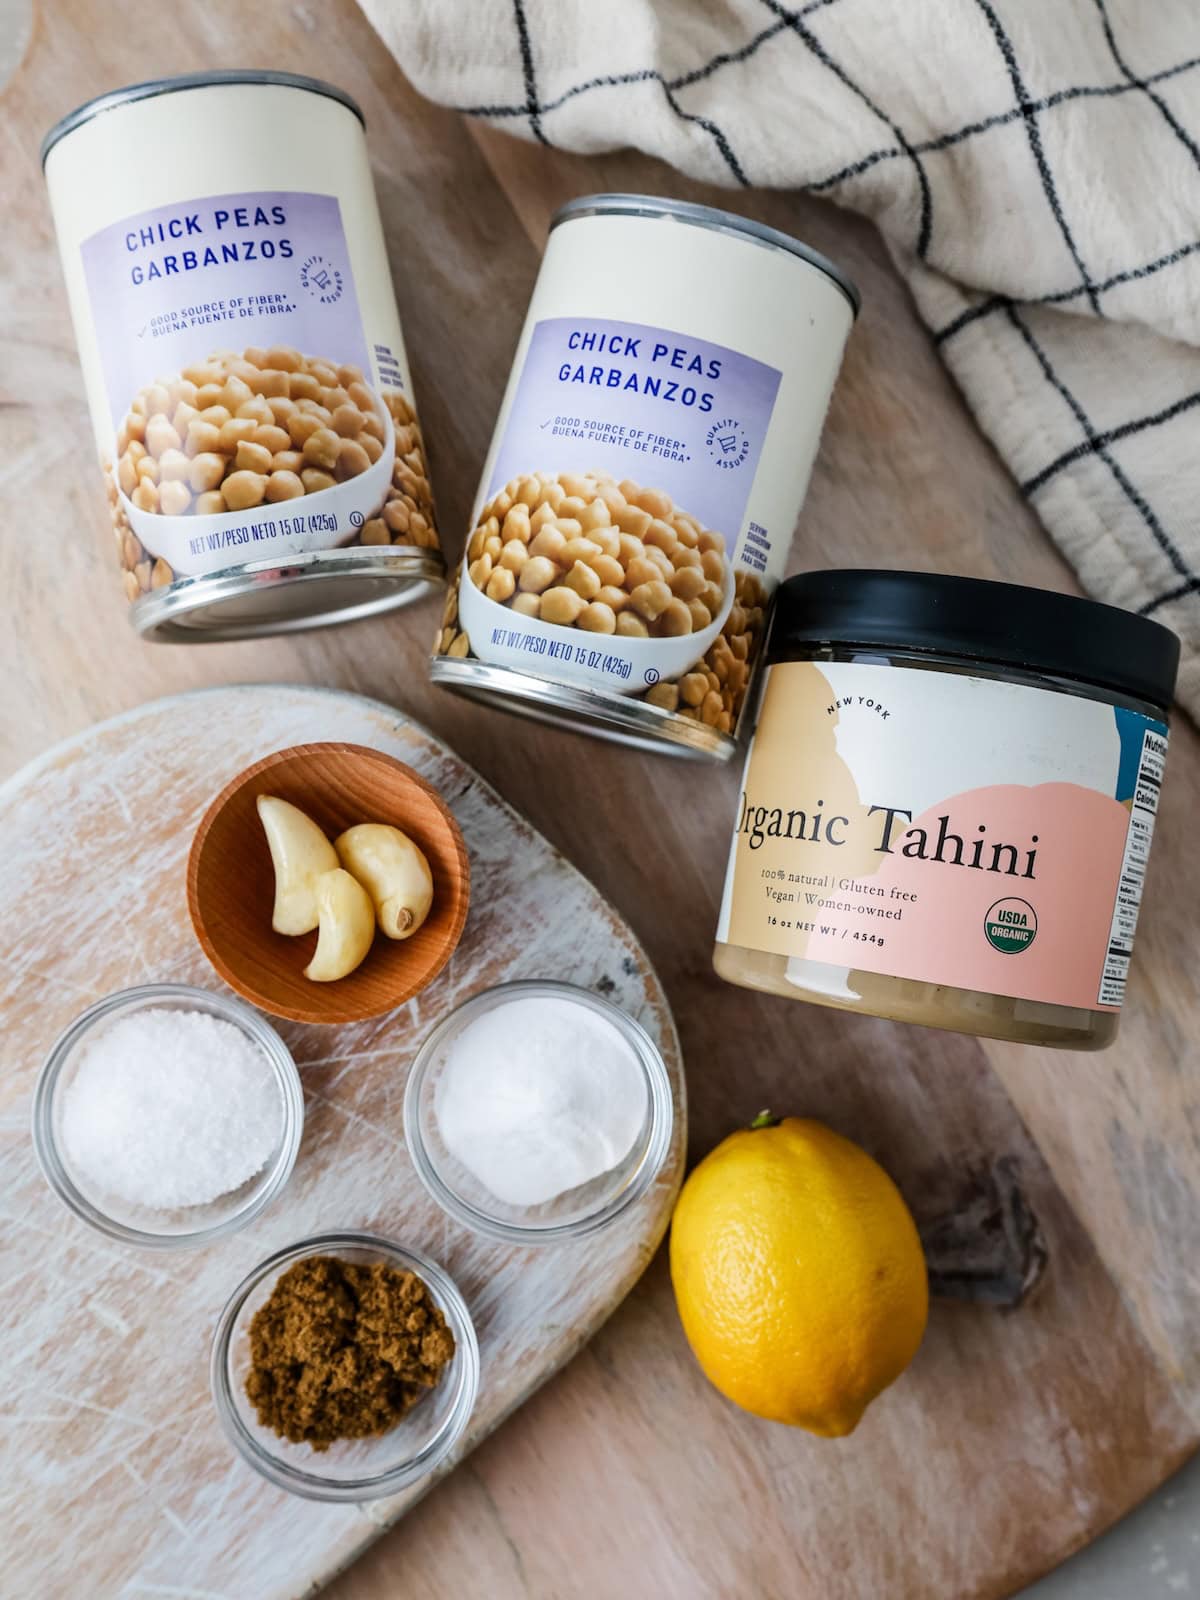
- Canned chickpeas: I often use Goya brand chickpeas, but you can use any brand you have on hand because they are all very similar. If desired, check the tip below for how to use dried chickpeas.
- Baking soda: Adds sodium to the beans to bring out their flavor, breaks down the outer skins and fleshy insides of the garbanzo beans, making them easier to blend.
- Fresh lemon juice: You might be tempted to use canned lemon juice, but I highly recommend using fresh-squeezed lemon juice for the best flavor.
- Garlic
- Kosher salt
- Sesame tahini: If you're not familiar with tahini, it's a nut butter made from ground sesame seeds, a staple in Middle Eastern cooking, and a key ingredient for this recipe. You can find it in some grocery stores, international food stores, and online. I find the brand doesn't matter too much, but I do like Seed & Mill, Somo, and Trader Joes brands.
- Ground cumin: Adds a subtle smoky flavor without overpowering the dip.
- Olive oil: For drizzling. Adds richness to each bite.
How to make this creamy hummus recipe
You are going to love how easy it is to make homemade hummus with baking soda. Follow this photo tutorial for simple step-by-step instructions. Comprehensive directions can be found in the recipe card.
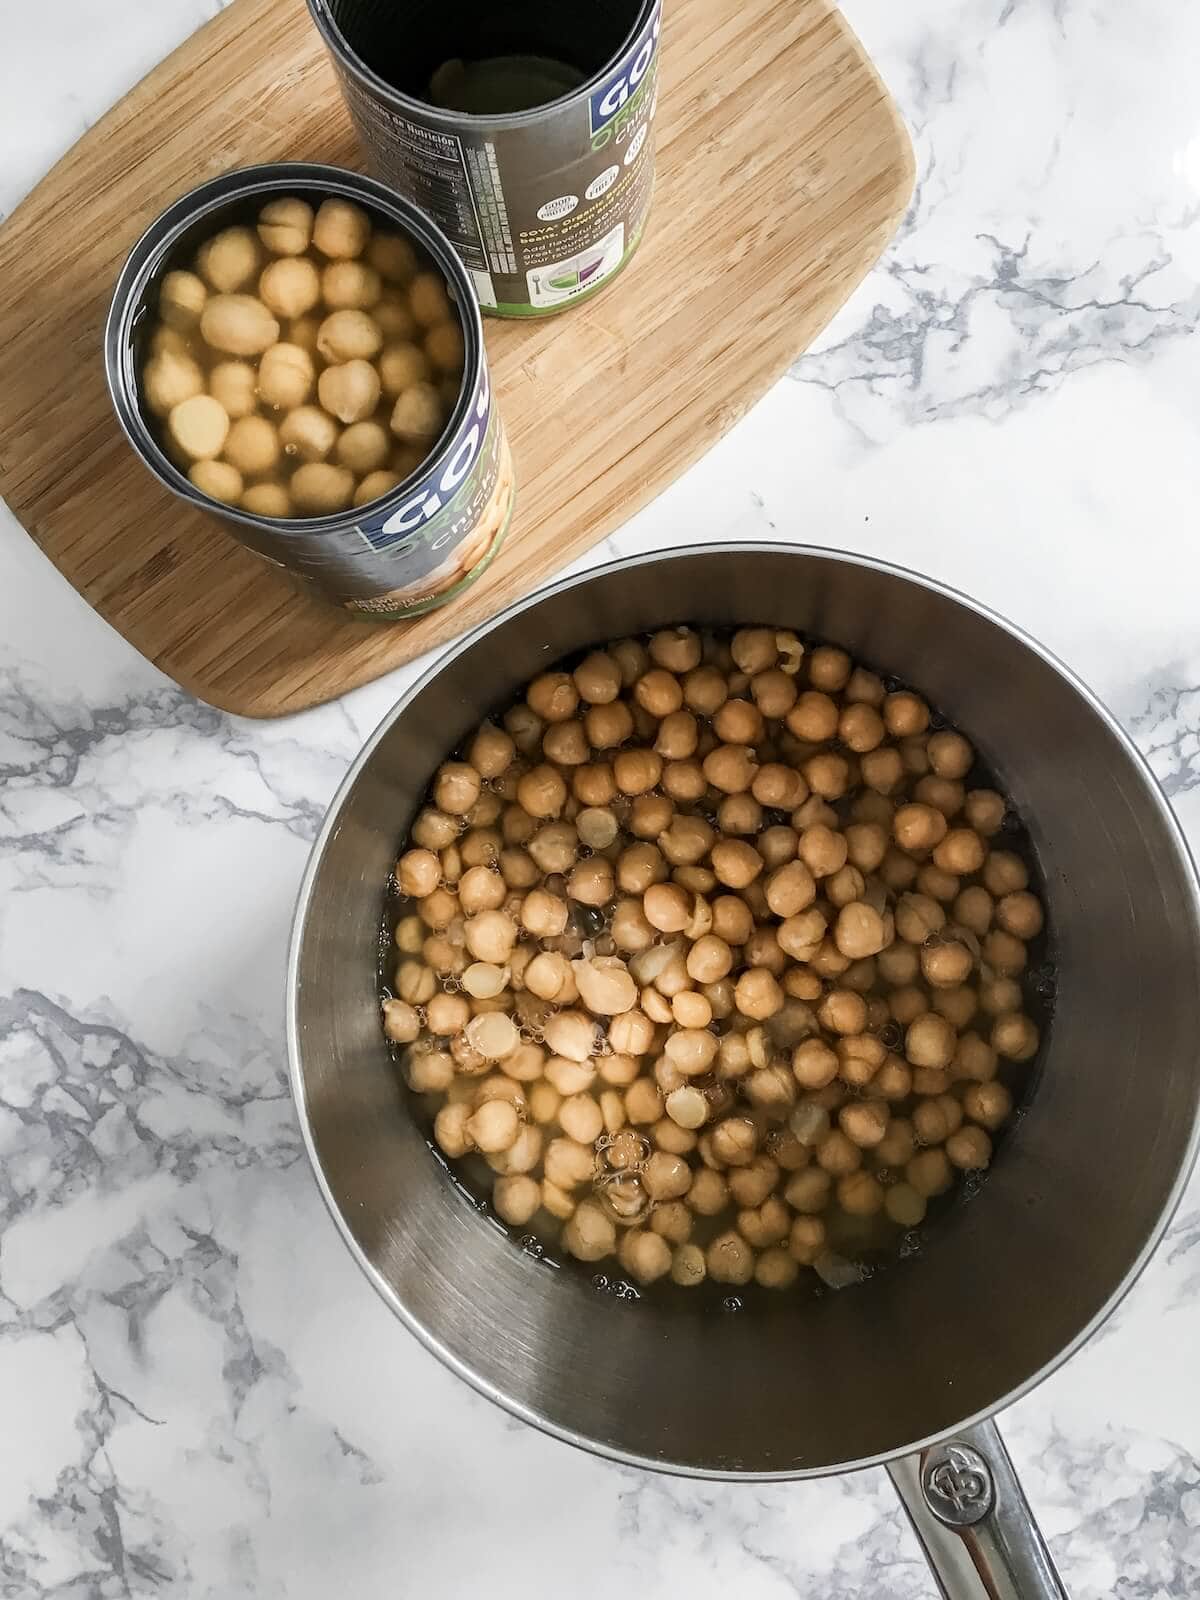
- Step 1: Simmer canned chickpeas and their liquid, water, and baking soda for 5 minutes.
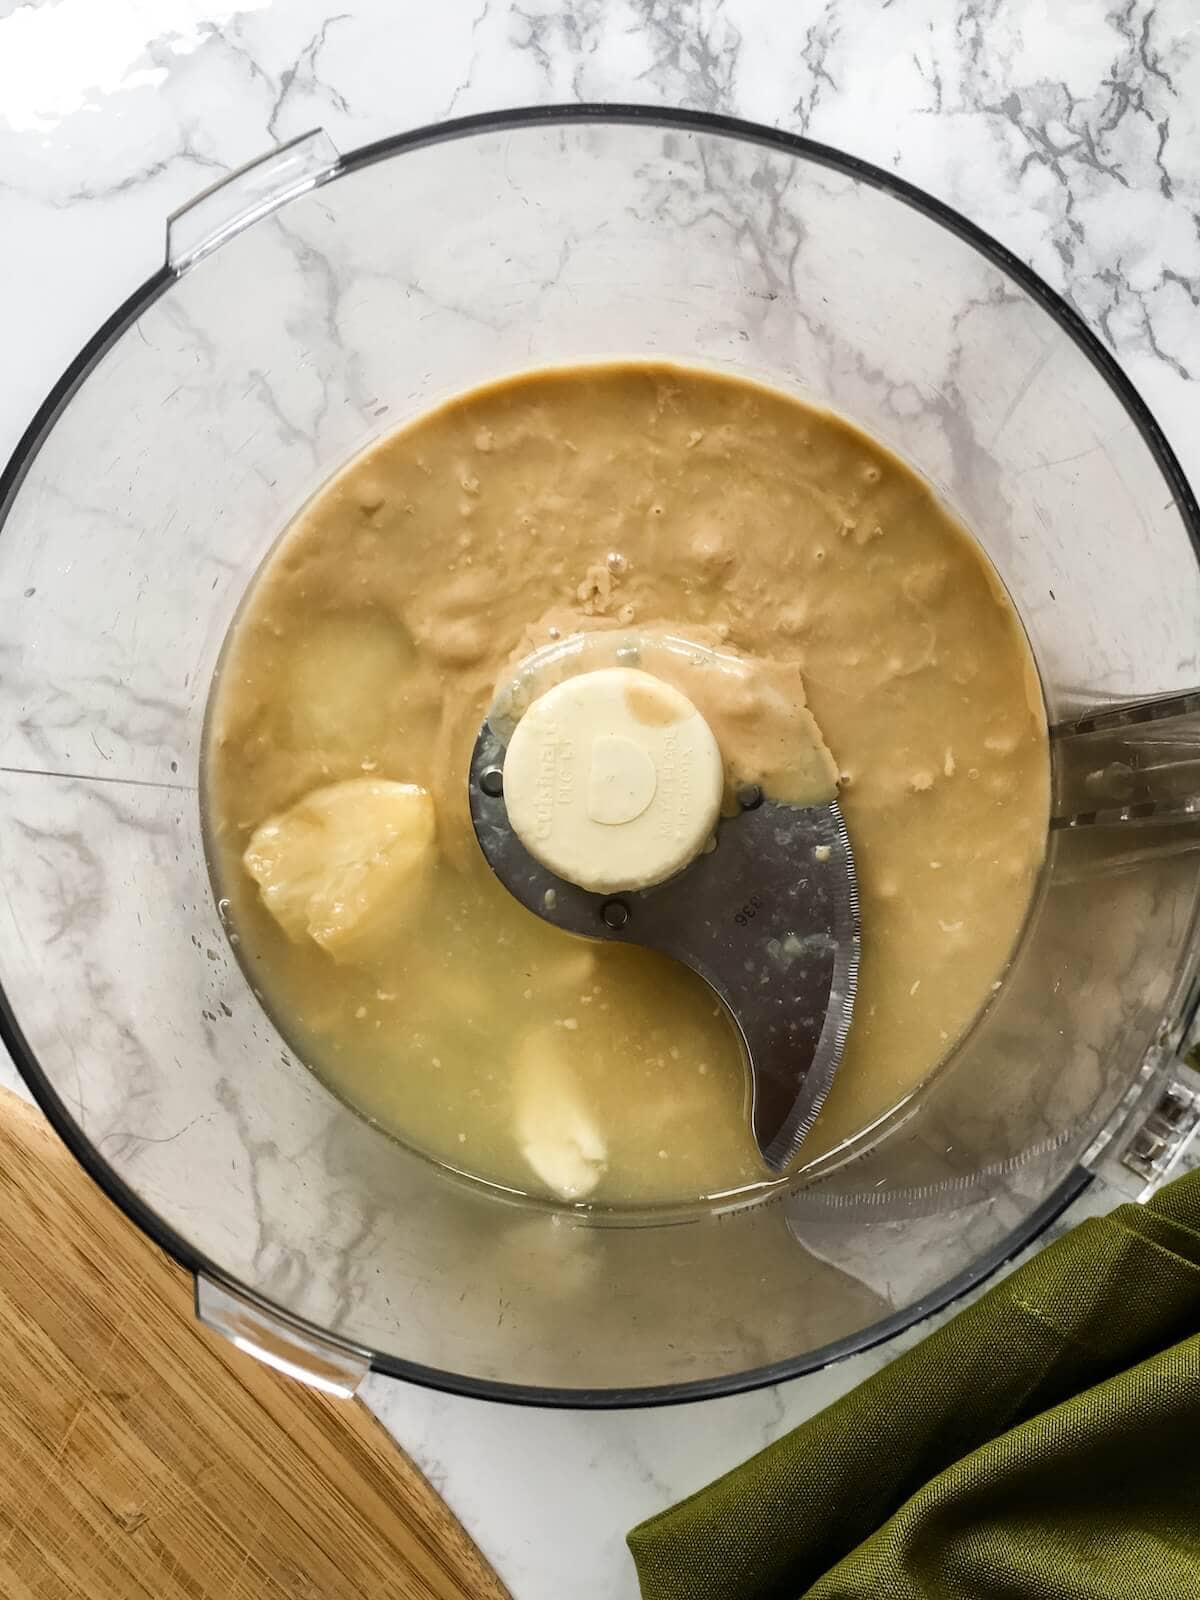
- Step 2: While the beans cook, combine lemon juice, garlic, salt, and tahini in a food processor.
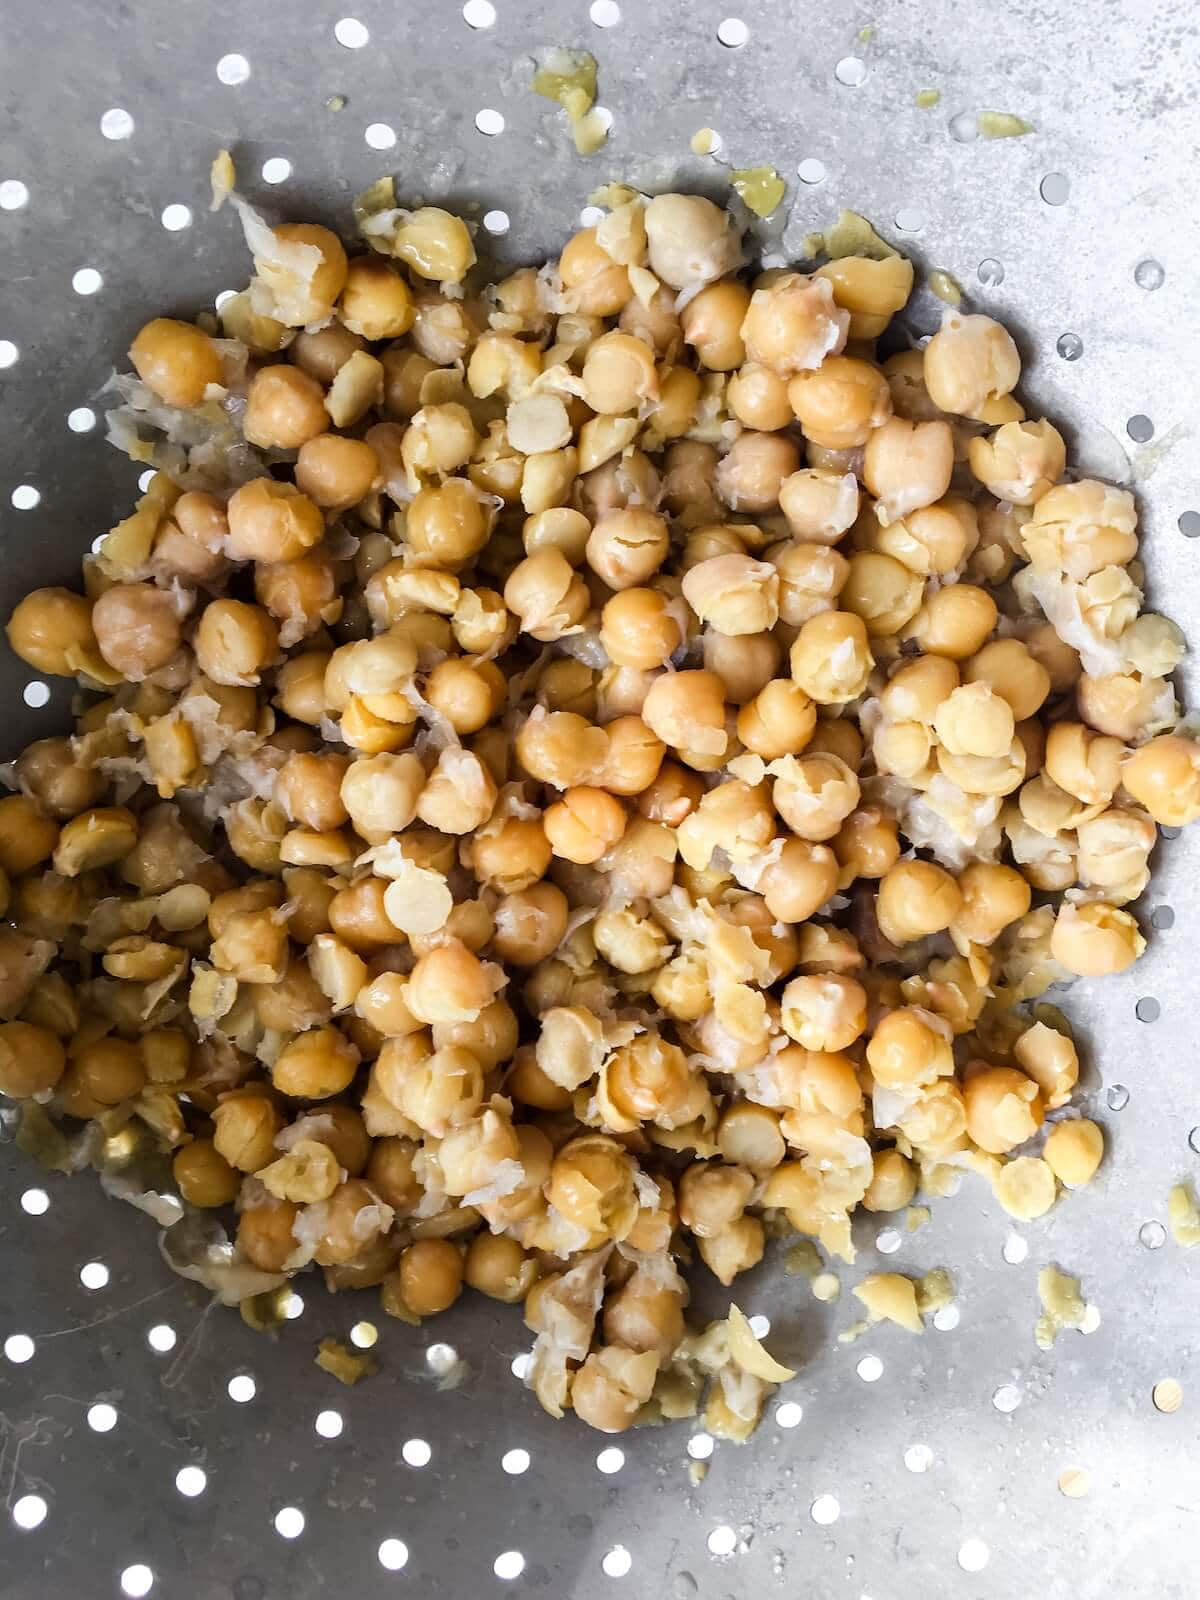
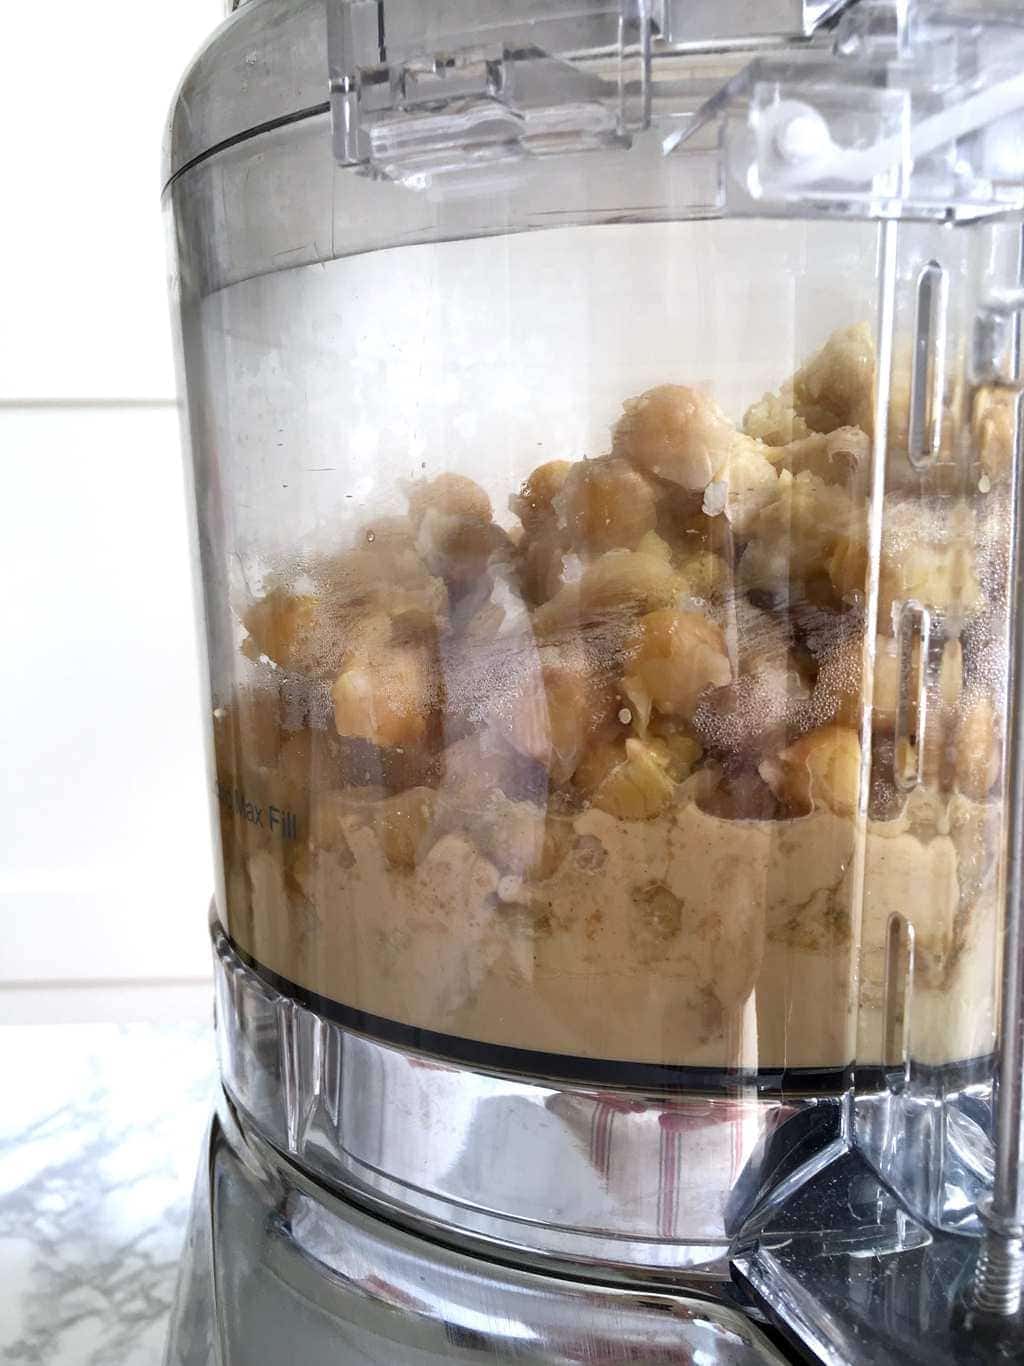
- Step 3: Drain the chickpeas and rinse carefully in hot water.

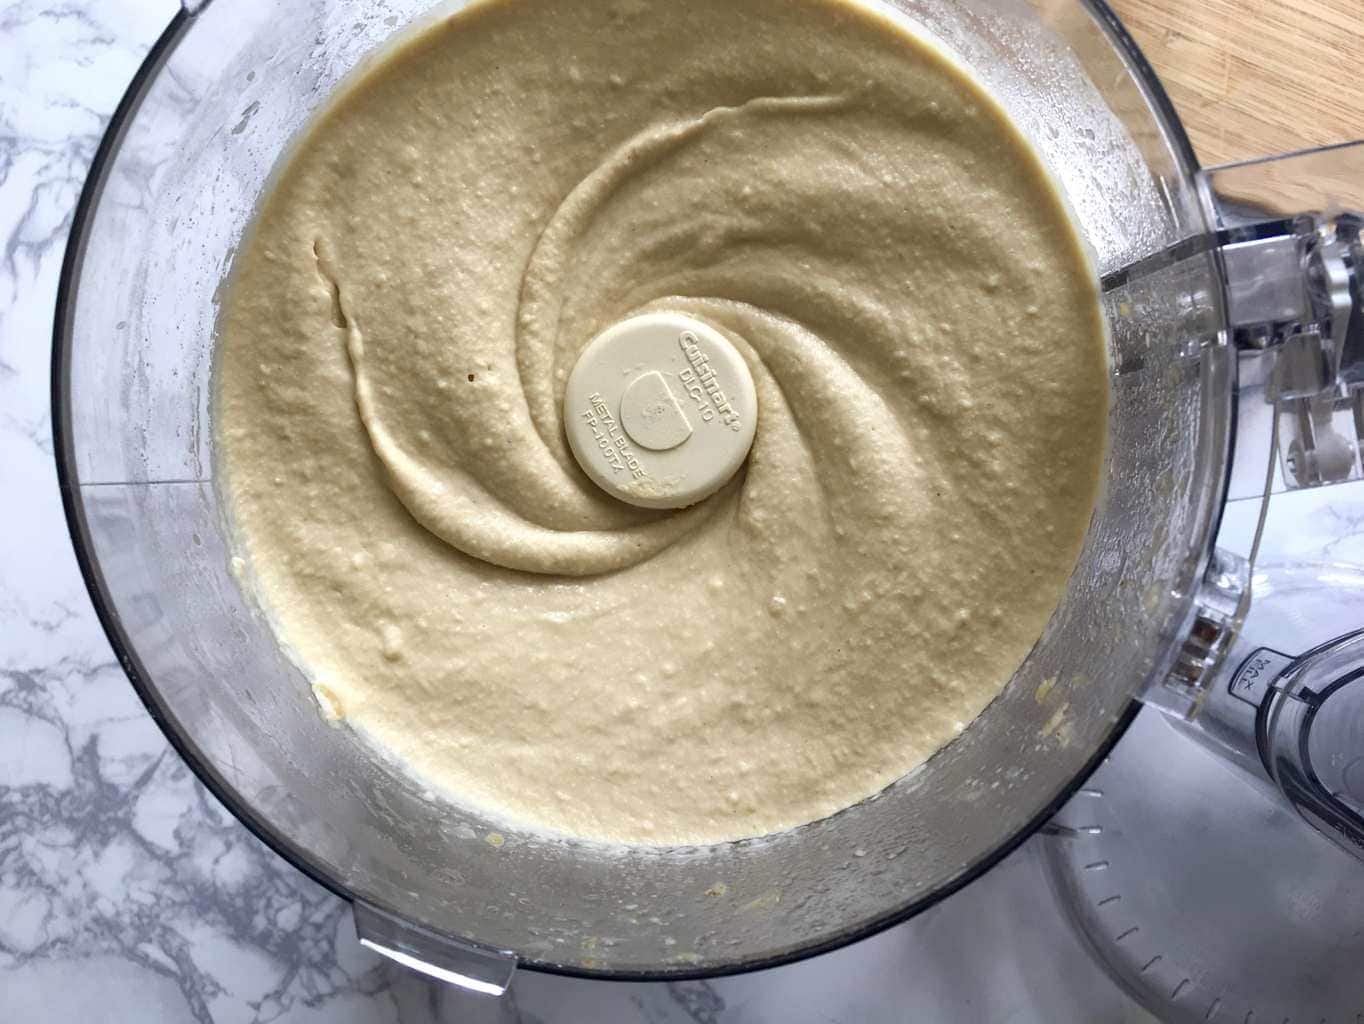
- Step 4: Add the hot chickpeas and cumin to the food processor. Begin blending, and slowly add hot water until the mixture becomes smooth.
Tara's top tips
Use canned chickpeas: While I love a from-scratch recipe, canned chickpeas make it easy to get smooth, flavorful hummus in about 20 minutes. If you prefer cooking dried chickpeas, see my tips below.
Boil the chickpeas: Even though canned chickpeas are already cooked, giving them a quick boil with baking soda softens them further and helps break down the skins. This extra step is essential to achieving that silky-smooth finish you’d find at a restaurant.
Don't skip the baking soda: A small amount of baking soda in the cooking water helps break down the chickpeas’ skins by increasing the pH. This softens the beans and pectin in the skins, and enhances their flavor, resulting in an ultra smooth blend.
Adjust the consistency: Keep hot water nearby and drizzle it in slowly until you reach your desired consistency. I typically add a couple tablespoons, but you can use up to ¼ cup. Be careful not to add too much water because it's difficult to rethicken the hummus if you accidentally thin it too much.
Blend while hot: Pureeing the chickpeas and other ingredients while still warm helps everything emulsify smoothly. It creates a lighter, creamier texture you’ll notice right away.
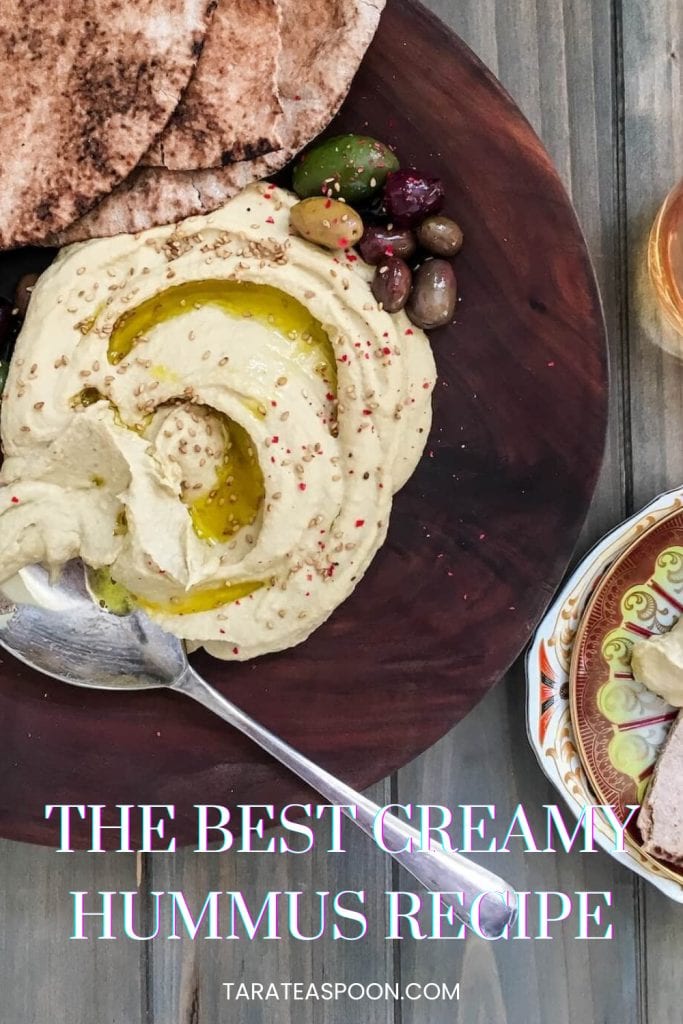
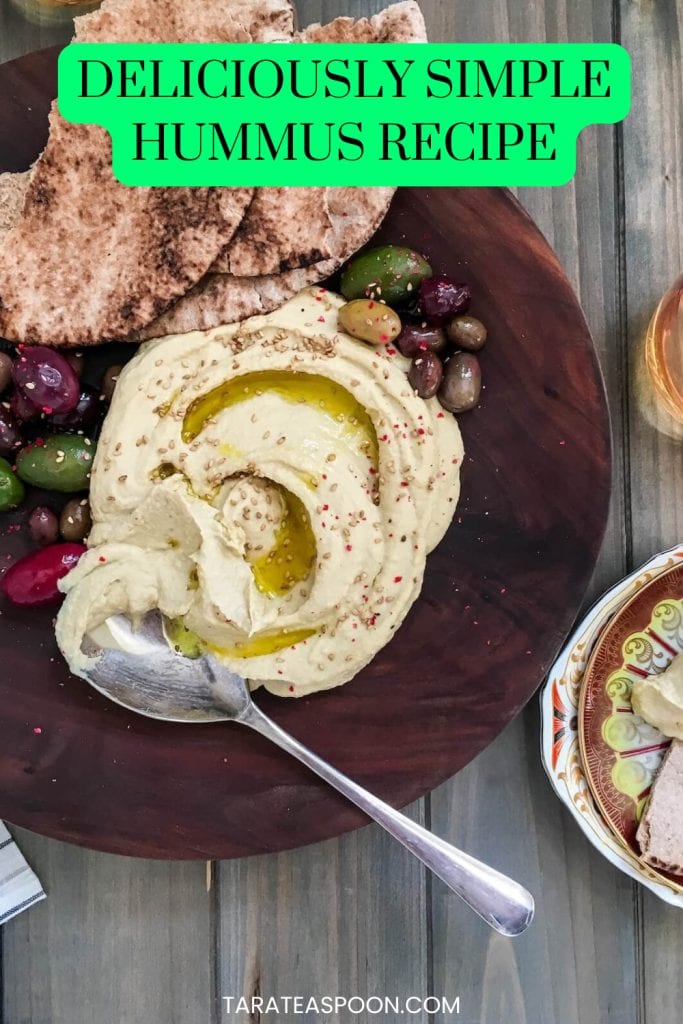
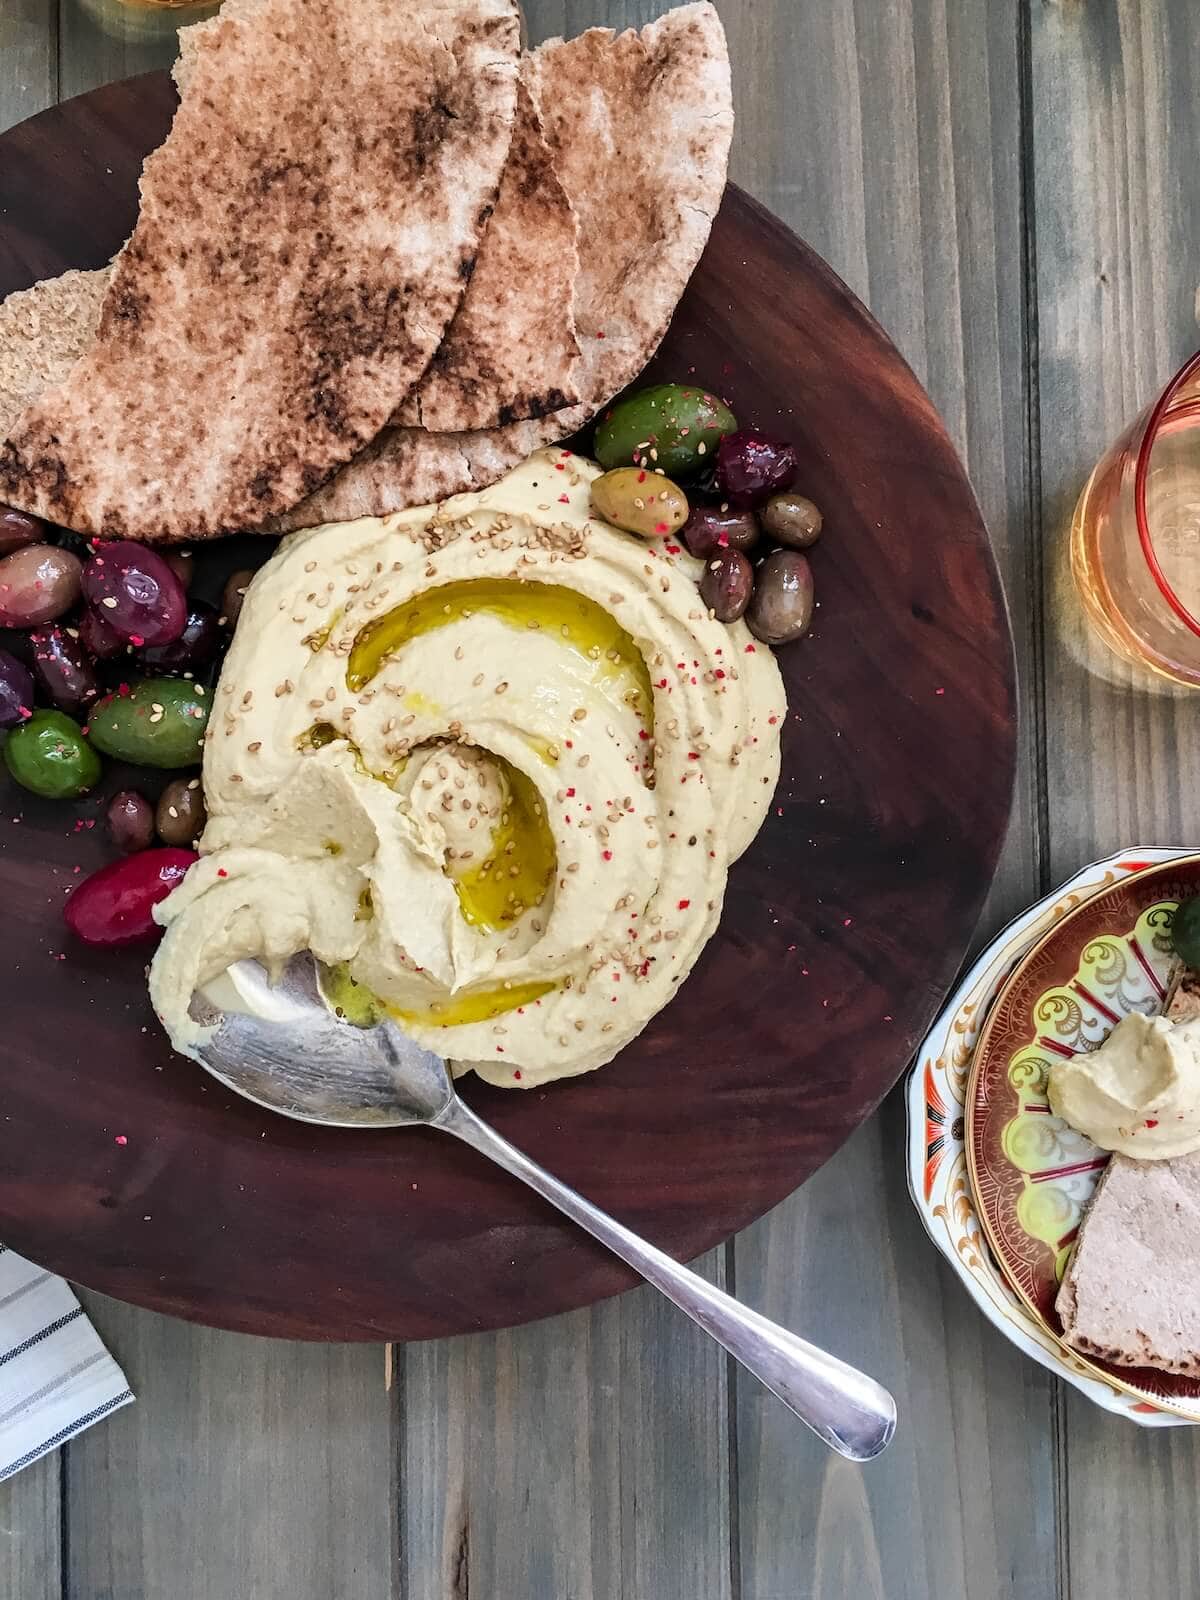
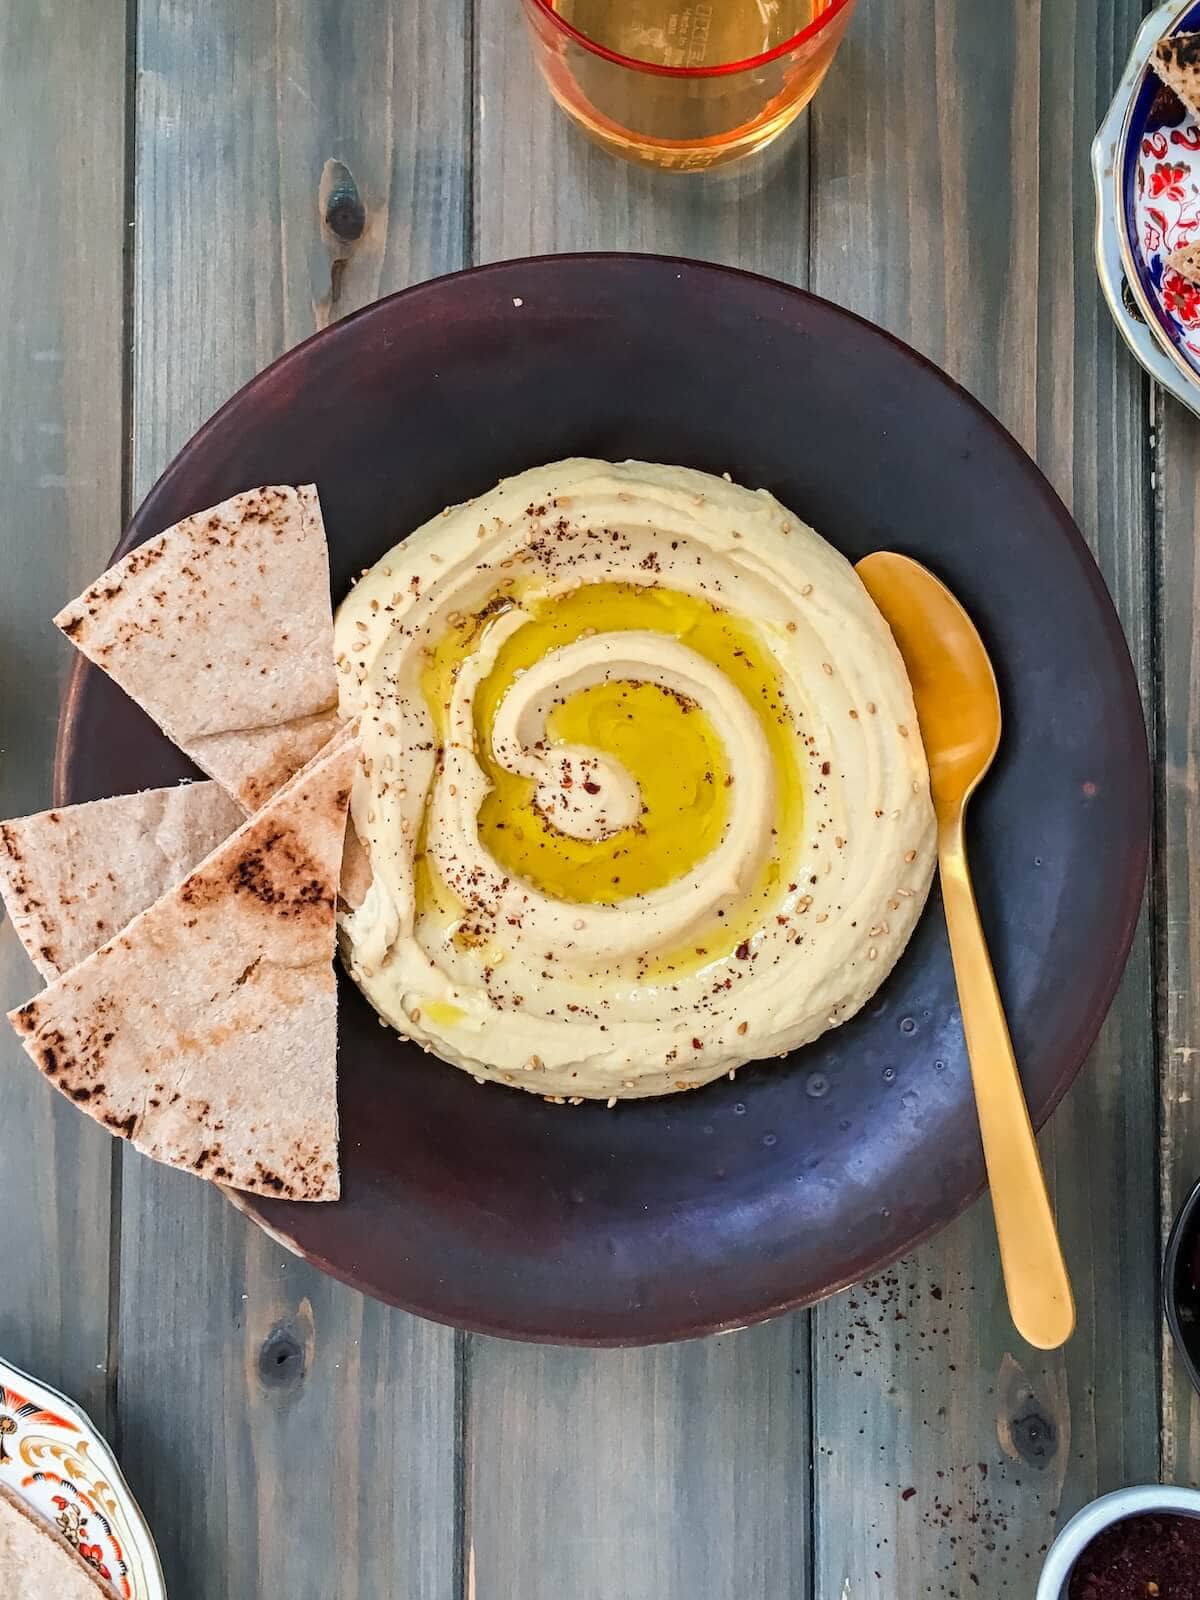
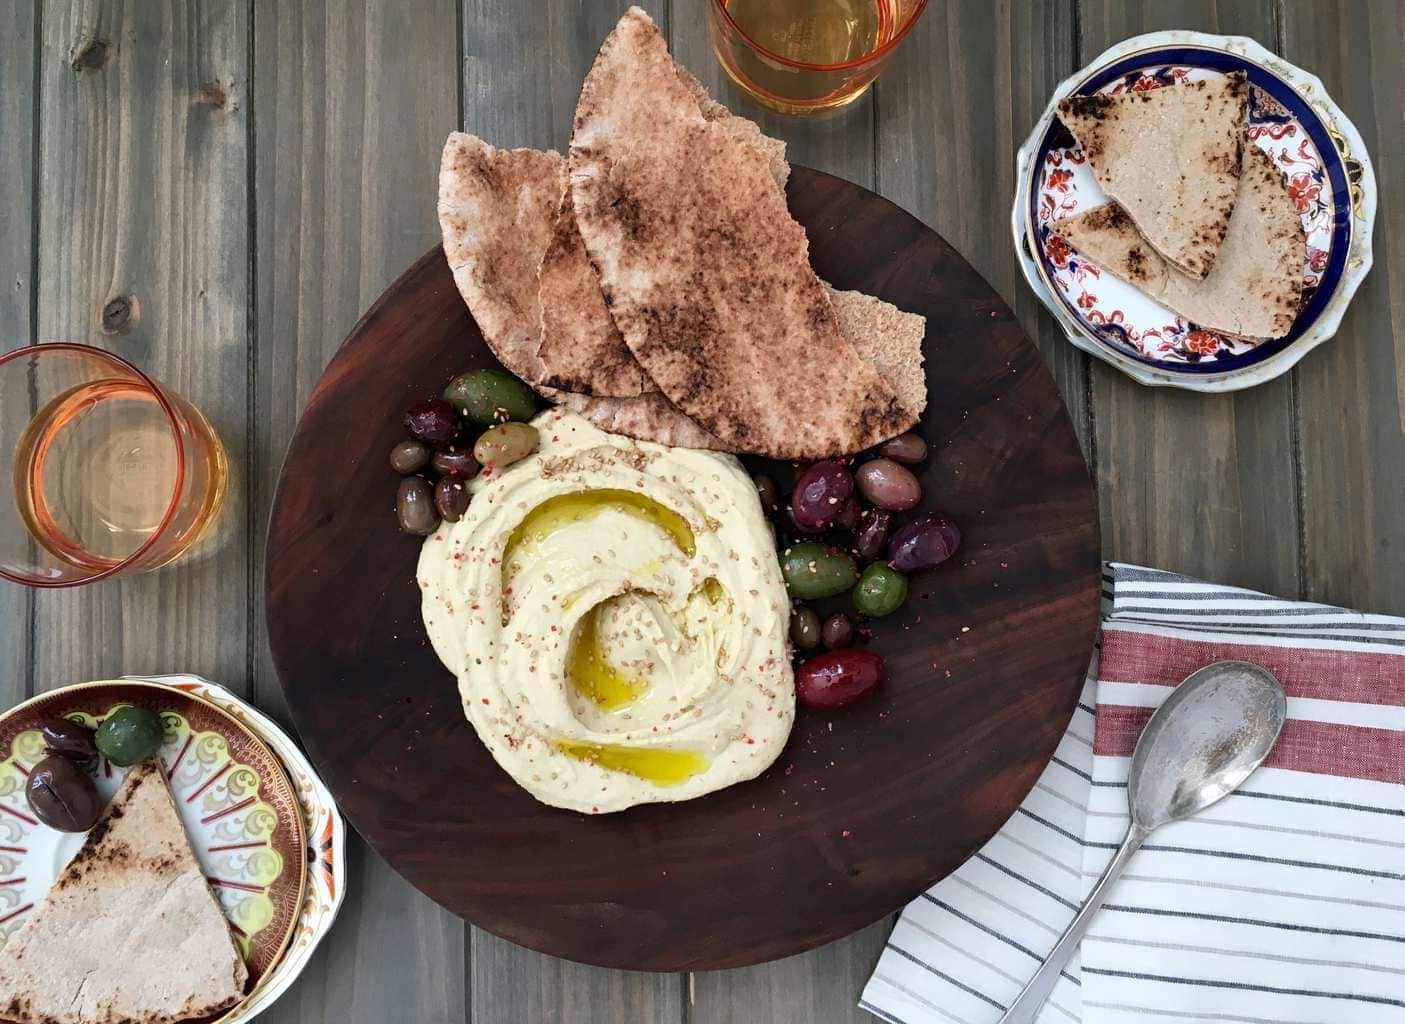
Serve frequently: While classic hummus is spectacular all on its own, I like to serve it drizzled with extra virgin olive oil for extra richness. You can use it as a dip for pita chips, falafel, and sliced fresh veggies, add it to a charcuterie board, or spread it on sandwiches, gyros, and wraps in place of mayonnaise.
How to cook dried chickpeas
Hydrate the beans: If you are making this with dried chickpeas, you will need to hydrate and soften the beans. Sort through 1 cup (7 ounces) dried chickpeas for stones or debris. Place them in a bowl and cover with a generous amount of water. Add 1 teaspoon baking soda to your soaking water and stir gently to combine. Allow the chickpeas to soak for 12 to 24 hours, then rinse.
Choose a cooking method: Add soaked chickpeas to a large pot or your Instant Pot, along with a clove or two of garlic and 1 teaspoon baking soda (this changes the pH of the beans and softens the skins—don’t skip it!).
- Stovetop Method: Cover the chickpeas with water and bring to a boil. Reduce the heat to medium and simmer uncovered, stirring now and then, for 1 to 2 hours. (Yes, it’s a wide range—taste a bean after 40 minutes and keep simmering until they’re perfectly tender.)
- Instant Pot (my favorite method): Cover the chickpeas, garlic, and baking soda with water so it rises about 2 to 3 inches above the beans. Stir, seal, and cook on Manual HIGH pressure for 10 to 12 minutes. Let the pressure naturally release for 10 minutes before opening. Pro tip: If your chickpeas soaked closer to 24 hours, shave the cook time down to 8 to 10 minutes.
Return to the recipe card: From this point, you'll follow the recipe as written by adding the hot cooked beans to the food processor and blending the recipe ingredients.
Equipment
Can opener: Find one that is easy to use like this magnetic can opener.
Saucepan: A heavy tri-ply 3-quart saucepan is perfect.
Food processor: I use my favorite food processor, but you could use a Vitamix or other powerful blender too.
Favorite variations
You can also enhance this easy homemade hummus with a few simple add-ins and garnishes:
- Lemon: Add extra lemon juice or zest to the mixture or serve with lemon wedges.
- Herbs: Use chopped fresh parsley, mint, cilantro, basil, or dill for a beautiful garnish.
- Spices: You can mix in other spices like sumac, smoked paprika, or extra cumin according to taste. Or, add some heat to make a spicy hummus with cayenne pepper or red pepper flakes!
- Other mix-ins: Go bold with flavor and try adding in one of the following: a head of roasted garlic or 1 to 2 roasted red peppers, ½ cup feta cheese, ½ cup Kalamata olives, ¼ cup sun-dried tomatoes, toasted sesame seeds, or pine nuts.
Get flavor inspiration with these tried and true hummus recipes:
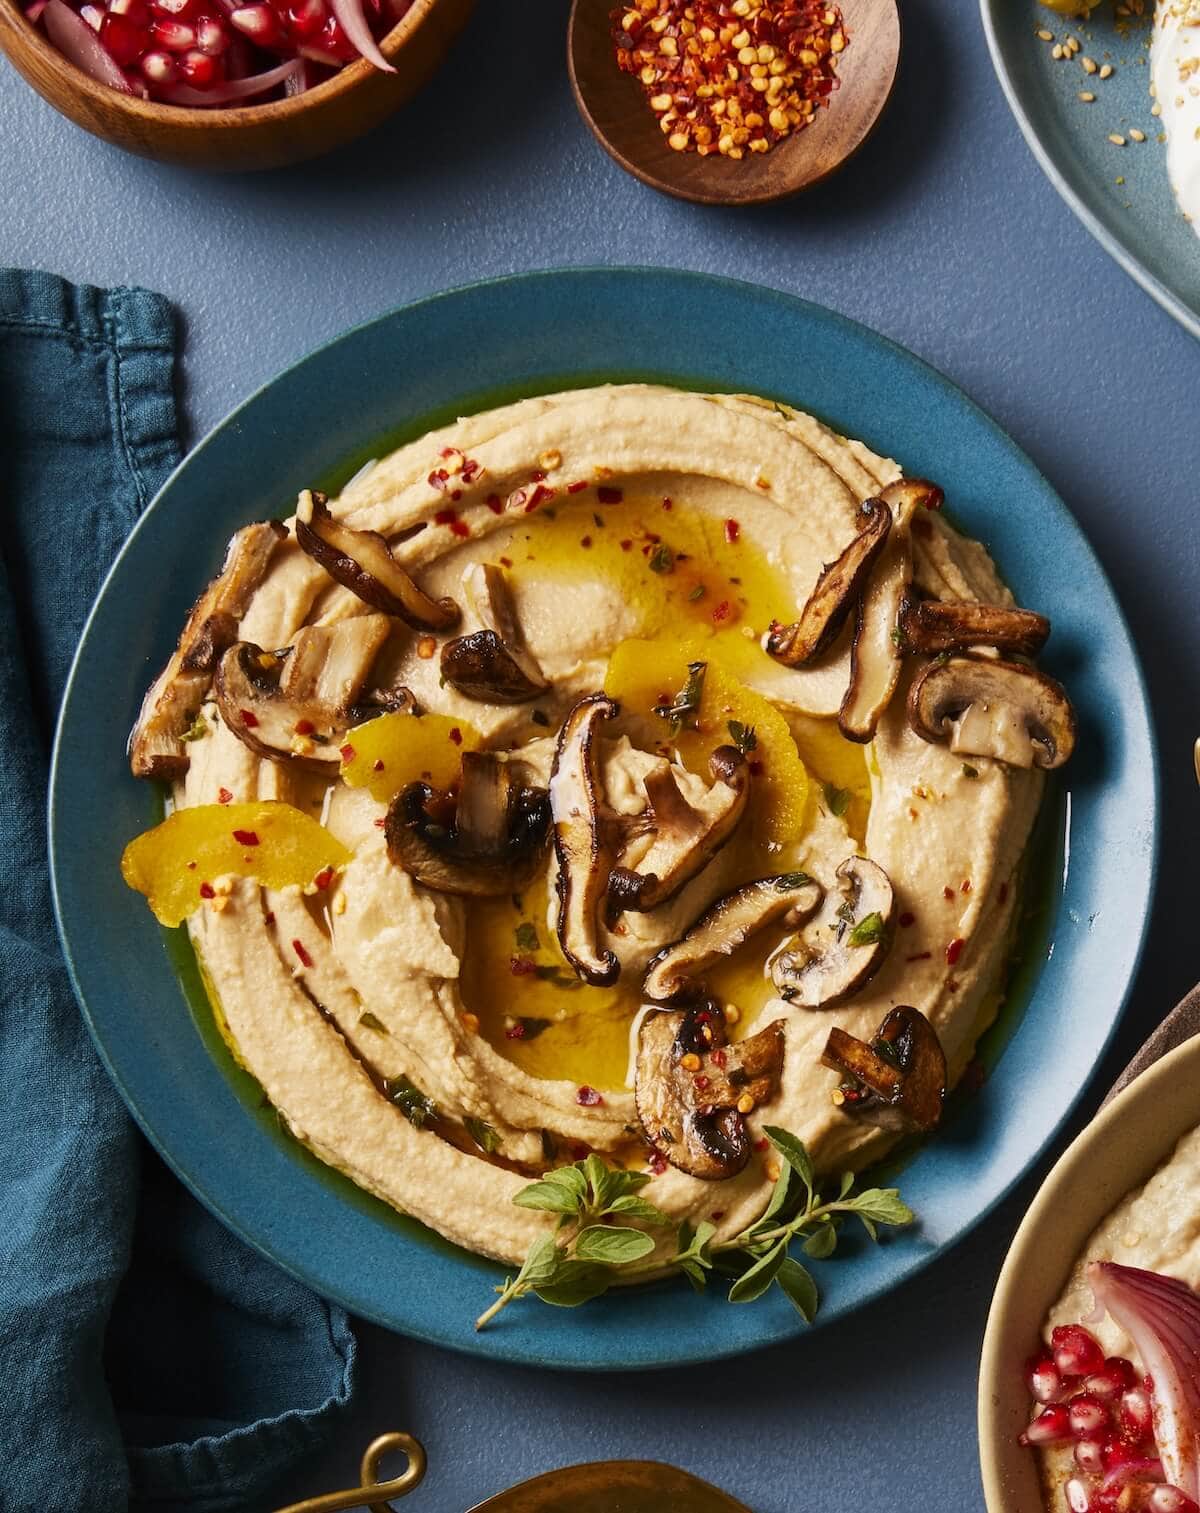
Cashew Hummus with Lemon Mushrooms has a soft nutty flavor and pairs well with sliced veggies. See note below for recipe information.

Pumpkin Hummus, with savory crisp garlic and sage, is perfect with toasted pita chips.
Note: I made the cashew hummus because my sister-in-law doesn't like tahini. For some people tahini can be slightly bitter. Using cashew butter softens the flavor, making it more palatable for those who are sensitive to tahini. This recipe is only available in my cookbook Delicious Gatherings.
Storage and reheating
Refrigerate: Leftovers should be covered in an airtight container and placed in the fridge. With proper storage, homemade hummus will keep for up to 1 week.
Reheat: For the best taste and texture, serve hummus at room temperature or warm it briefly in the microwave.
FAQ
To get ultra-creamy, smooth hummus, two simple techniques matter most: Boil your chickpeas with baking soda: Even canned chickpeas benefit from a quick simmer with baking soda. This breaks down the skins and softens the beans for easier blending.
Blend while warm: Mixing the ingredients together while the chickpeas are still warm helps everything emulsify for the silkiest texture.
That ultra-smooth hummus you find in Middle Eastern and Mediterranean restaurants comes from tradition, technique, and a little kitchen science. Many chefs were trained in family or professional kitchens, and they know exactly how to prepare chickpeas for the perfect texture and flavor.
Inspired by those techniques, I created this recipe using ingredients and steps that mimic what top Israeli chefs do with an easier method for home preparation.
More flavorful appetizers and dips
Love flavorful appetizers and dips? Try these blog favorites:


Rate this recipe! ⭐⭐⭐⭐⭐
Scroll to the bottom of the page to rate and comment on this recipe. Leaving comments, questions, and ratings helps other too!
📖 Full Recipe

Best Creamy Hummus Recipe (Canned Chickpeas)
Video
Ingredients
- 2 15-ounce cans chickpeas (or 7-ounces dried chickpeas, see Note below)
- 1 teaspoon baking soda
- ⅓ cup lemon juice (freshly squeezed is best)
- 3 cloves garlic
- 1½ teaspoons kosher salt
- ½ cup sesame tahini
- ½ teaspoon ground cumin
- Hot water
- Olive oil (for drizzling)
Instructions
- Cover chickpeas and their canned liquid with ½ an inch of water in a saucepan. Add the baking soda and bring to a boil. Boil until chickpeas are hot and soft, about 5 minutes. Drain in a colander and rinse gently under hot water.
- While chickpeas boil, in a food processor combine the lemon juice, garlic, salt, and tahini. Pulse and then let sit until the chickpeas are cooked.
- Add the drained, softened chickpeas to the food processor with the cumin and blend until smooth, scraping the bowl as needed.
- Adjust the consistency of the hummus by drizzling in a tablespoon of hot water at a time, until desired consistency is achieved (up to ¼ cup hot water).
- Serve warm or at room temperature, and drizzle with olive oil, if desired.
- Cover and refrigerate leftovers for up to a week.
Notes
Pro tip: If your chickpeas soaked closer to 24 hours, shave the cook time to 8 to 10 minutes. From this point, you'll follow the recipe as written by adding the hot cooked beans to the food processor and blending the recipe ingredients.
Nutrition Per Serving
Recipe and photography by Tara Teaspoon.

Tara Teaspoon
I’ve been in food publishing for over 25 years, creating recipes & food-styling for magazines, books, television, food brands, & advertising. With two cookbooks under my belt and thousands of my recipes at your fingertips, I hope you'll be inspired to spend more time in the kitchen!
Kristin says
This needed WAY more LEMON AND garlic! Otherwise liked the boiling part it was smooth for sure!
Tara Teaspoon says
Kristin thanks for adding your personal preference to the comments. I suggest everyone make as is, then adjust seasonings to their desired potency!
Jill McGill says
This hummus recipe is FANTASTIC! The flavor is so good and the texture is to-die-for! It's incredibly creamy and good enough to eat by the spoonful.
Tara Teaspoon says
I'm so happy you love it!
amy liu dong says
We love hummus in our family with are pita bread, and this one is so easy.
I can't wait to make this for everyone!
Catherine says
Oh my gosh! This hummus recipe is super easy to make and delicious!
I am fan, thank you!
Ashleigh says
This recipe looks easy and delicious! I’m definitely trying it with some cut veggies for an easy snack for me and the kids!
Barbie R says
OMG, this recipe looks delicious! I’m such a huge hummus fan and could seriously eat the whole batch myself! The mushrooms are a great touch!
JOY says
this was one of the best hummus recipes i have tried! i love that it is ready in under 20 minutes.
Msjane90 says
I love hummus! I never tried making one but thanks to you and to this recipe you made it look so easy. I will give it a try!
Michelle says
This was such a tasty recipe! Hummus is one of my favourite dips, and I always love trying new versions of it. This was so good.
Emily says
I have a whole bag of chickpeas I've been meaning to use. Now I know exactly what I'll be making with them; this is going to be delish!
Claudia says
This is one of the best hummus recipes I've ever made. It's so super creamy.
Beth says
This is so good! This is the fist time I've ever made my own hummus, but it won't be the last!
Betty says
Made with canned garbanzos,
Meyer lemons and garlic from the garden, because I needed something to make sandwiches or wraps with some sprouts I made, and everything costs too much at the store these days. Half a recipe fits perfectly in my container. Delicious, and doesn't take any more time than going to buy hummus as long as you already have the ingredients and equipment (I did have Trader Joe's tahini and a Cuisinart).
Tara T. says
Hi Betty, your hummus sounds delicious especially using produce from your garden. Using hummus as a spread to your sandwiches adds so much flavor & texture. And I agree with you, it's less expensive, fresh and easy!
Tara
William says
Why are you cooking the already shelled garbonzo beans from a can? And baking soda? Made hummus last week with canned garbanzo beans not cooking them and it was great…..used the juice from the canned beans, olive oil, kosher salt, cumin, tahini,lemon juice. Next time I’ll try black pepper……
Tara Teaspoon says
Hi there William. I explain why in the blog post. The baking soda breaks down the texture of the bean skins. Some people separate the beans from the skins to create a super smooth, creamy hummus, but this step means you can avoid that. Your recipe sounds straight forward and classic. I encourage you to try my method and see the texture difference. You won't see much of a flavor change as our ingredients are very similar, but the over-cooking of the canned beans with the baking soda makes a big difference. It is the method my favorite Israeli restaurant uses.
Belinda Pond says
Tara saves the day - again! My vegan friend can't have a lot of olive oil (digestive issues... TMI) and my previous go-to hummus recipe has a bunch of olive oil. So I tried this and it is perfection. So creamy and flavorful. Instead of adding a little water at the end, I threw in a jarred roasted red pepper just because I like that flavor profile, but this recipe is swoon worthy without the red pepper.
Dallin Inouye says
I made this again today. Great option for when I'm trying to go more vegetarian!
Jen Walker says
This hummus recipe is incredible! I haven't purchases hummus from a store since I came across this recipe. It's easy and the results are so yummy.
Tara says
Jen thanks!! I am the same, I can't get myself to buy (or eat) store hummus anymore! I'm so happy you like it friend.
Mary Bench says
I don't like Hummus! This recipe changed my mind!
LANE says
Okay, I did it! I made it! It was easy and the texture is PERFECT!!
Tara says
Woooo! Awesome Lane. Glad you liked it!
Melissa Griffiths says
I needed all those tricks in my life! This looks like hummus perfection!
Tara says
They totally work! It's pretty perfect 🙂
Tara says
You're a doll! Thanks Melissa
Jennifer L says
Oh wow I've always wanted to make hummus but I'm always nervous about it tasting bland. Not anymore! I'll be making this this week with my pita chips I like to make. Thank you for the baking soda tip!
Tara says
Of course! Oh yes, adjust the garlic, lemon, tahini and even the cumin to create the best tasting hummus for your palate. The texture is what will for sure keep you coming back!
Meg says
I've never made hummus from scratch, but you've got me interested! Pinning this one.
Tara says
You'll never go back to store bought!
Jordan | Read. Eat. Repeat. says
I adore hummus, and these are easy tips that I can't wait to try...thanks for sharing!
Tara says
Oh good! I hope you love it!
Alex says
I crave hummus!! This looks so delicious!
Tara says
Oh thank you. It's definitely crave-worthy!
Tina Gleisner says
This looks like a lot of work but maybe the perfect dish to make in my new Instant Pot, http://hometipsforwomen.com/awesome-kitchen-gadgets-instant-pot
Tara says
Tina it's a cinch! You can make it in about 20 minutes with canned beans. But yes, try that instant pot for cooking dried beans. I'm sure it will be fantastic.
rachel says
That looks so good! I had no idea about the baking soda...
Tara says
Thanks! Such a fun tip for sure!
Donna Ashworth says
I have never tried to make this yet but am always saying I will! i ma going to now, thanks!
Tara says
Oh perfect! I'm glad I've inspired you.
Jennifer Quisenberry @ The Awesome Muse says
Thanks for the soaking tips. I've tried making homemade hummus, and I just haven't been able to get it smooth and creamy. I'll try the soaking next time. I hope it makes the difference!
Tara says
Jennifer I really think it will make the difference. I've tried everything too...even peeling off every skin. No thank you! You'll be thrilled with this technique.
Tiffany says
I've honestly never heard of using baking soda in hummus before. What a great tip! This hummus really does look creamy dreamy! Must try. 🙂
Tara says
It's a lovely secret from the Israeli chefs here in NY. Love that I can share it.
Jennifer says
Looks amazing T! I have made homemade hummus but never tried the baking soda trick. I'm going to give it a whirl this weekend. I could live on hummus pita and olives!
Tara says
Yes! Oh can't wait to hear what you think.
Amber Myers says
Ooo yum. I do love hummus. I've never tried to make it before--I might have to try it out!
Tara says
For sure! It's so simple you can't pass it by.
tara pittman says
I love homemade hummus. I need to try the bean cooking thing
Tara says
If you love it already, this will still change your life! The bean cooking thing is genius! 🙂
robin rue says
I have never had homemade hummus before. I need to try this.
Tara says
Oh you'll love it. It's so easy and Oh So much better tasting than store-bought!
Jana says
Great tips! I can't wait to put them to use! Thanks! 🙂
Tara says
Thanks Jana! Oh I think you'll love it.
Kathy Swenson says
Can't wait to try this! Now, do you have a great pita recipe to go with the hummus?
Thanks Tara!!
Tara says
Ha! Oh shoot, I will let you know when I do! There are too many good pitas in the stores and bakeries here, I forget!