With a classic long ferment, and simple ingredients, this authentic Neapolitan pizza dough recipe is make-ahead and no-fail! Perfect for beginners and experts, you can make that chewy, soft, quick-cooking dough just like the Italian pizzerias.
I'm giving you all the simple notes and tricks for making easy and authentic Neapolitan pizza dough for your backyard pizza oven.
It's inspired by the best pizza in Naples Italy, and I've made the process simple to understand.
I don't love messing with equations for hydration, percentages of flour to leavening, or tricky pizza dough recipes. You won't find that here.
What is Neapolitan pizza?
This pizza style originated in Naples, Italy and has unique characteristics all it's own.
True and authentic Naples-style pizza must be approved by the AVPN, or the verifying association of Napoletana pizza! We aren't commercial pizza makers, so let's just stick to the basics!
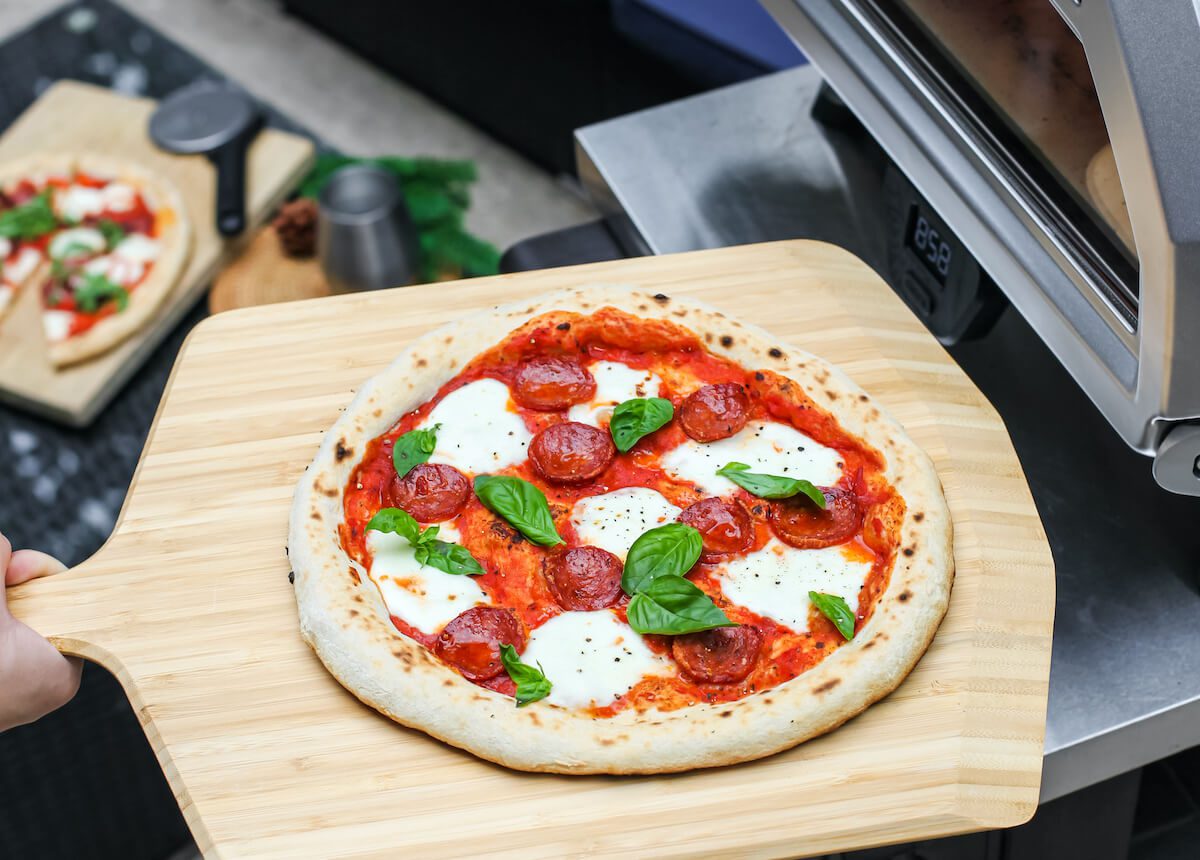
Most Neapolitan pizzas are cooked in wood-fired ovens around 800ºF, and the crust is made with only high protein, finely ground tipo 00 flour. The crust gets blackened spots from the fire with puffed edges and a thin center.
Toppings for this style of pizza are kept simple and typically start with San Marzano tomatoes, fresh mozzarella or buffalo mozzarella cheese, and are finished with fresh basil and extra virgin olive oil.
At the pizzerias here in New York City I find all sorts of amazing toppings and combinations, so I'm not afraid of some creativity.
Jump to:
- What is Neapolitan pizza?
- This dough needs a long ferment or proof time
- The right tools for Neapolitan pizza dough
- The right ingredients for Neapolitan pizza dough
- What is the best dough recipe?
- How to make the dough
- Toppings for Neapolitan Pizza
- Do I need a pizza oven?
- Important crust recipe tips:
- Freezing the dough
- Neapolitan Pizza Dough Recipe
This dough needs a long ferment or proof time
Neapolitan pizza crust's defining characteristics are its elastic, soft, and airy consistency. The dough is squishy and hydrated, so the baked crust is light, but chewy and perfectly crisped on the edges.
You must let this dough long ferment. This means the dough proves, or takes it first rise for hours and even days. The fermentation process allows the yeast to feed on the sugars in the flour for longer, helping to develop a deeper flavor and unique texture.
As easy as this dough is to make, the wait is the hard part. So plan ahead! I suggest at least 2 days or up to 4 for a nice, authentic result.
The right tools for Neapolitan pizza dough
Before you start on your Neapolitan pizza journey let's get set up with the right tools. Most likely you are planning to make pizzas for a crowd, or a hungry family, so having multiples of some of these tools is also helpful.
To find out more about the multi-fuel, backyard pizza oven I use, check out my article on the Ooni Karu 16.
Scale
Get a kitchen scale please! Let's do this team! A kitchen scale can be had very affordably, and is crucial to the no-fail aspect of this dough.
I don't want to mess around with how everyone scoops, taps, spoons, or measures flour. Get a scale and save some stress for other areas of your life!
Dough whisk
This is not a must, but I sure love mine. A dough whisk is a twisted wire tool that is perfect for mixing doughs. The spirals of the dough whisk are big and loose and flat. You'll get your simple ingredients mixed up in a jiffy with much less mess using this tool.
Dough Scraper
Sure, you can use your hands or a rubber scraper, but a little plastic dough scraper becomes an extension of your hand and helps you scrape and fold the dough in the bowl, as well as maneuver it and cut it on your work surface.
Mixing Bowls
I have a big stack of stainless steel mixing bowls that are perfect for mixing batch after batch of dough. They are non-reactive, clean up like a dream, and are light and easy to move around the kitchen. Find bowls you like and have a few on hand for this dough project.
Plastic containers
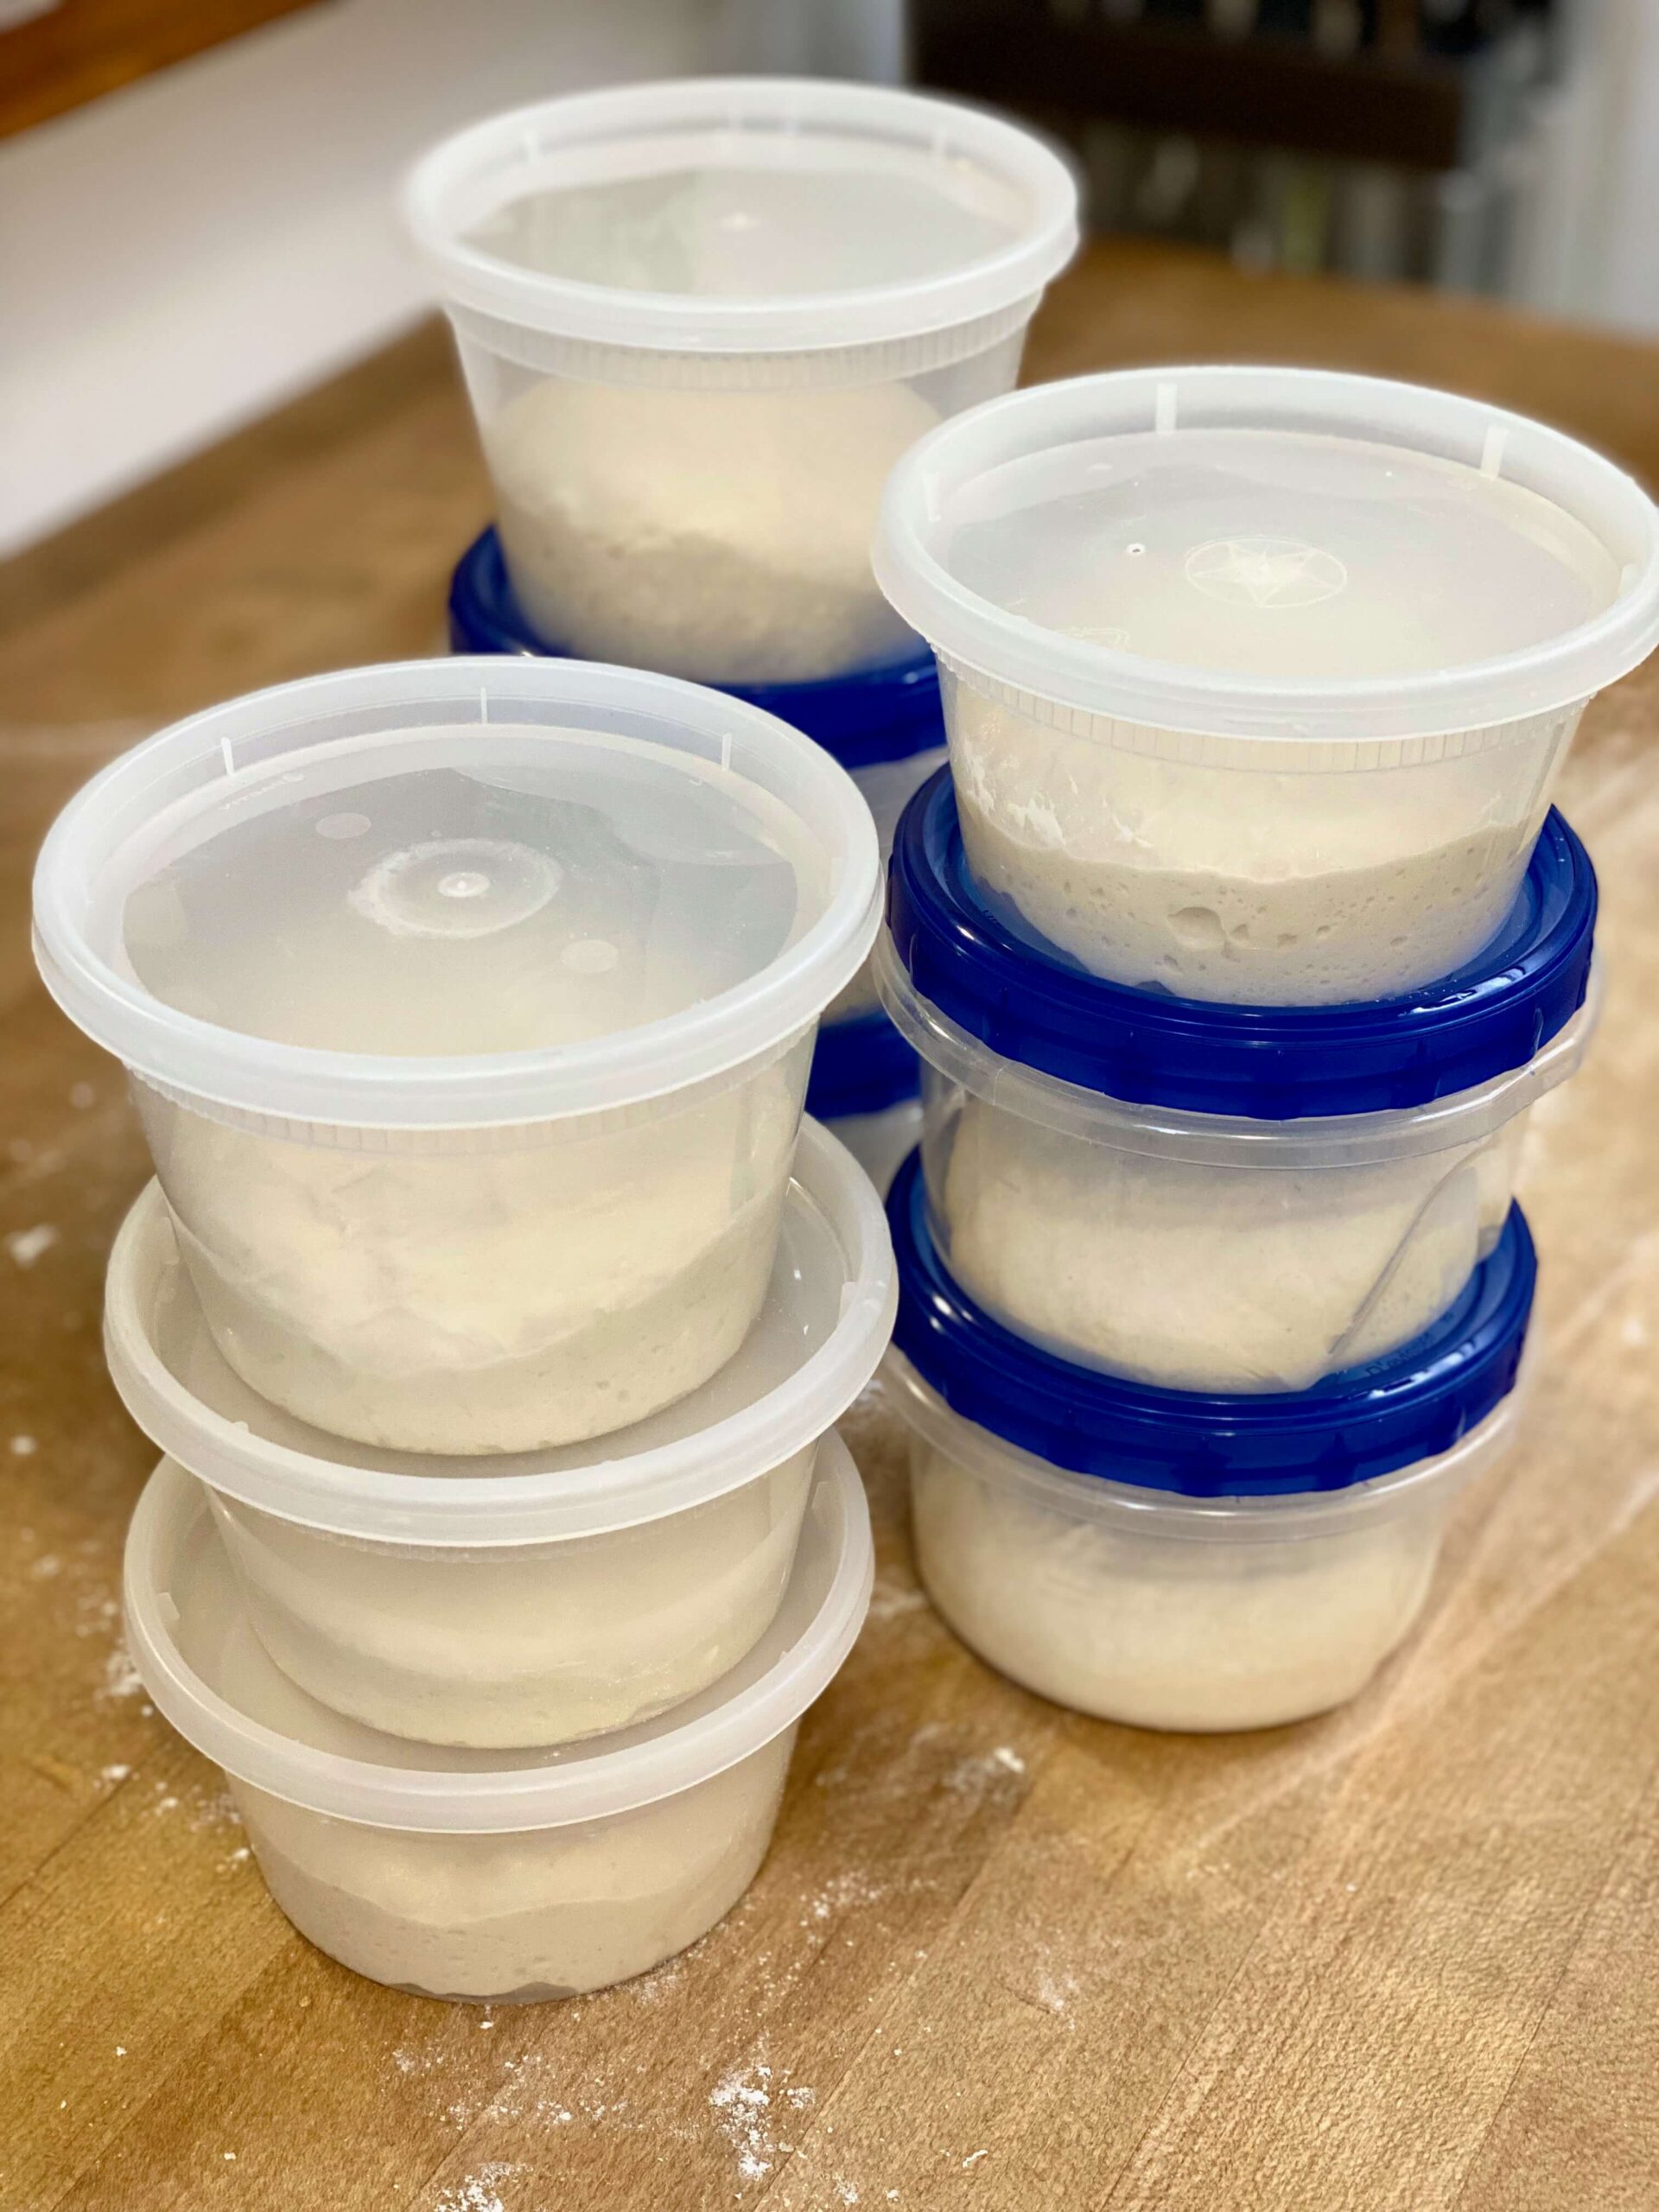
I love my pint plastic containers for the long ferment. Each one holds one ball of dough (which is one pizza crust), and I can stack them neatly in the fridge. You can use square containers, glass containers, or whatever you have on hand. However it's nice to have a stack of all the same container to stay organized and tidy. If you are making pizza for a crowd, you can have up to 12 containers of dough in your fridge for the long ferment.
Baking tools
Make sure you have a wood pizza peel for sliding the pizza into the oven. A metal turning peel for turning the pizza in the hot oven, and a metal pizza peel for removing the pizza from the oven. I also like to have pizza pans on hand so I don't run out of cutting boards to cut and serve my pizza.
This is a long list of tools. Once you get set up and invest in the right equipment, you will not regret it! It's hard to make authentic Neapolitan pizza without the right tools. You can follow my links or go to your local restaurant supply store to find these items.
The right ingredients for Neapolitan pizza dough
I am not here to give you the official Neapolitan pizza dough recipe, or hold you to the Italian standards that would qualify you to make this style of pizza professionally. However, I want you to be super successful, and make great pizza with ease!
Here are some ingredients you'll want to procure so your crust turns out darn good!
Flour
You'll find reference to tipo 00 flour (double zero flour) in all the Neapolitan dough recipes around. It's very necessary for this style of crust.
The Italian tipo 00 flour is a very finely ground (that's what the double zero refers to), high protein flour that creates the super soft, strong dough we need for fancy pizza crust.
This is not your super sturdy New York slice-style pizza dough, so we need to make it with different ingredients than we might not be used to. Find a source for this flour whether its online here, at a specialty market, or your local grocery store and stock up!
Yeast
Super authentic bakers will swear by fresh yeast for Neapolitan-style dough. I find your standard instant yeast or active dry yeast works perfectly.
The yeast is there to start the fermentation process so gluten can form, and the long proofing does the rest for structure.
Tip: always keep your yeast in the fridge or freezer (tightly wrapped) to keep it fresh longer.
Semolina flour
Semolina flour is a course flour perfect for sprinkling on your pizza peel. It allows the dough to slide off the peel and into the oven with ease. It helps prevent piles of regular flour from building up in your oven, as well as adds a nice crunch to the bottom of your pizza.
What is the best dough recipe?
The best dough recipe is the one you feel comfortable making and baking. Depending on where you live, the humidity, and whether you weigh or measure your flour, the dough recipe becomes your own as you practice making it.
I've tried many of the top recipe posts for Neapolitan pizza dough. I have gotten to the point where I can see and feel the texture and know if it needs more flour on a humid day, or more water if it's feeling stiff.
I've found that this recipe is actually forgiving (thus no-fail) because even when it's not quite right, it bakes into really delicious pizza.
I found the Serious Eats recipe from Kenji Lopez-Alt a bit dry. And even though I was using a scale and all the right ingredients, I had to play around a little to get it the right texture for me.
The Neapolitan-Style pizza crust recipe from King Arthur Flour had sugar in it. I know why they added it (because they wanted more sugar for the yeast to feed on), but it's not truly authentic so I ditched the sugar.
My Ooni pizza oven website has a recipe and I just didn't love it.
All that to say, my recipe is a combination of several, and what I landed on as I developed a simple recipe that works for me.
How to make the dough
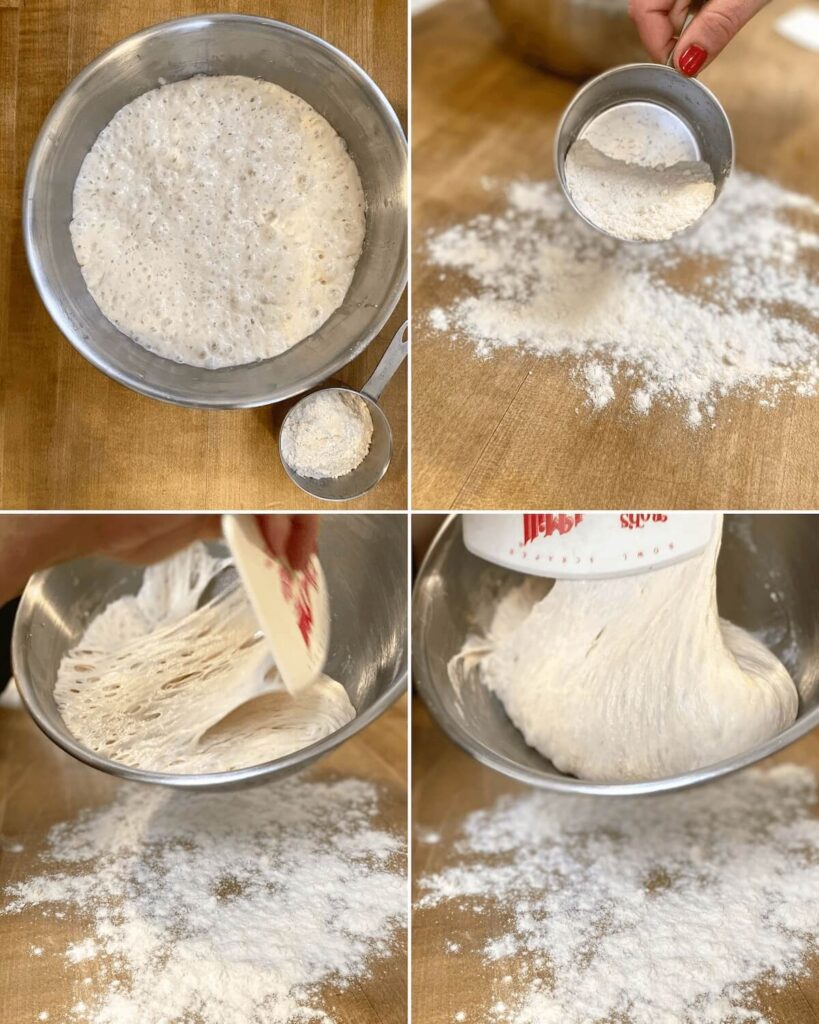
I have doubled the dough for these images, so my dough makes 4 balls for 4 pizza crusts.
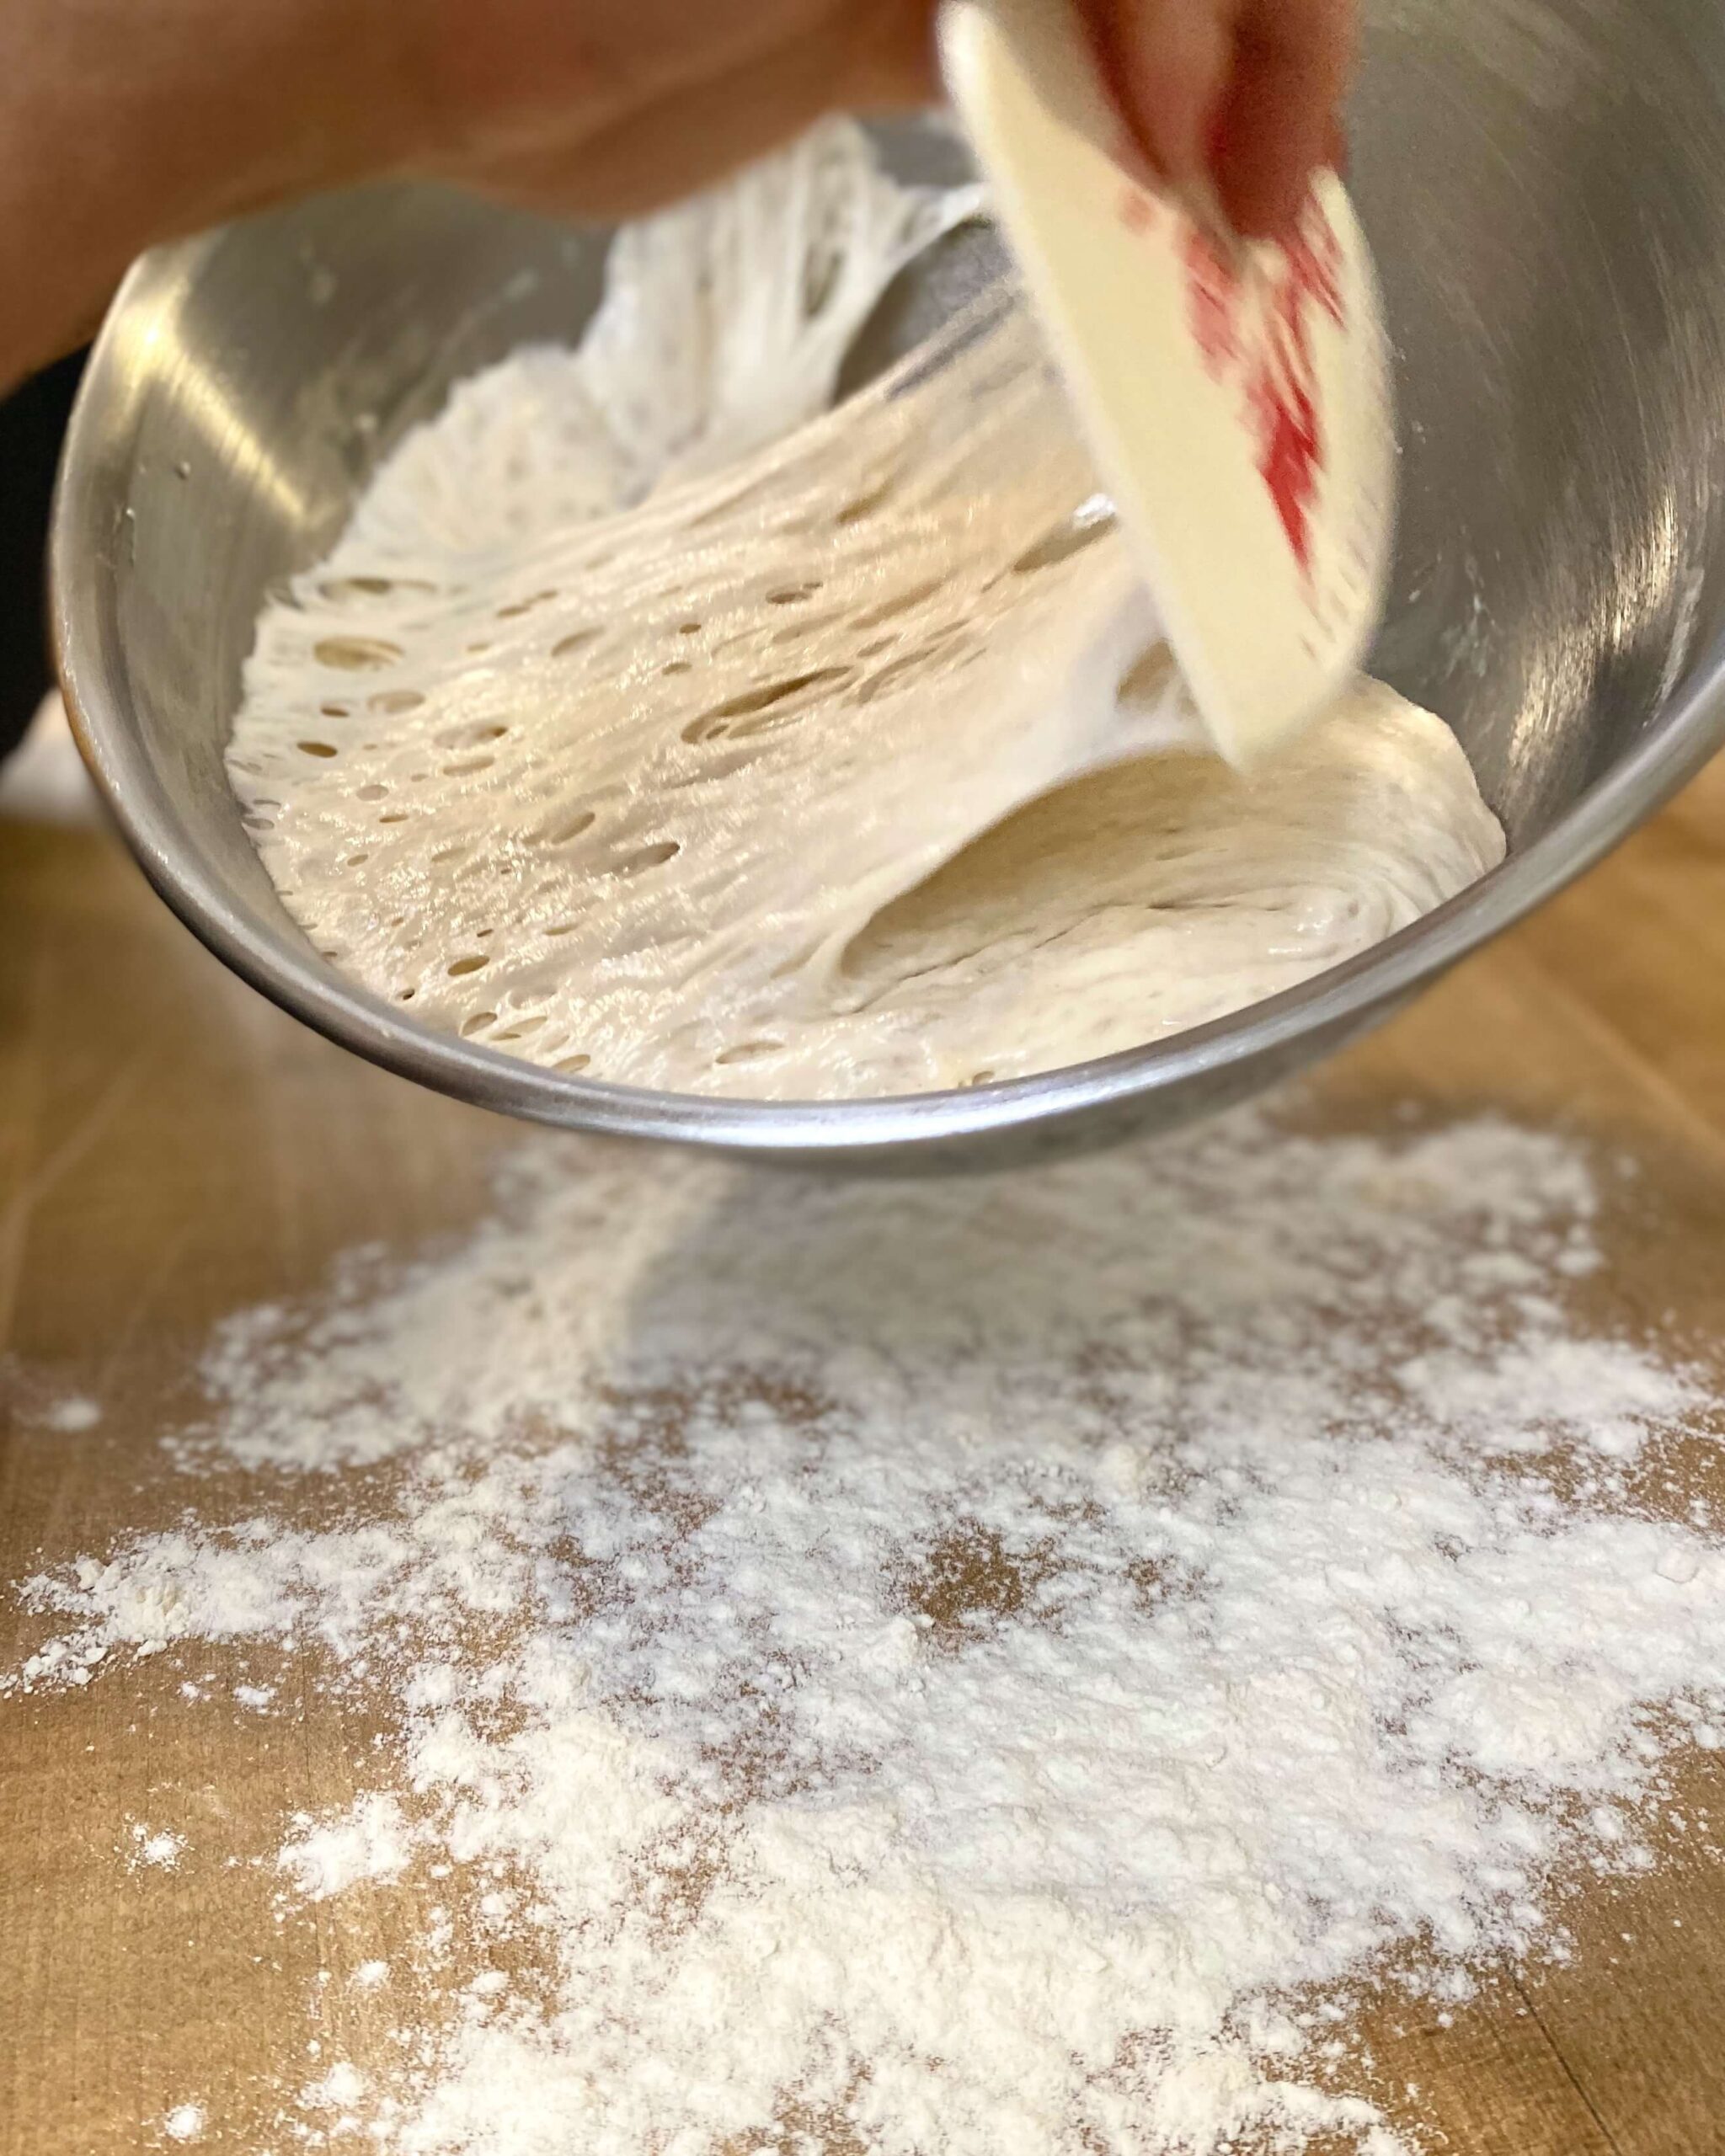
Mix together the dough ingredients, cover and let proof at room temperature for 8 to 24 hours.
Flour a work surface. You can use all-purpose flour or '00' flour.
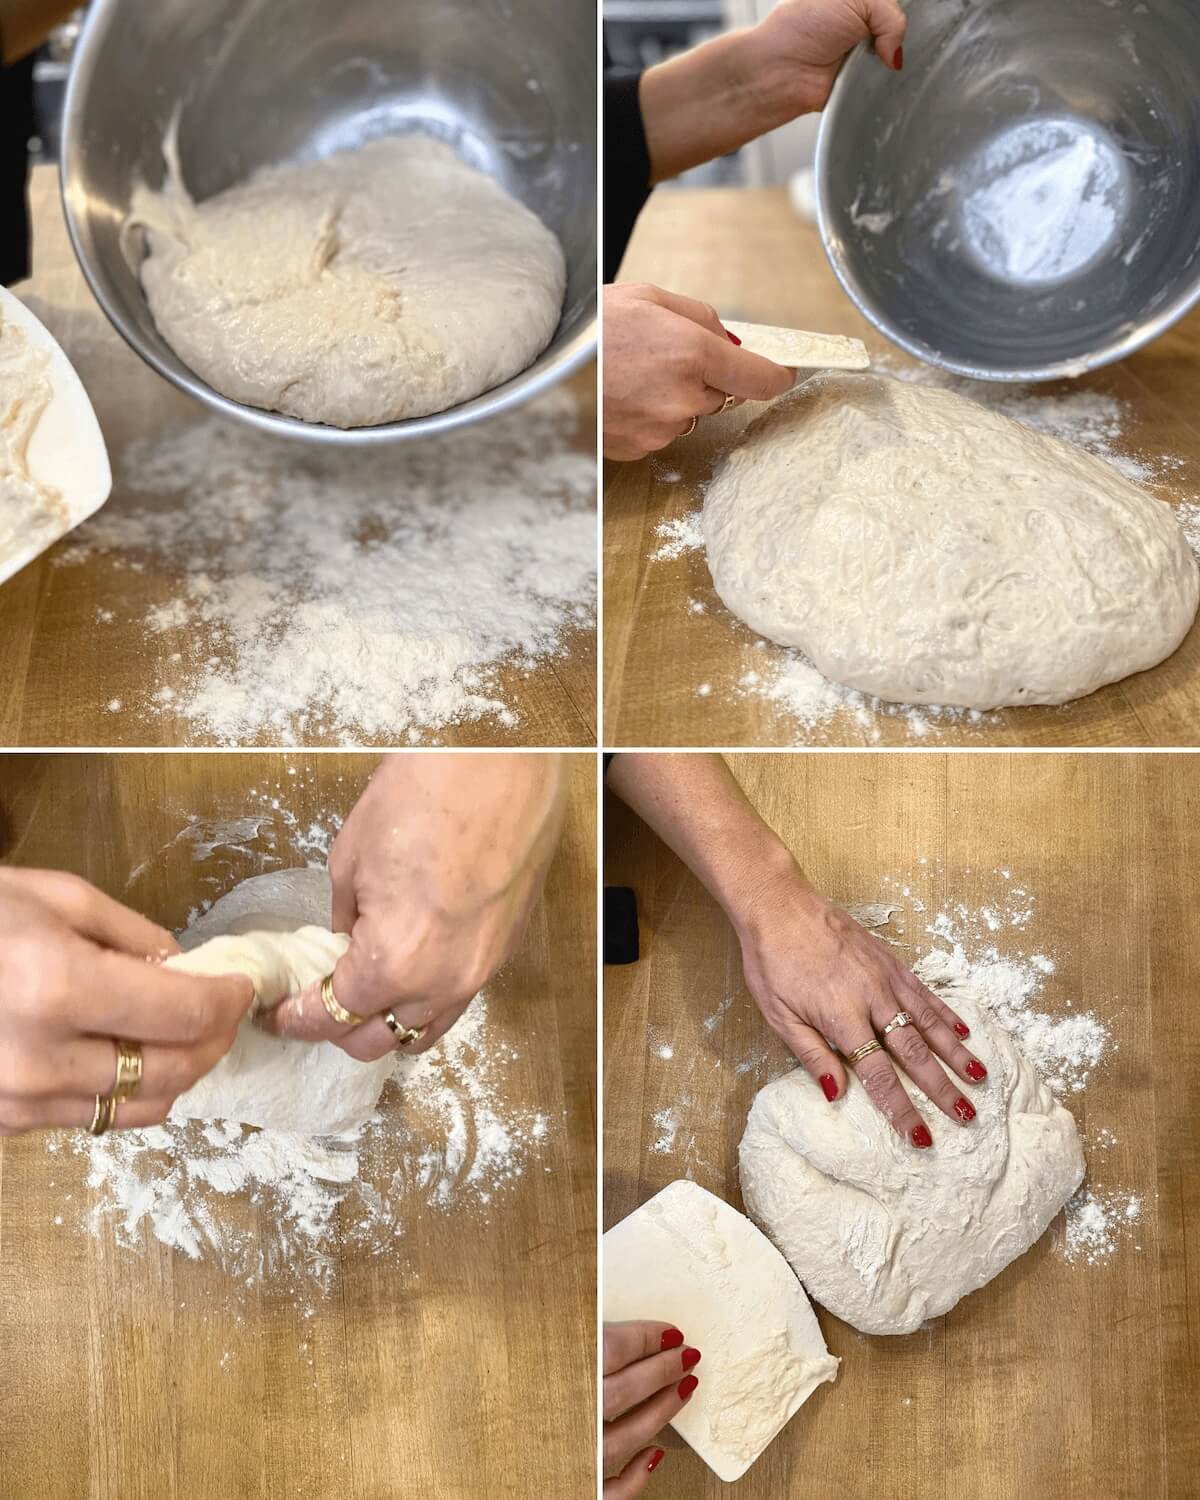
Use your hands or a dough scraper to turn dough over itself a few times.
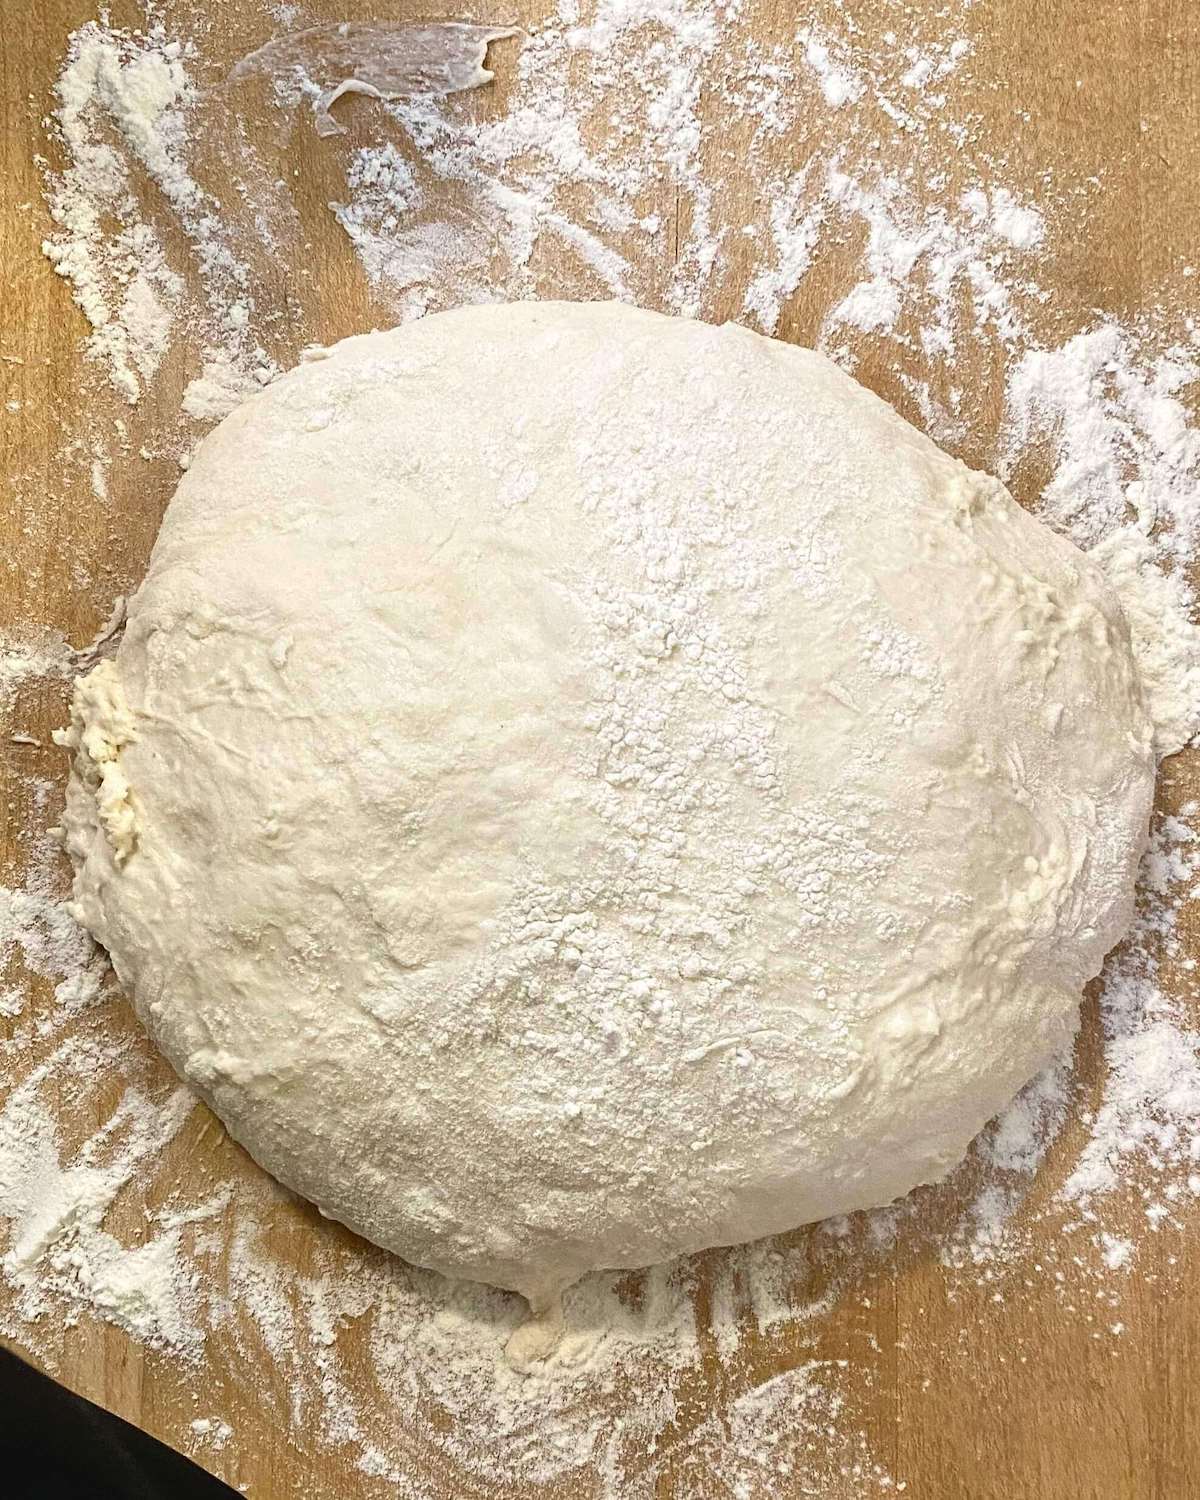
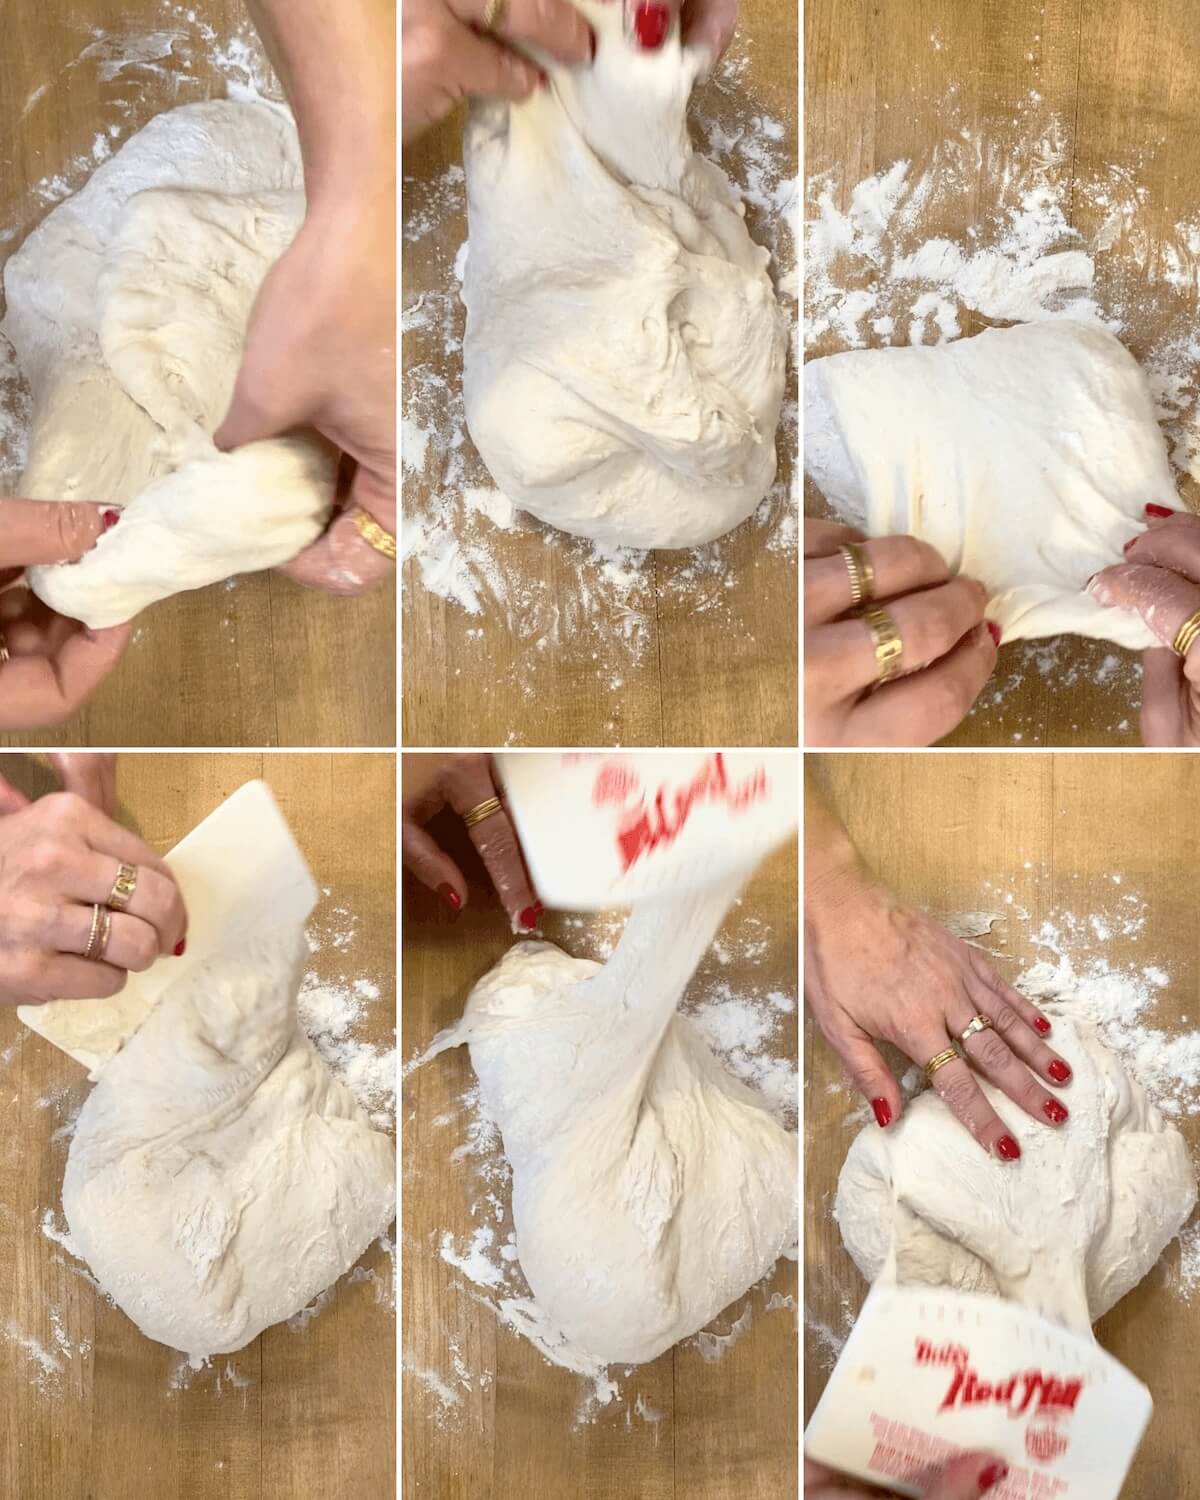
Turn dough out onto work surface and stretch and fold the dough over itself about 4 times. You can use your hands or a dough scraper to pull dough up and over.
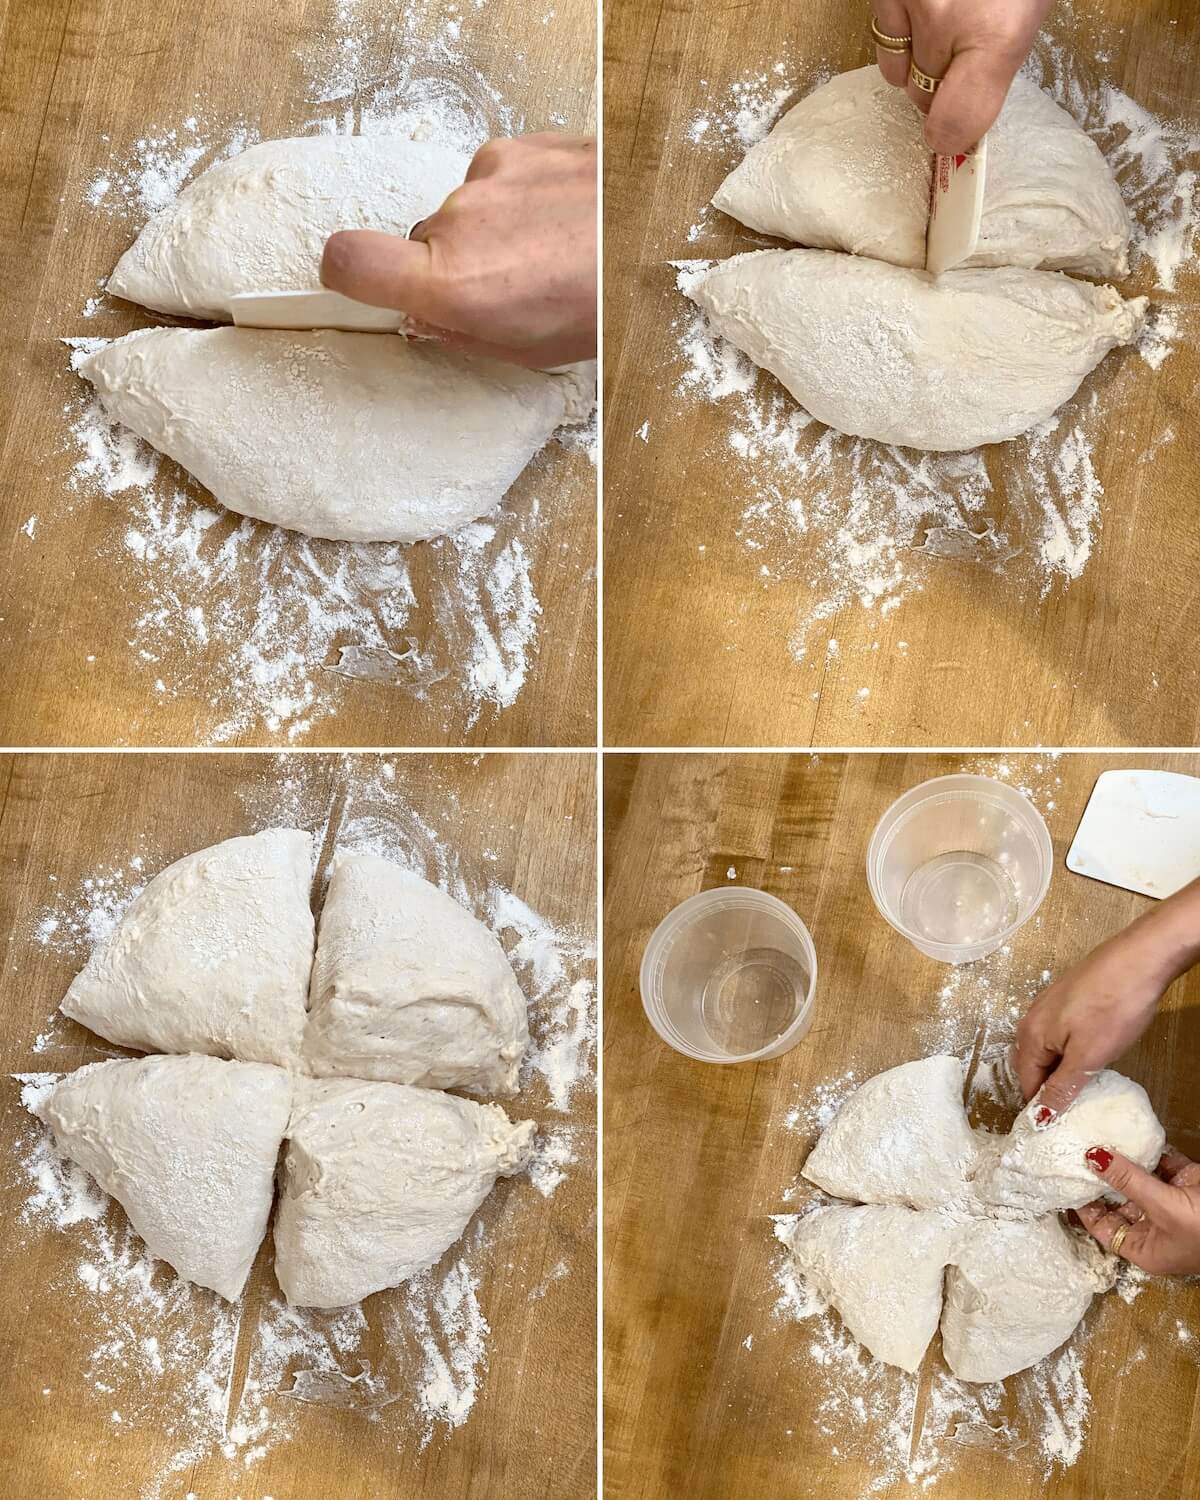
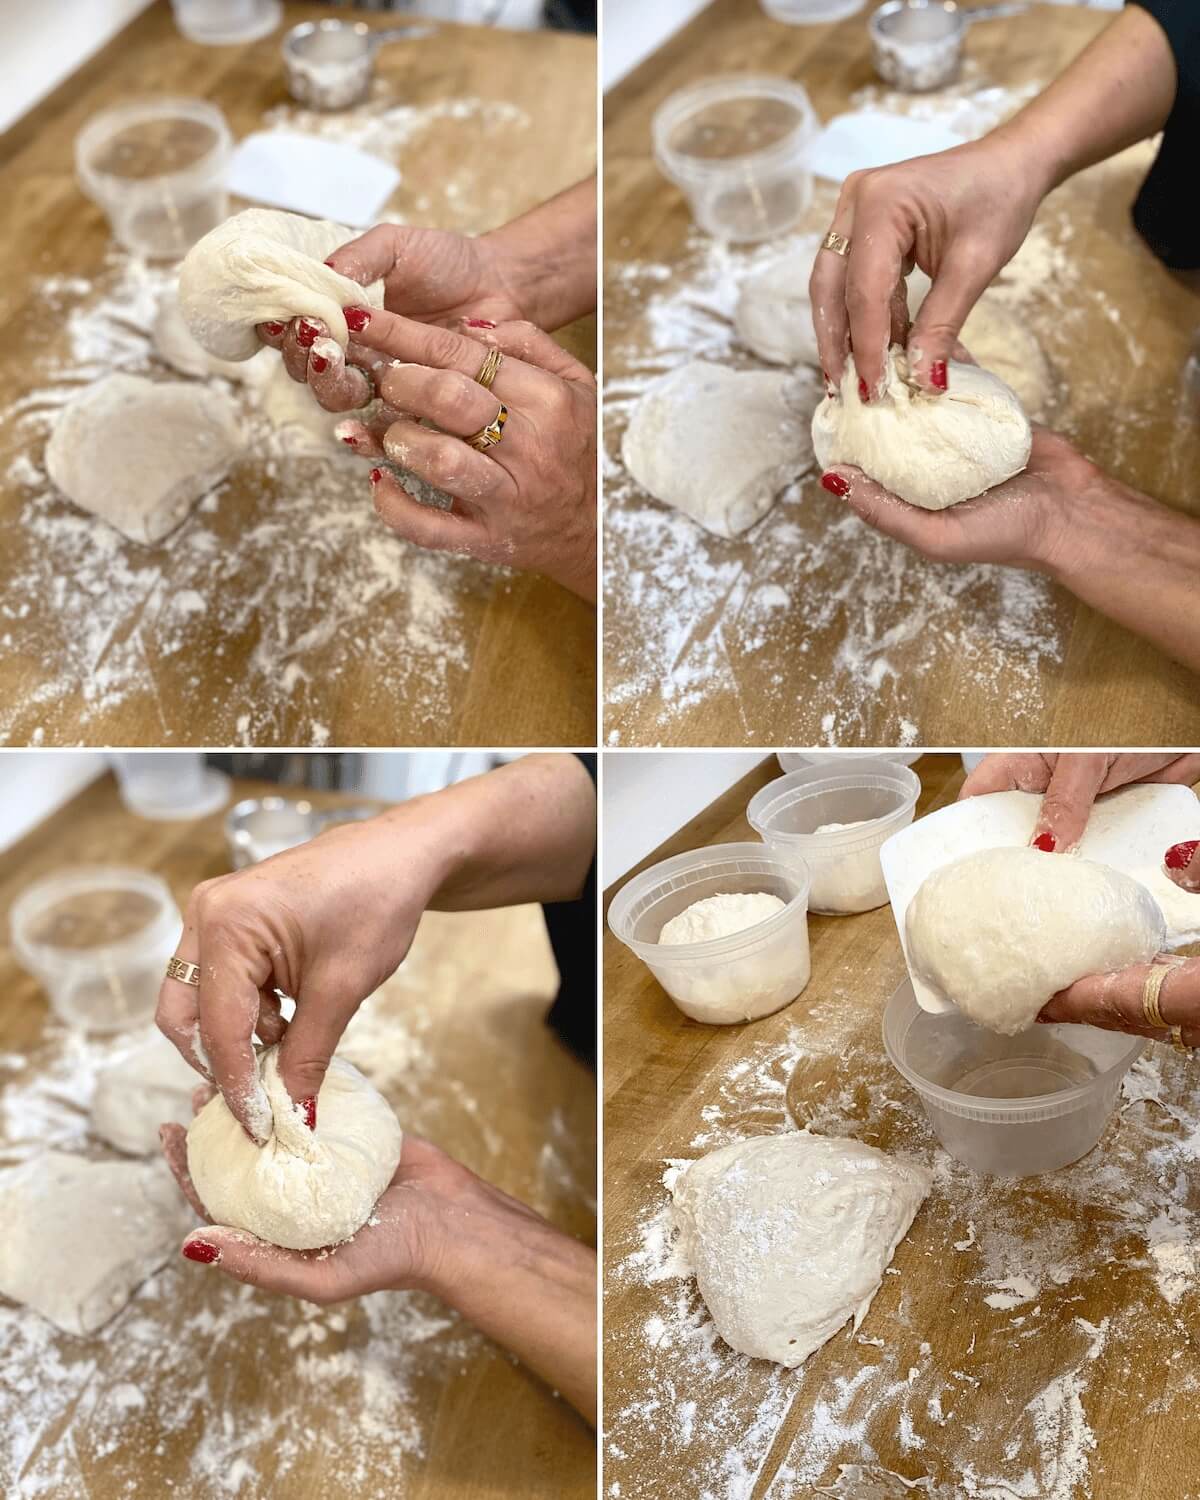
Use the dough scraper to divide dough into equal pieces.
Form each piece into a ball, stretching it so the top of the ball is tight. Pinch the bottom of the ball to hold the dough into shape.
Place dough balls into plastic containers and refrigerate for up to 4 days until ready to use.
Toppings for Neapolitan Pizza
The classic Neapolitan pizza has a thin dressing of tomato puree, or crushed San Marzano tomatoes, some fresh mozzarella and maybe a sprinkle of Parmesan, and is finished with fresh basil and olive oil after it's baked.
That being said, as long as you don't overload your special, delicate crust you just made, the sky is the limit to your toppings.
Herbs and Greens
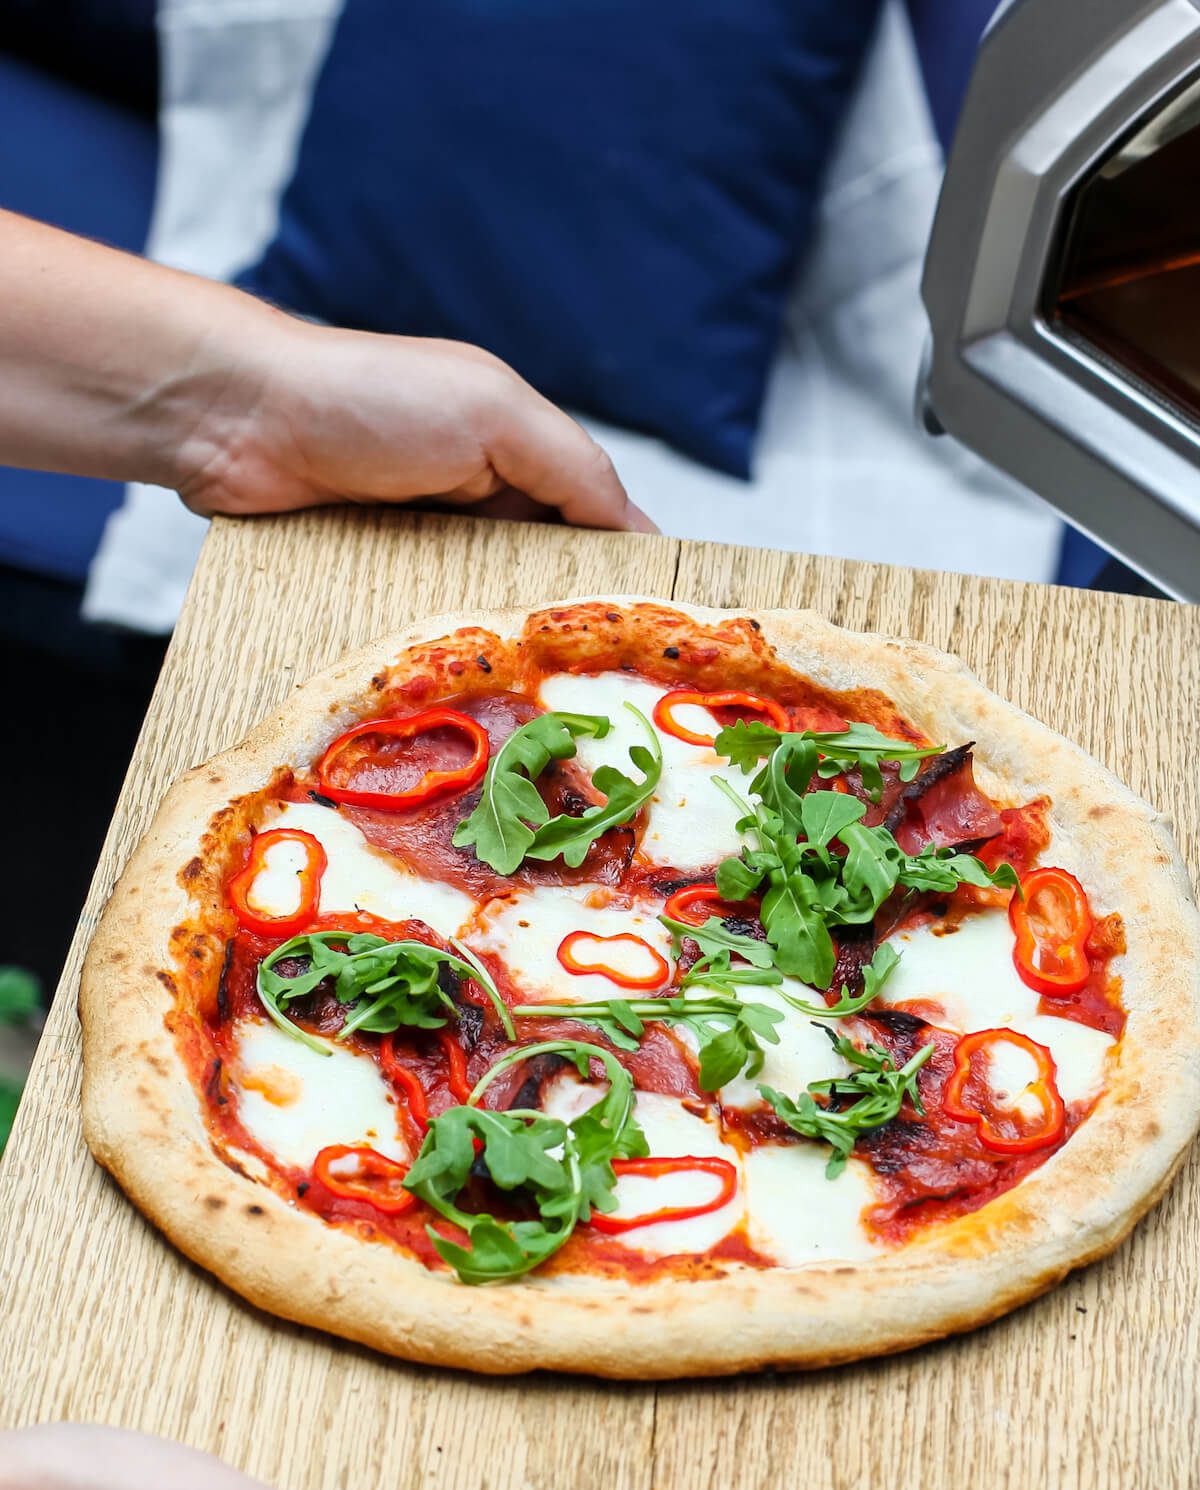
Herbs like basil, oregano, parsley, and arugula should all be added after the pizza is out of the oven. They are too tender and light to bake with the crust, and will burn.
Cheeses
Fresh mozzarella: use torn or sliced pieces
Grated mozzarella: even this humble American-style cheese will work
Soft cheeses: try slices of Brie or Camembert
Hard cheese: Pecorino, Parmesan and Asiago are lovely grated on pizza
Creamy cheese: dollops of ricotta or stracciatella add a nice creaminess *Burrata should be added after the pizza is out of the oven.
Vegetables
Mushrooms: try them thinly slices since the pizza cooks quickly
Eggplant and zucchini: both watery so just use thin slices
Bell peppers and chilis: thin slices or small dice work well
Artichokes: baby frozen or canned artichokes sliced
Tomatoes: try halved cherry tomatoes
Brussels sprouts: shaved or thinly sliced
Onions: thinly sliced red onions or shallots
Broccoli rabe: small stems and branches *I like par-cooking it first
Meats
Sausage: cooked and crumbled, try mild or spicy
Salami: slices or strips
Pepperoni
Pancetta: diced and cooked
Prosciutto
Ham
Soppressata: or other cured meats like bresaola
Other
Olives
Fruit
Nuts
Clams
Kale or spinach
Red pepper flakes: sprinkle on after baking
Hot Honey: for drizzling
Do I need a pizza oven?
I would love for you to have an outdoor pizza oven! But alas, we can't all have one of those.
Backyard pizza oven
If you want to get a portable or small backyard pizza oven, I highly recommend the Ooni brand. There are many compact pizza ovens on the market today. They are not inexpensive, but well worth the investment if you're not building a large, traditional brick one on your patio!
I use an Ooni Karu 16 Multi-Fuel pizza oven and typically just use the propane gas option.
Standard Oven
You can cook this pizza in your standard home oven with a preheated pizza stone, or baking steel. You'll need to be able to heat your oven to 500ºF (usually the hottest setting) without risk of affecting side by side appliances, or damaging anything around your oven. 500ºF is HOT!
Important crust recipe tips:
Doubling
This recipe makes 2 crusts. You can double the recipe in one bowl and then form 4 balls for fermenting. If you want more crusts than that I suggest making a double batch several times separately, instead of one giant batch. I find it's easier to control the texture, as well as divide it evenly into balls.
Forming the pizza
You can watch a helpful video here, or practice gently pressing and stretching the dough into a round crust. It's ok if your crust isn't perfectly round! Just remember to leave a nice inch or so of un-pressed crust around the edge to get that signature puffy edge.
Using semolina
I use extra '00' flour on my work surface when forming my crusts, but dust as much off of it as I can before transferring to a semolina flour-dusted pizza peel. Regular flour burns very quickly and you don't want it piled up in your pizza oven.
Semolina flour is course and helps the dough slide off of a pizza peel. You also don't need as much of it as you would regular flour, so not as much piles up in the oven.
Black flour and fire
You can get a pizza oven brush to dust excess burned flour and semolina off your pizza stone if you're cooking several pizzas. Letting the blackened flour build up can be a fire hazard as well as give the bottom of your pizzas a terrible flavor.
Freezing the dough
This dough is great to freeze! I let the dough long ferment for at least 1 day in the plastic containers in the fridge. Then I just transfer the containers to the freezer and freeze for up to a month.
To thaw, just transfer the containers to the fridge at least a day before you want to use them, then follow the regular instructions to let the dough come to room temperature for 1 to 2 hours before using in the oven.
You can also transfer the 1-day-fermented dough balls from their plastic containers to a tray parchment-lined tray to freeze. Freeze, then wrap the tray or dough balls individually. Place the dough balls back in containers in the fridge to thaw.
Let me know how it went!
Scroll to the bottom of the page to rate ⭐⭐⭐⭐⭐ and comment on this recipe. Leaving comments helps other too!

Neapolitan Pizza Dough Recipe
Ingredients
- 2 cups (232 g) '00' Flour
- ¼ teaspoon instant or active dry yeast
- 1¼ teaspoons sea salt
- ¾ cup (170 g) water (room temperature)
- Desired toppings and sauce
- Semolina flour (For baking)
Instructions
- *I typically double the recipe. Images reference a doubled recipe.Combine the flour, yeast and salt in a medium mixing bowl. Add the water and mix vigourously with a dough whisk or fork until combined. It will make a rough but cohesive dough.
- Scrape down sides of bowl and cover the bowl with plastic wrap. Let rise at room temperature for 8 to 12 hours and up to 24 hours.
- The dough will be bubbly. Turn dough out onto a floured work surface and gently pull the edges up and over itself about 4 times (on each side of the ball of dough).
- Divide dough into 2 equal pieces, and with floured hands form into balls by gently stretching the dough and pinching the bottom of the ball to secure. Place each ball, pinched side down in a covered container and place in the fridge for 2 days and up to 4 days.
- When ready to use, remove dough balls from fridge 1 to 2 hours before ready to use. Heat your oven and stone, or pizza oven as needed.
- If necessary use floured hands to manipulate the dough. On a floured surface gently press dough ball into a 10 to 12 inch circle leaving about 1 inch of puffed dough around the edge. You can gently pick up the crust and let the weight of it stretch itself into a circle, and gently use your knuckles to stretch it without tearing.
- When the dough circle is formed, place it on a semolina-dusted pizza peel, quickly top it as desired, then slide it onto the pizza stone in the oven, or into the hot pizza oven.
- Bake, rotating about every 20 seconds using a pizza turning peel, until blistered and cooked through. Quickly remove the pizza with a metal pizza peel and transfer to a pizza pan or cutting board.
- Dress as desired basil and olive oil, or other fresh toppings, and serve immediately.
Notes
Nutrition
Newest recipes from Tara Teaspoon!

About Tara Teaspoon
I’ve been in the food publishing business for over 20 years, creating recipes & food-styling for magazines, books, television & advertising. Order my new cookbook & stick around for amazing things to eat.









Mia
I have added this pizza oven to my wish list!