
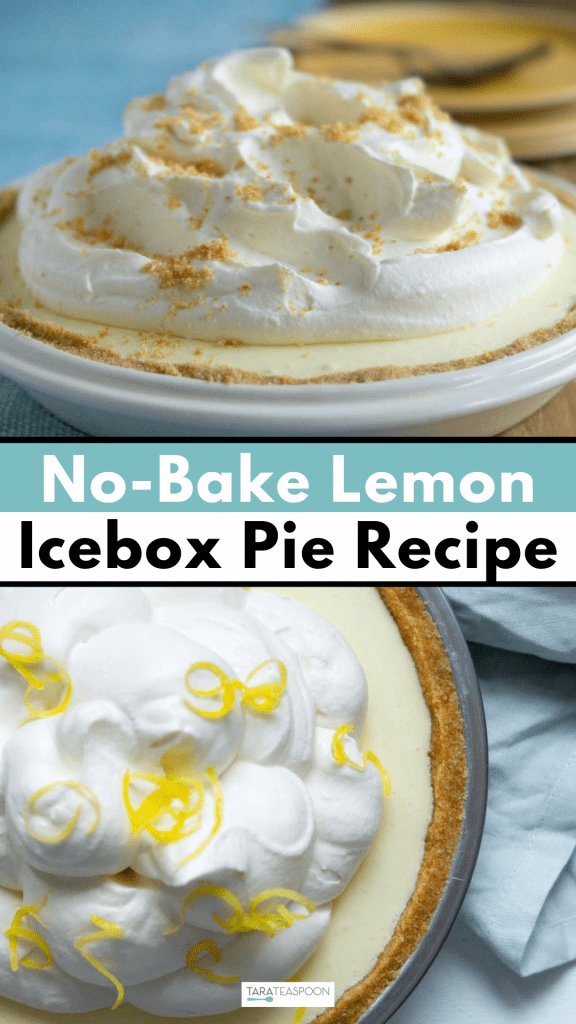

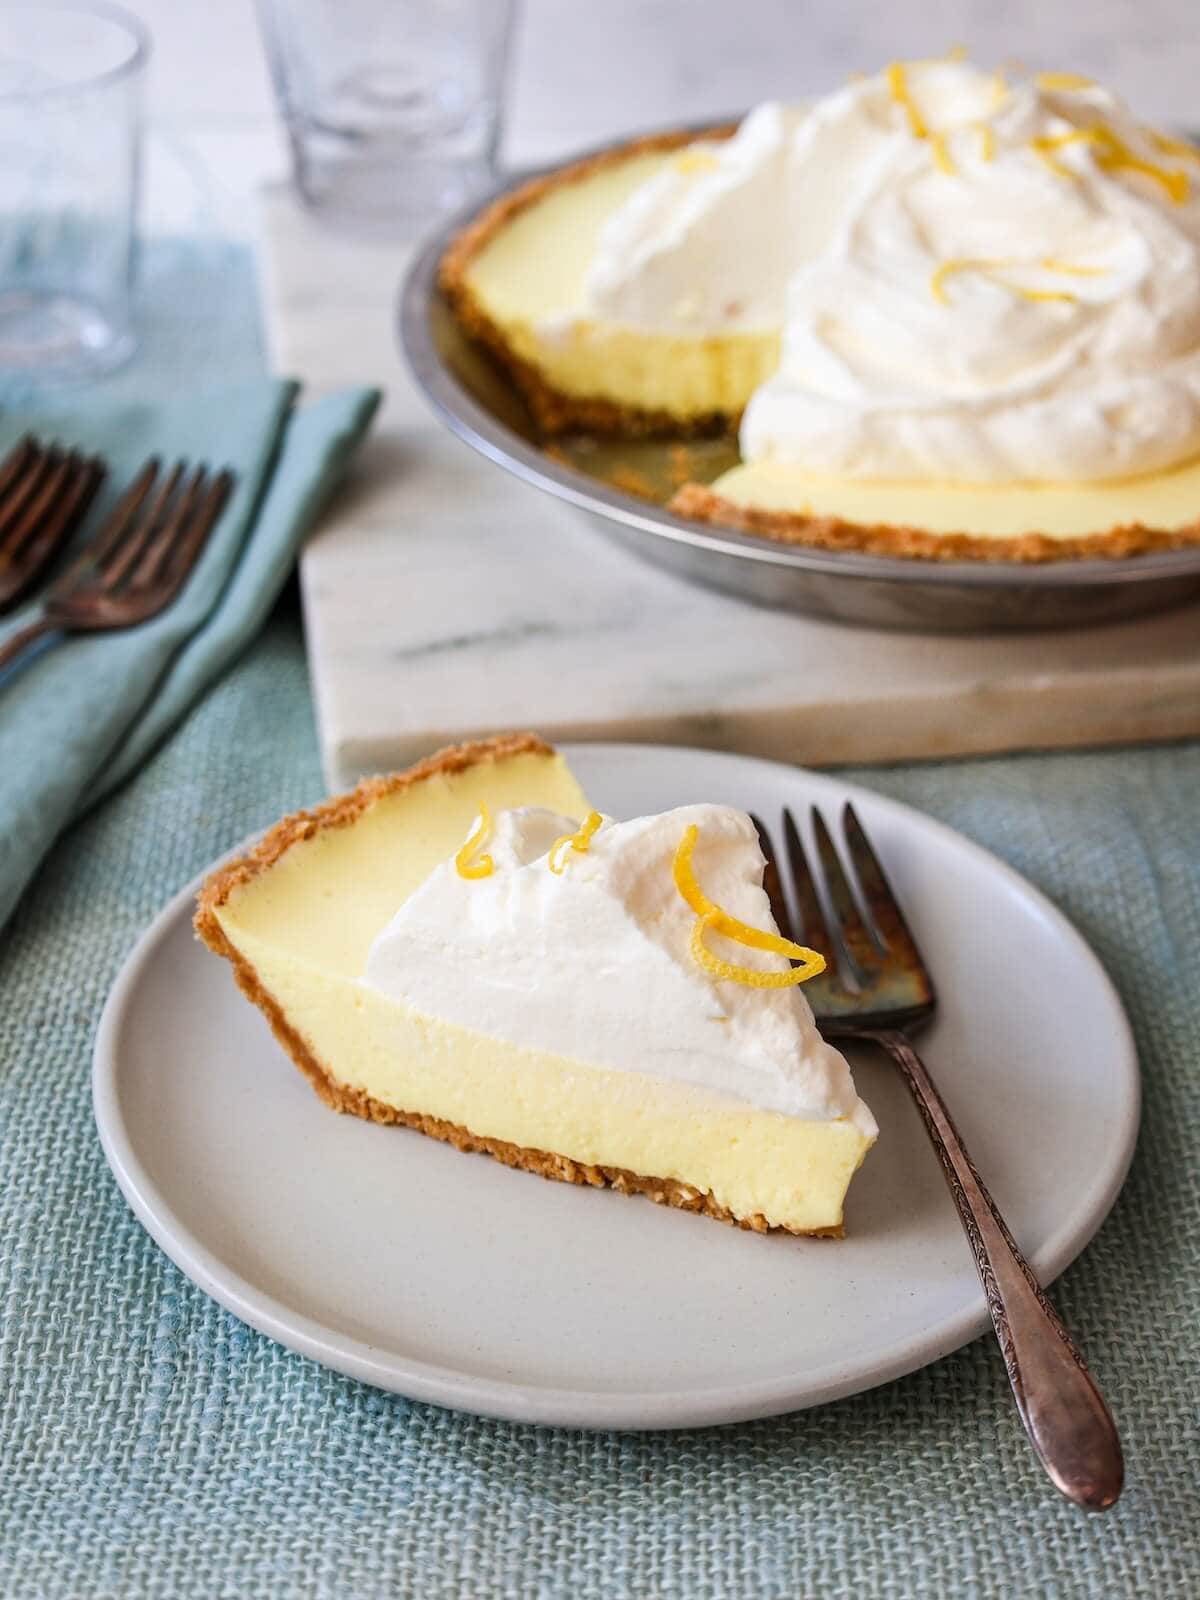
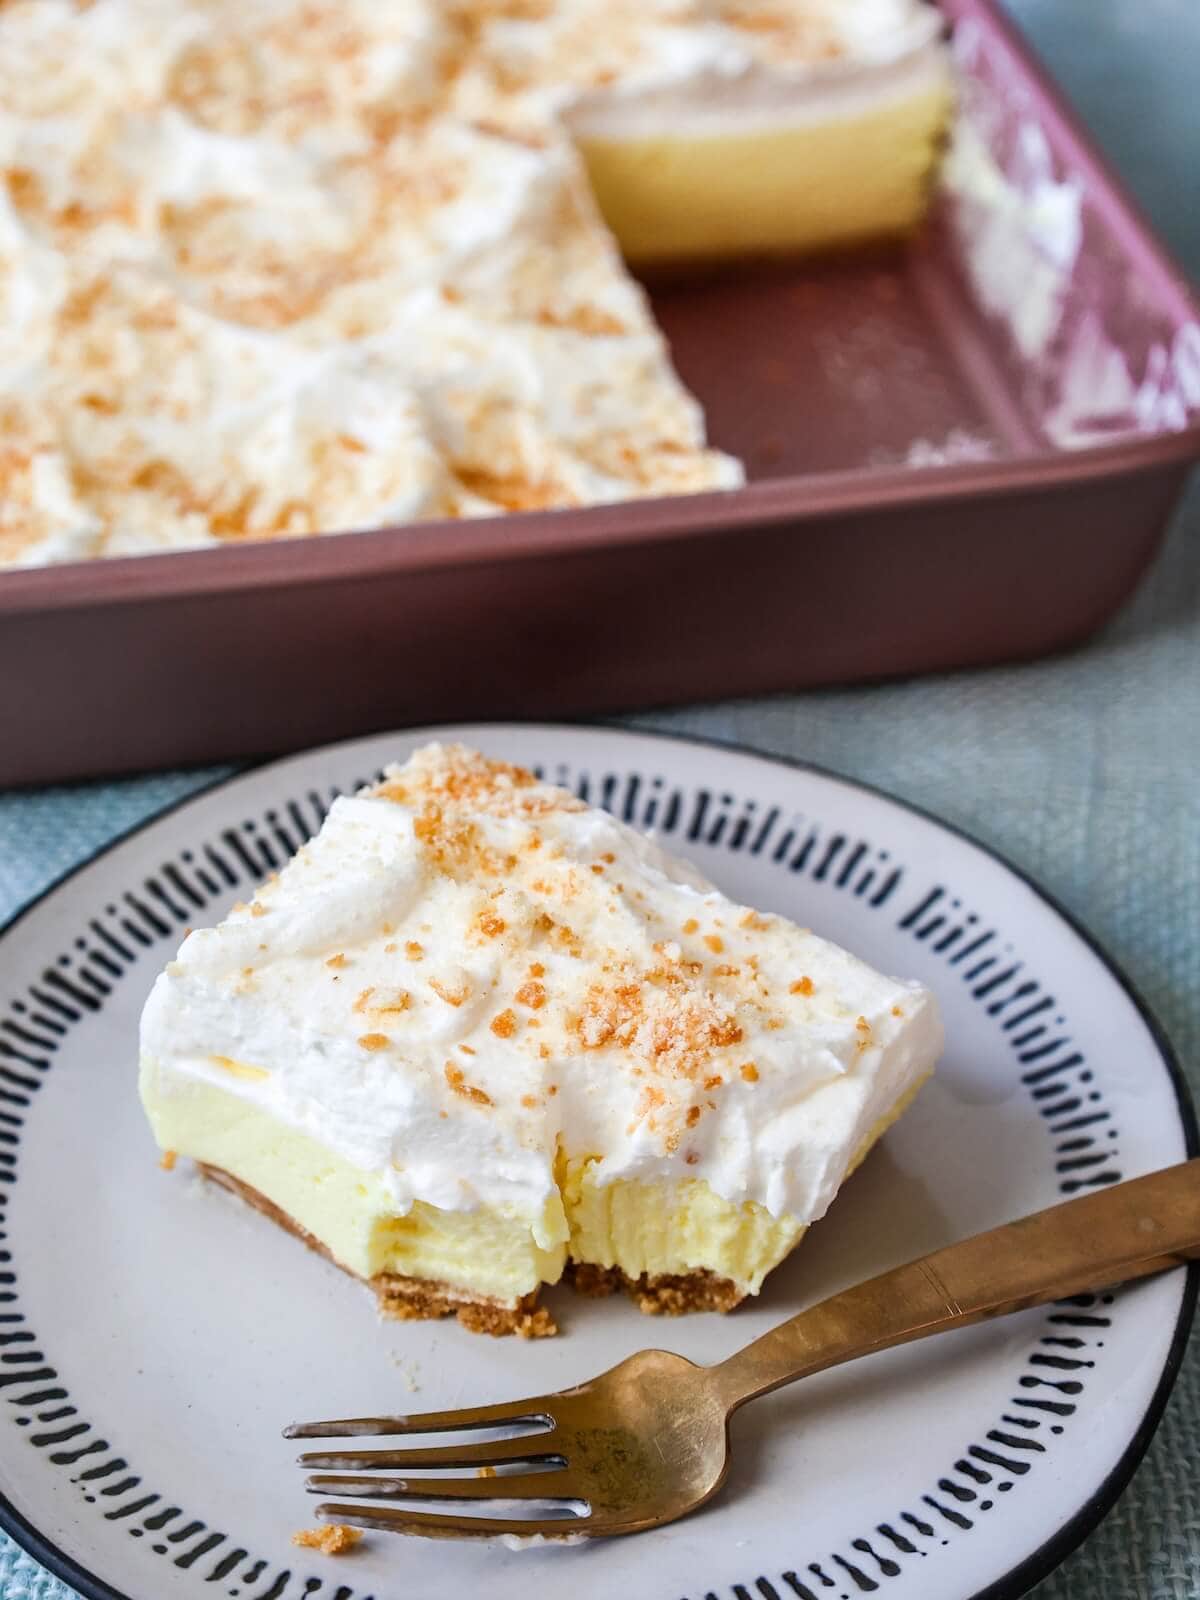
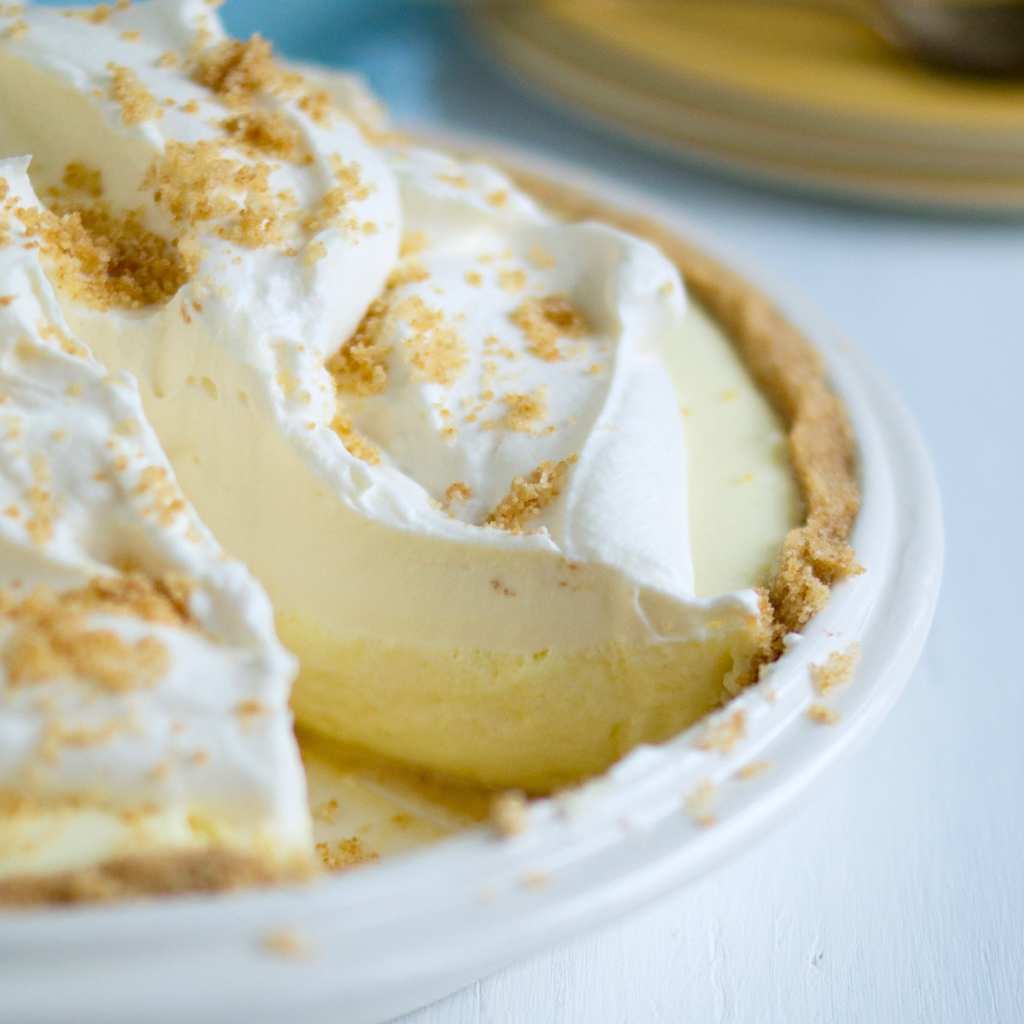
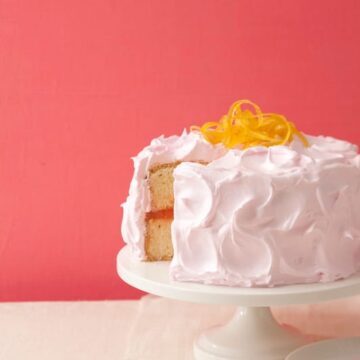
This no-bake Lemon Icebox Pie recipe has a bright lemon filling, rich crumbly crust, and mounds of sweet whipped cream on top. With a few simple ingredients and just 30 minutes of assembly time, it's the perfect make-ahead summer dessert. Simply chill it in the fridge for a few hours before entertaining!
In this article you'll learn:
- How baking expert Tara Teaspoon developed and retested this recipe to ensure the gelatin sets perfectly every time.
- This version of lemon icebox pie swaps condensed milk and cream cheese for a stabilized lemonade mousse and heavy cream to create a lighter, silkier texture.
- You only need 30 minutes of hand-on prep and basic kitchen tools to assemble this no-bake dessert.
- Using lemonade concentrate and vanilla wafers makes a nostalgic 1950s "lemon fluff" flavored dessert.
- This make-ahead pie stays fresh in the fridge for up to three days, for a low-stress option for entertaining.
- You can adapt the recipe to a 9-by-9-inch square pan instead of a traditional round pie.
Generated with AI and experts from the Tara Teaspoon team.
This is my expert take on an old classic dessert. Make it as a pie or in a square pan, and enjoy the bright, delicious treat!
I LOVE lemon desserts! When I was little, I was obsessed with a classic '50s dessert made from lemon Jell-o called Lemon Fluff. My mom's version was the best, with its airy, citrus filling and a signature layer of crumbled cookies on top.
With those childhood flavors as inspiration, I used my skills as a chef to create the ultimate no bake lemon icebox pie. It's got a tangy stabilized lemonade mousse and buttery vanilla cookie crust that take this nostalgic favorite to the next level.
What is an icebox pie?
An icebox pie is a type of no-bake chilled pie made with a mousse filling in a graham cracker or cookie crust. In my kitchen 'icebox' is shorthand for easy and delicious!
You can think of an icebox as the non-electric predecessor to the refrigerator. It was quite literally a box or chest that kept foods chilled with a large block of ice. The name stuck, even years into the invention of the electric refrigerator!
Iceboxes were used in homes in the early to mid 1900s and opened the way for home chefs to experiment with chilled desserts, otherwise known as icebox desserts.
Jump to:
- In this article you'll learn:
- What is an icebox pie?
- My signature lemonade and cookie crust combo
- Ingredients and substitutions
- How to make lemon icebox pie (step by step)
- Make it in a square pan
- Tara's top tips
- More no-bake desserts
- Equipment
- Make-ahead and storage
- FAQ
- Variations for lemon icebox pie
- More delicious lemon recipes
- 📖 Full Recipe
- 💬 Comments & Reviews
My signature lemonade and cookie crust combo
When developing this lemon icebox pie, I researched classic '50s no-bake desserts. Most of the pie recipes I found were made in a standard graham cracker crust and relied on cream cheese, sweetened condensed milk, and lemon gelatin for the filling. They're delicious, but not the flavor I was going for.
I decided to boost the lemon in my pie with lemonade concentrate and used unflavored gelatin to thicken the base.
- I used lemonade concentrate because the flavor is deep, bright, and it's easily found! I don't suggest using fresh lemon juice, as I didn't test with it and wouldn't know how much sugar to tell you to add!
I finished the mousse filling by folding in pillows of freshly whipped cream before nestling it into a vanilla cookie crust. The resulting pie is seriously dreamy in your mouth!
There's more to know about this recipe:
- Retested for success: I’ve retested this recipe to ensure the gelatin sets perfectly every time, giving you a fail-proof dessert.
- No fancy equipment: Since this is a no-bake recipe, it's perfect for beginning bakers. All you'll need are a few bowls and an electric mixer.
- Easy to make in advance: It only takes 30 minutes of hands-on work time to assemble the pie, and then it finishes setting in the fridge on its own.
- Great all year long: This make-ahead dessert is the best summer pie. Make it any time of year you crave a taste of summer. It's sure to be a family favorite!
What does it taste like?
This pie has a fluffy, spongy and mousse-like texture. The whipped cream on top adds a silky, dense contrast to the filling. You'll love the velvety texture on your tongue and the bright lemon flavor.
The lemon isn't muted and really pops with each bite. The buttery, sweet crust is the perfect contrast to the soft filling.
If you're a lemon lover too, try my Easy Lemon Bars and Lemon Curd Cake.
We loved this no-bake lemon icebox pie! It's creamy, luscious and just perfect. Lemon desserts are my favorite and definitely going to make this again. We only have a few slices left!
- Kathryn

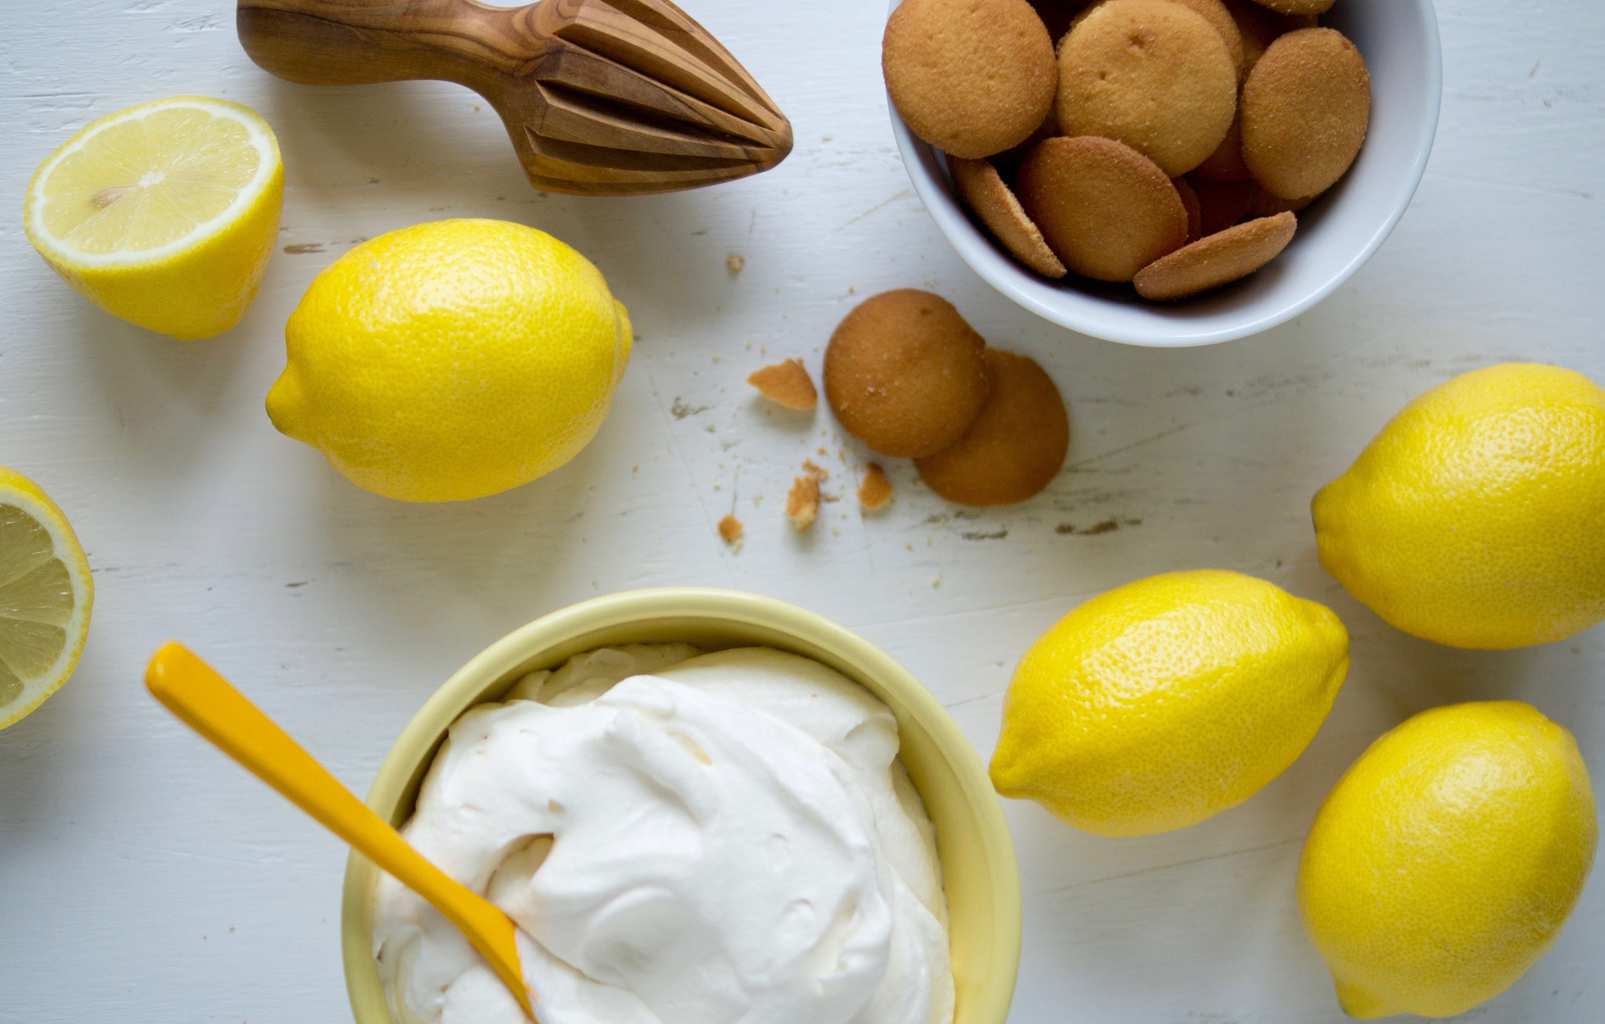
Ingredients and substitutions
Check out the ingredients I used below to recreate the vintage, classic flavors of the '50s with this dessert. See recipe card for quantities.
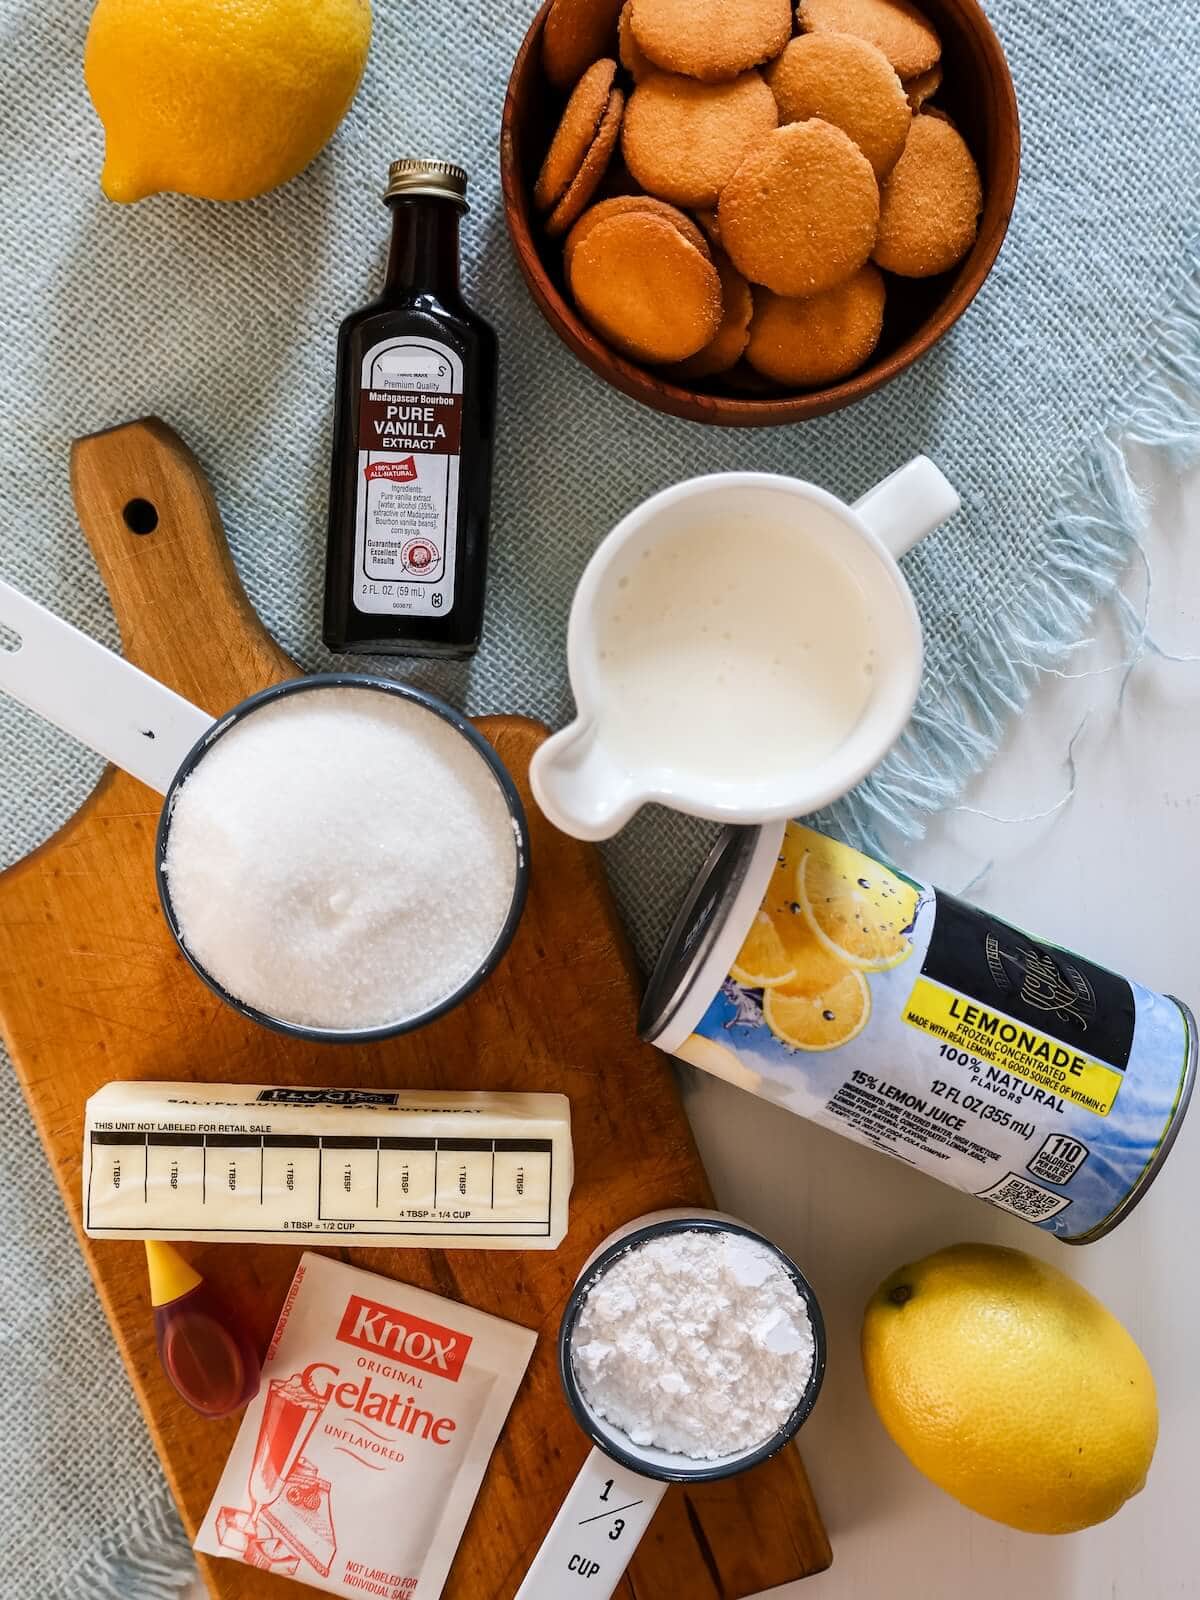
- Vanilla wafer cookie crumbs: You could also use shortbread or gluten-free cookies. You can also use a store-bought graham cracker crust to save time.
- Unsalted butter
- Frozen lemonade concentrate: Thawed, but still cold. Gives the pie a bright lemon flavor.
- Granulated sugar
- Water
- Unflavored gelatin: Helps to thicken and set the mousse filling. I use Knox unflavored gelatin. I haven't tested the recipe with agar-agar for a vegetarian version.
- Heavy cream: For the creamy ingredient in the pie filling, I swapped traditional canned milk for heavy cream, it's just so much richer, in a good way!
- Yellow food coloring, optional: If desired, you can brighten the color of the pie with a few drops of liquid food coloring.
- Confectioners' sugar
- Vanilla extract
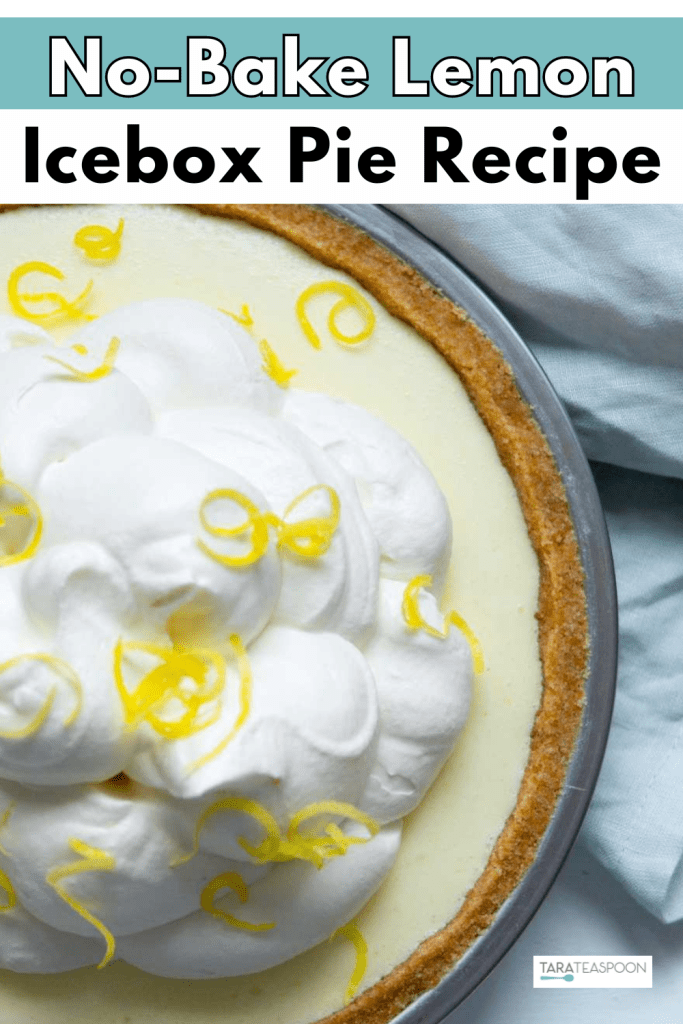
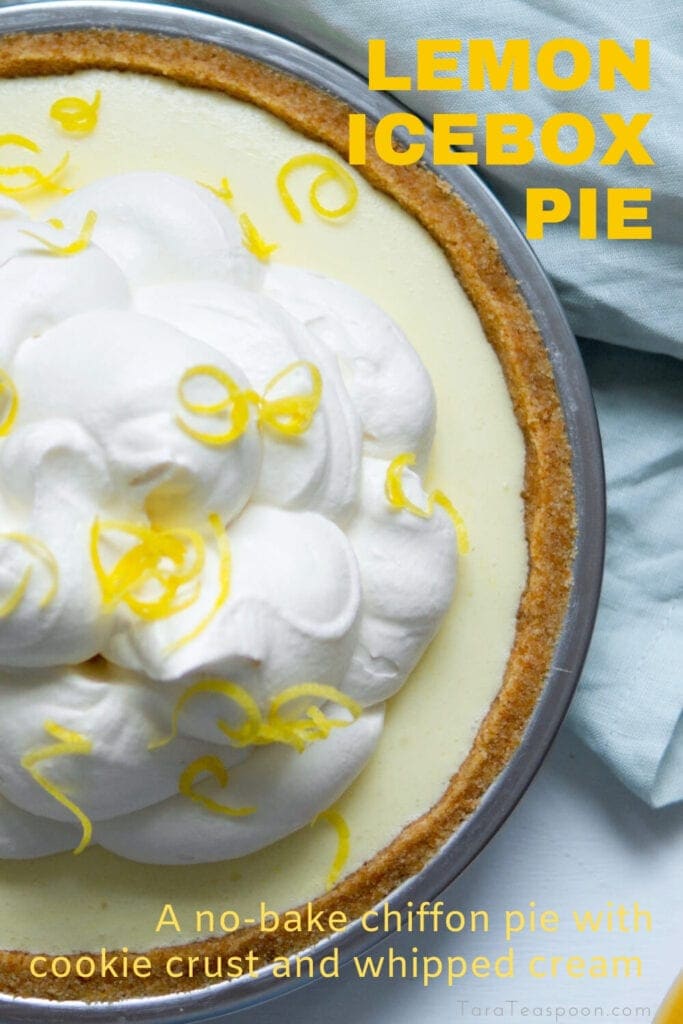
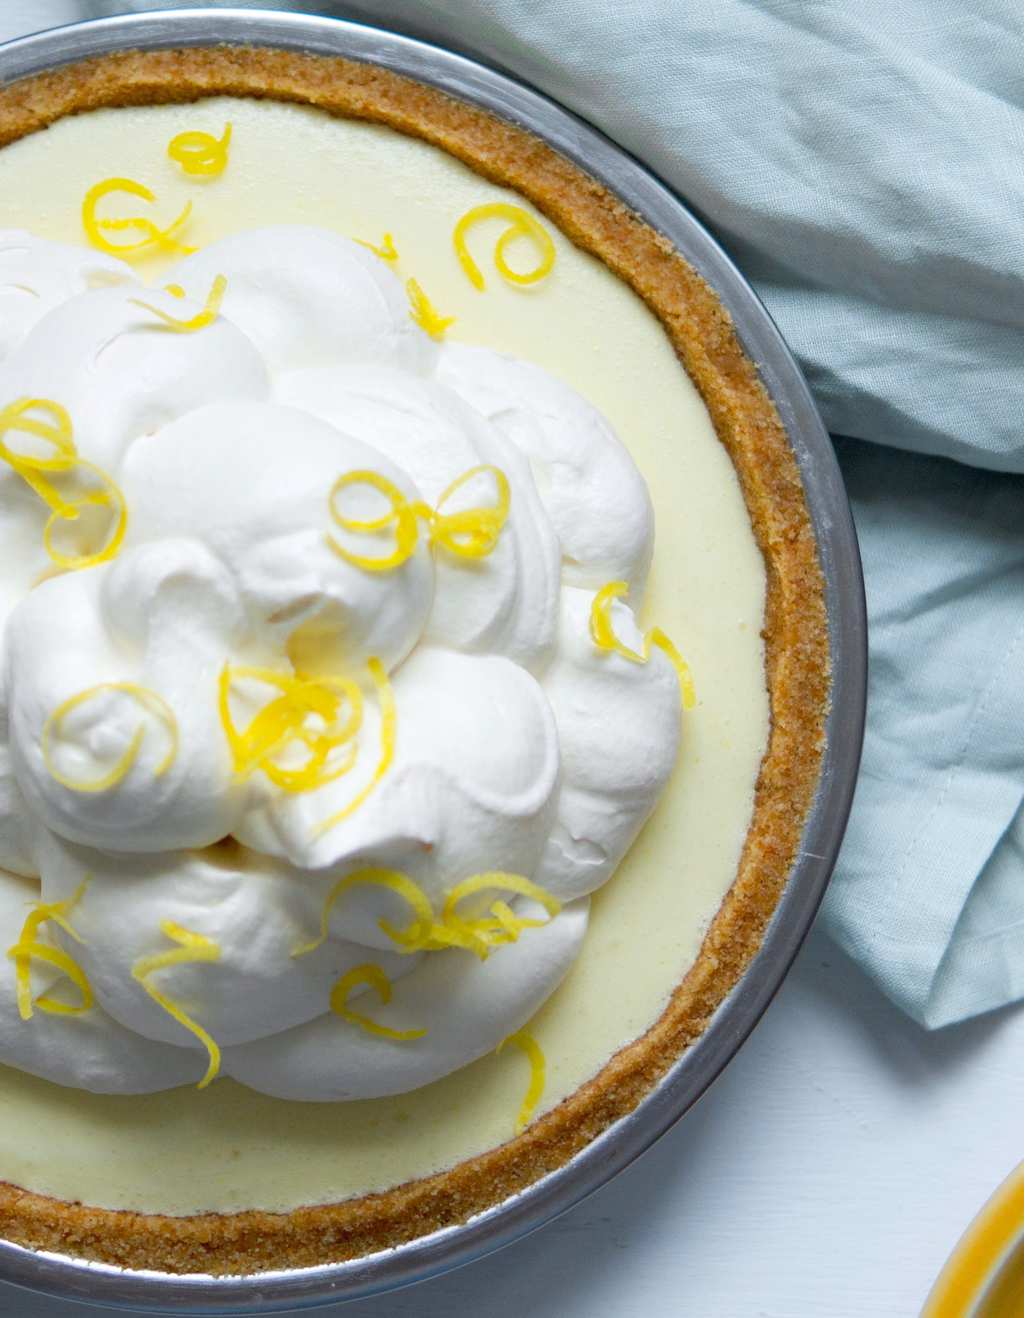
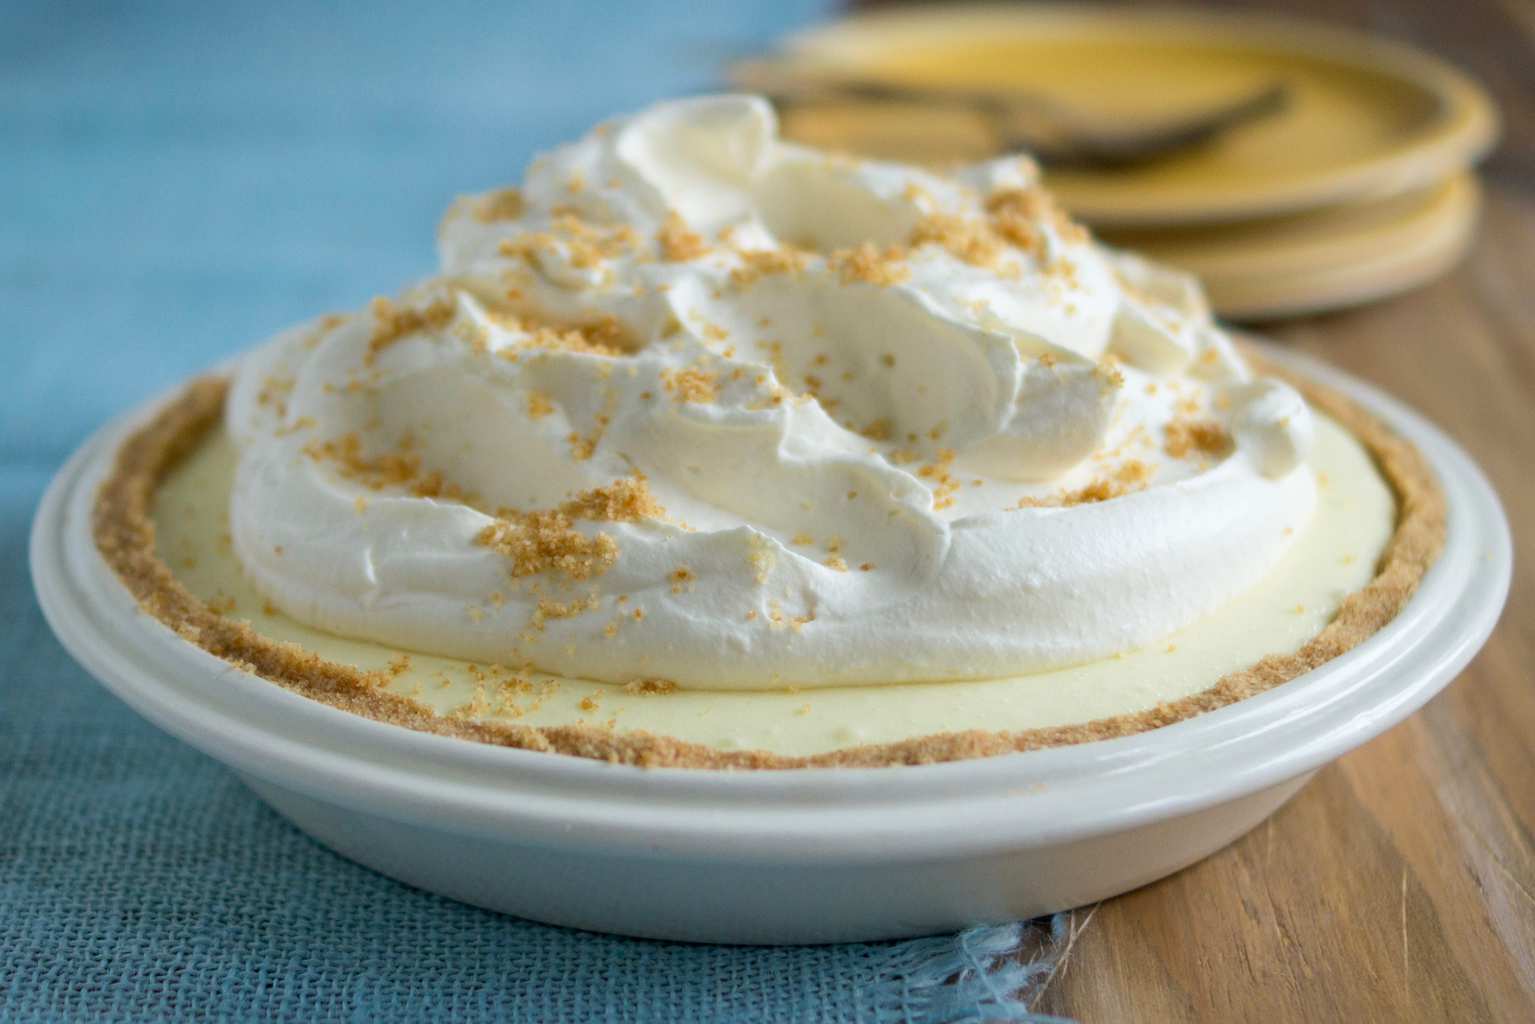
- Garnish, optional: You can garnish the top with lemon zest curls, candied lemon zest, or extra crumbled cookies. The crumbled cookies are more reminiscent of the classic dessert, but the lemon curls are just so pretty!
How to make lemon icebox pie (step by step)
Let's make this lemon ice box pie together! Follow these step-by-step instructions to get familiar with the process. See recipe card for comprehensive directions.

- Step 1: Blend vanilla cookies until they are fine crumbs. Add melted butter to form a crust crumble.
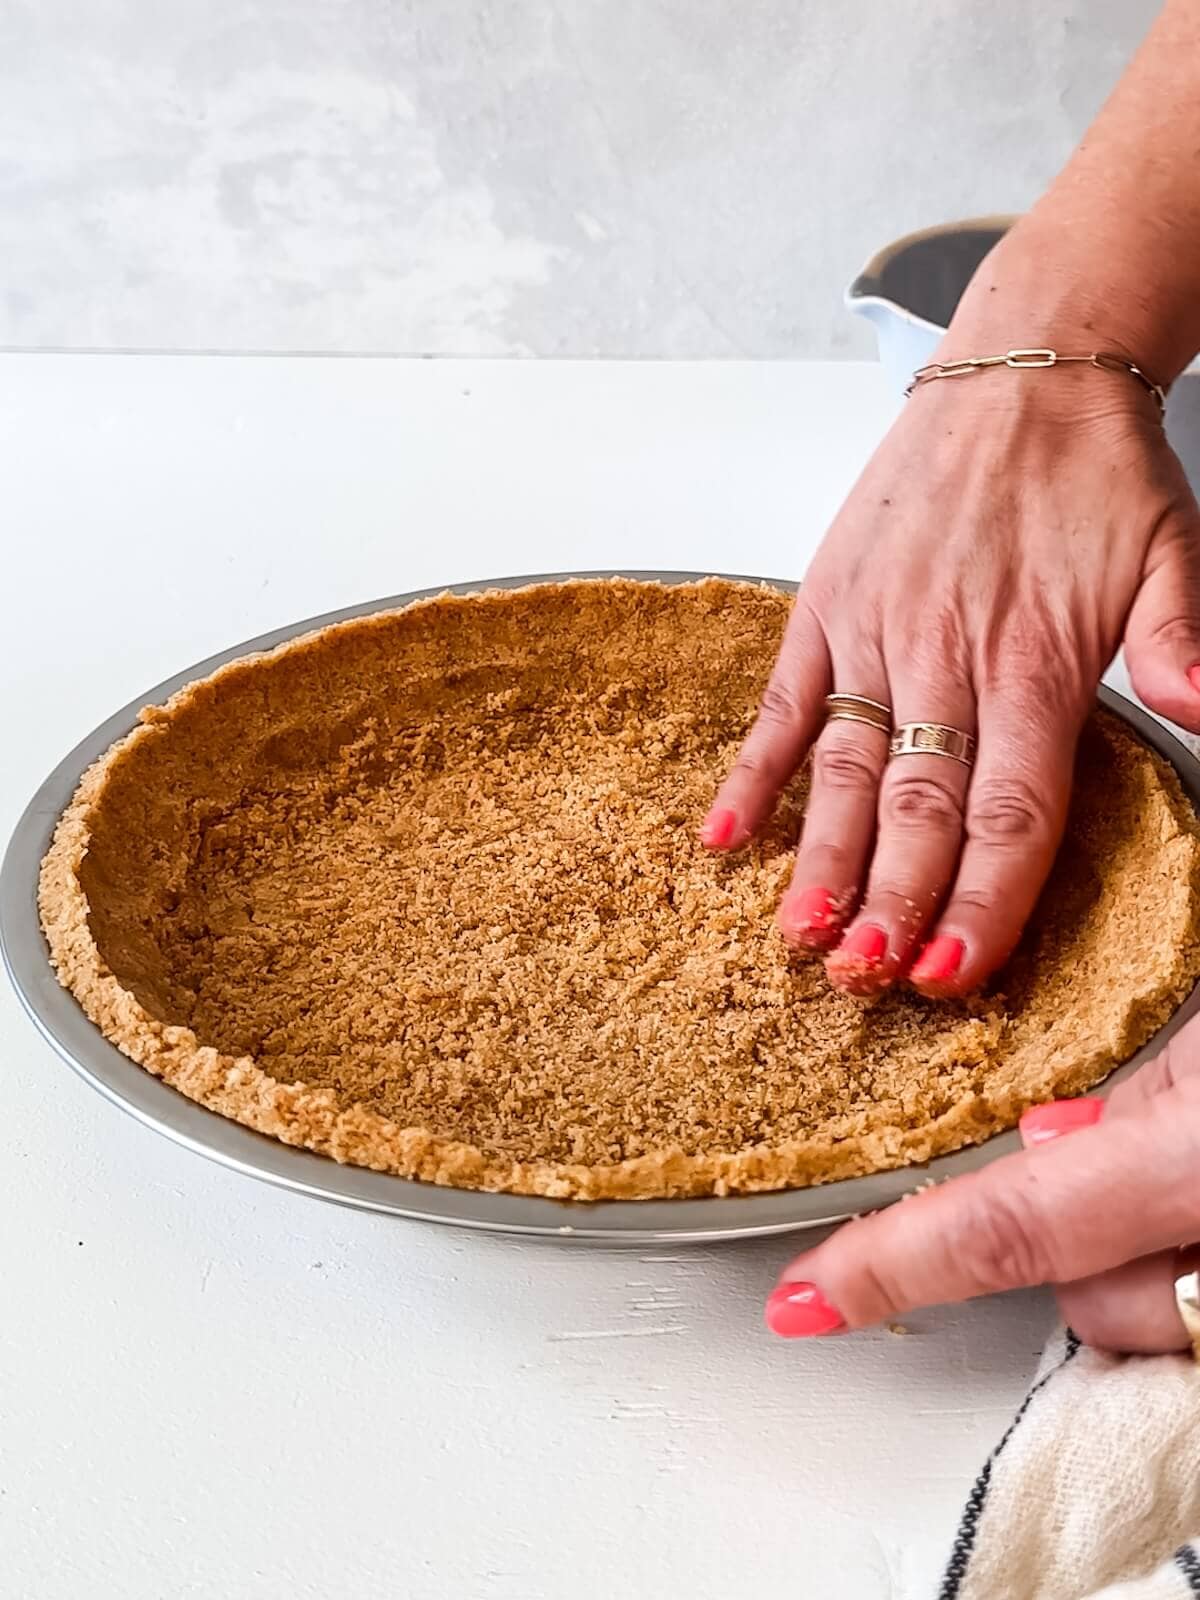
- Step 2: Press the crumbs into a pie tin and chill or freeze.
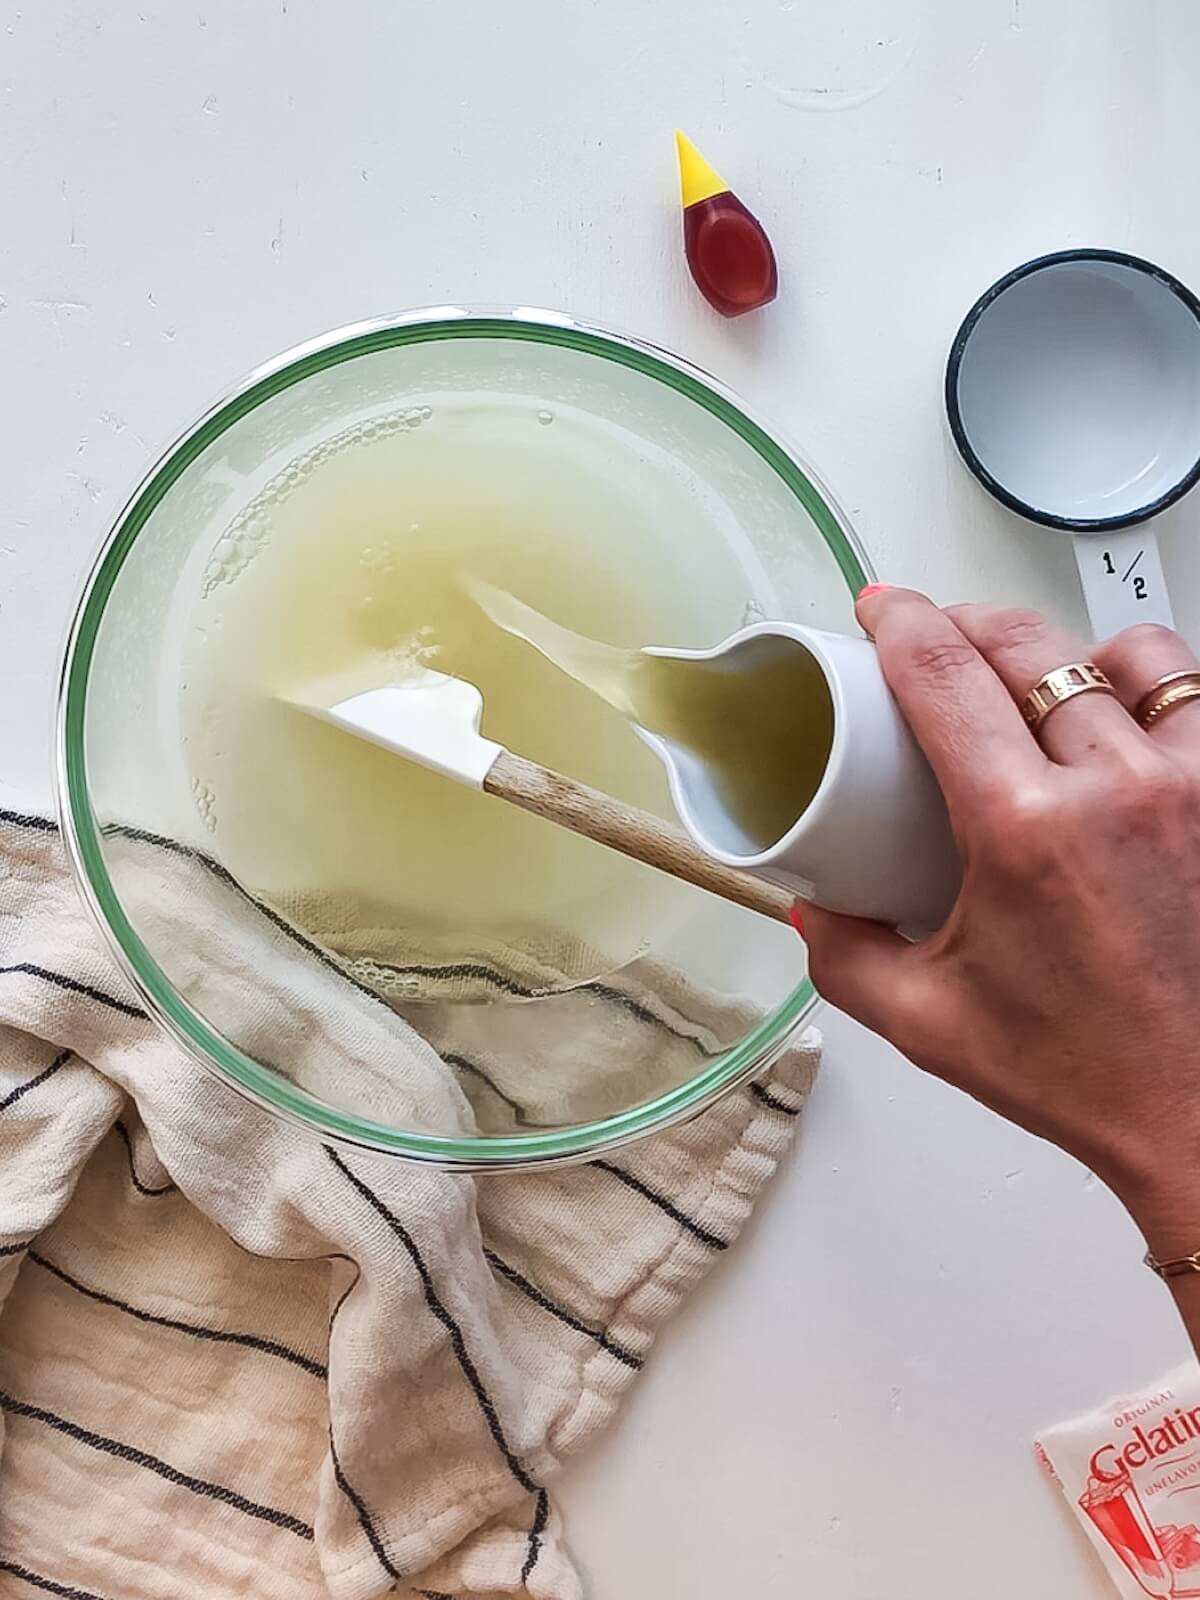
- Step 3: Soften gelatin in water; then add sugar, and lemonade concentrate.
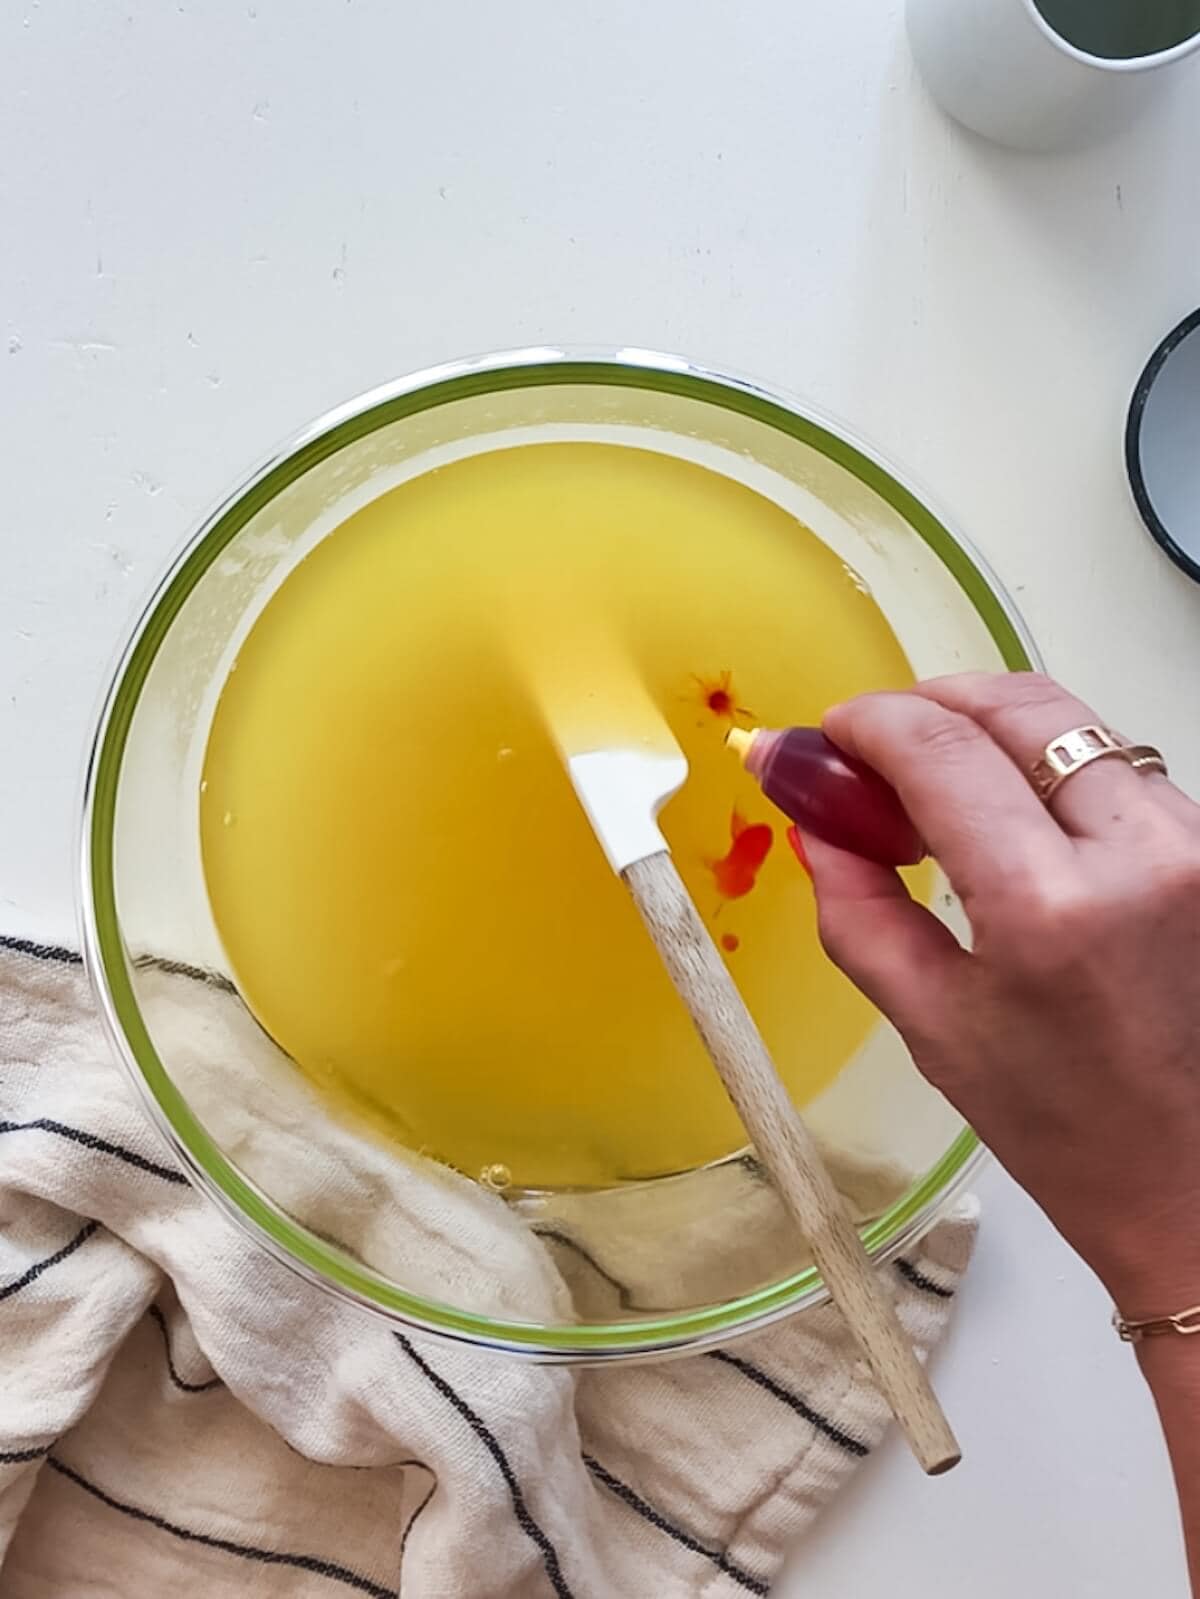
- Step 4: Add yellow food coloring to intensify the color, then chill this mixture until starting to jelly (should look like the texture of unbeaten egg whites).
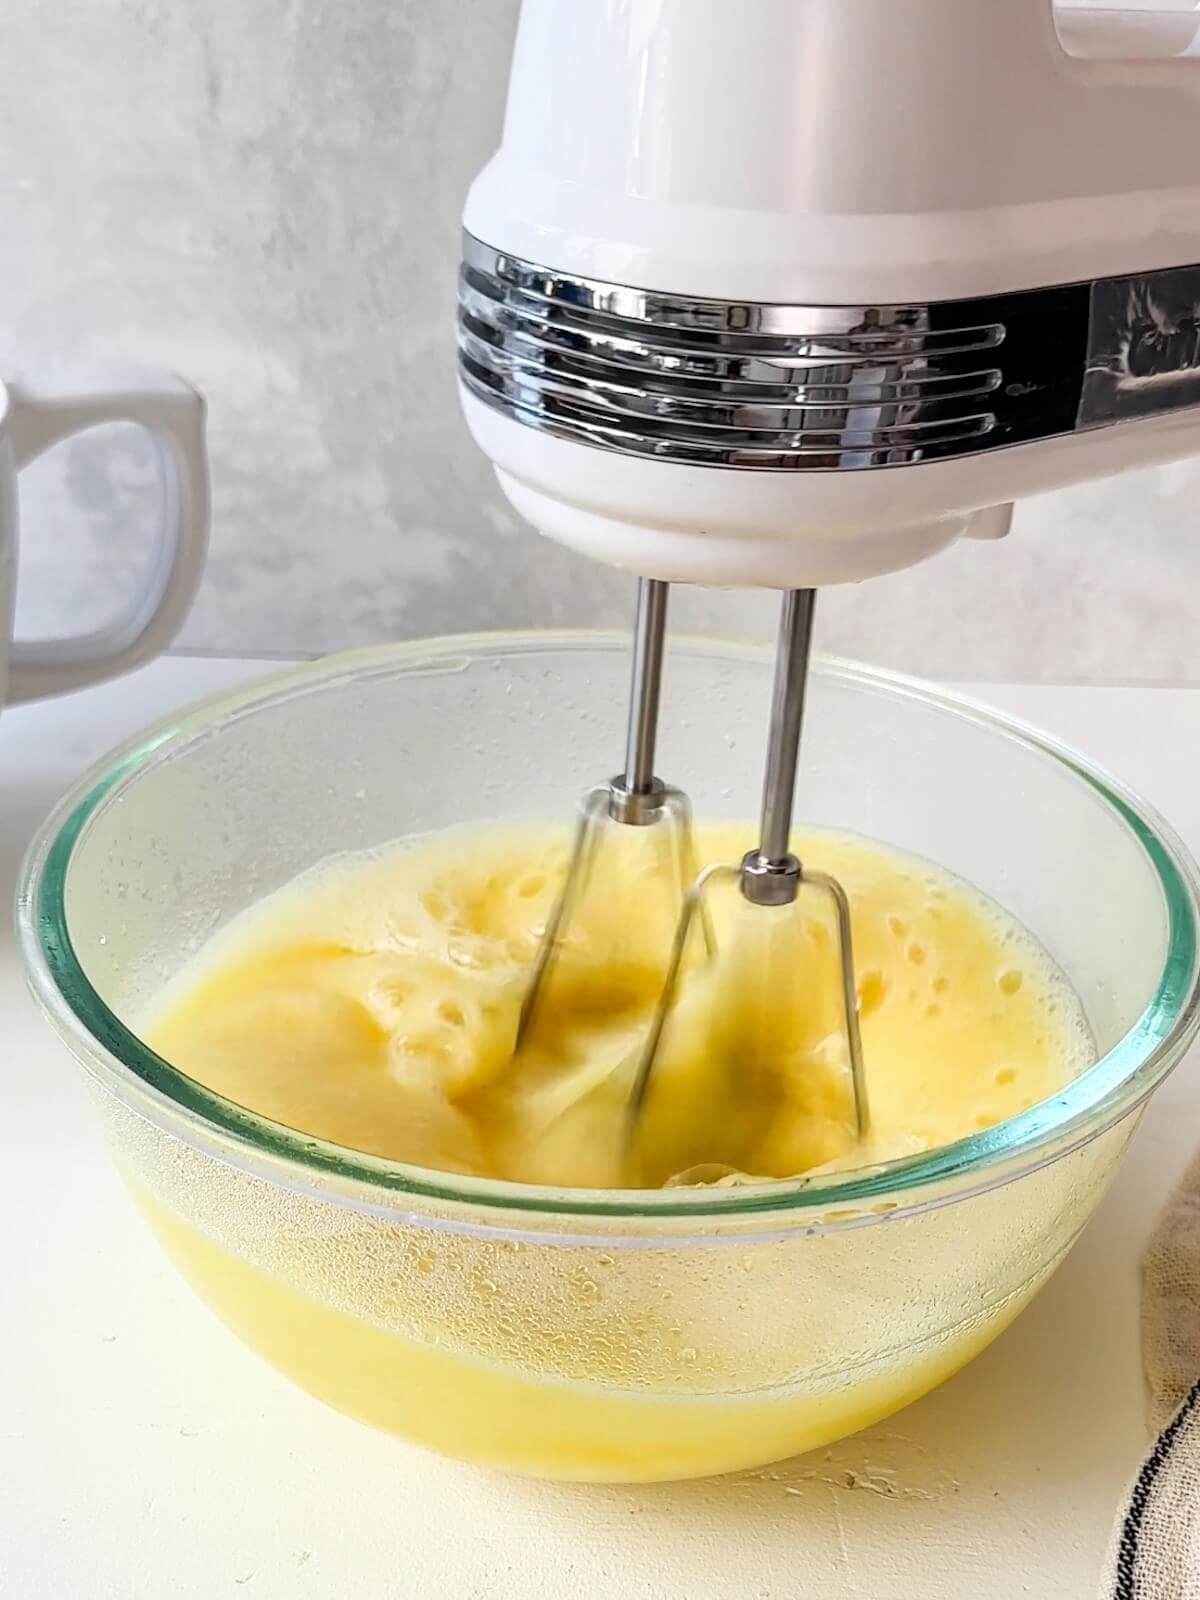
- Step 5: Whip the chilled gelatin mixture until lightened.
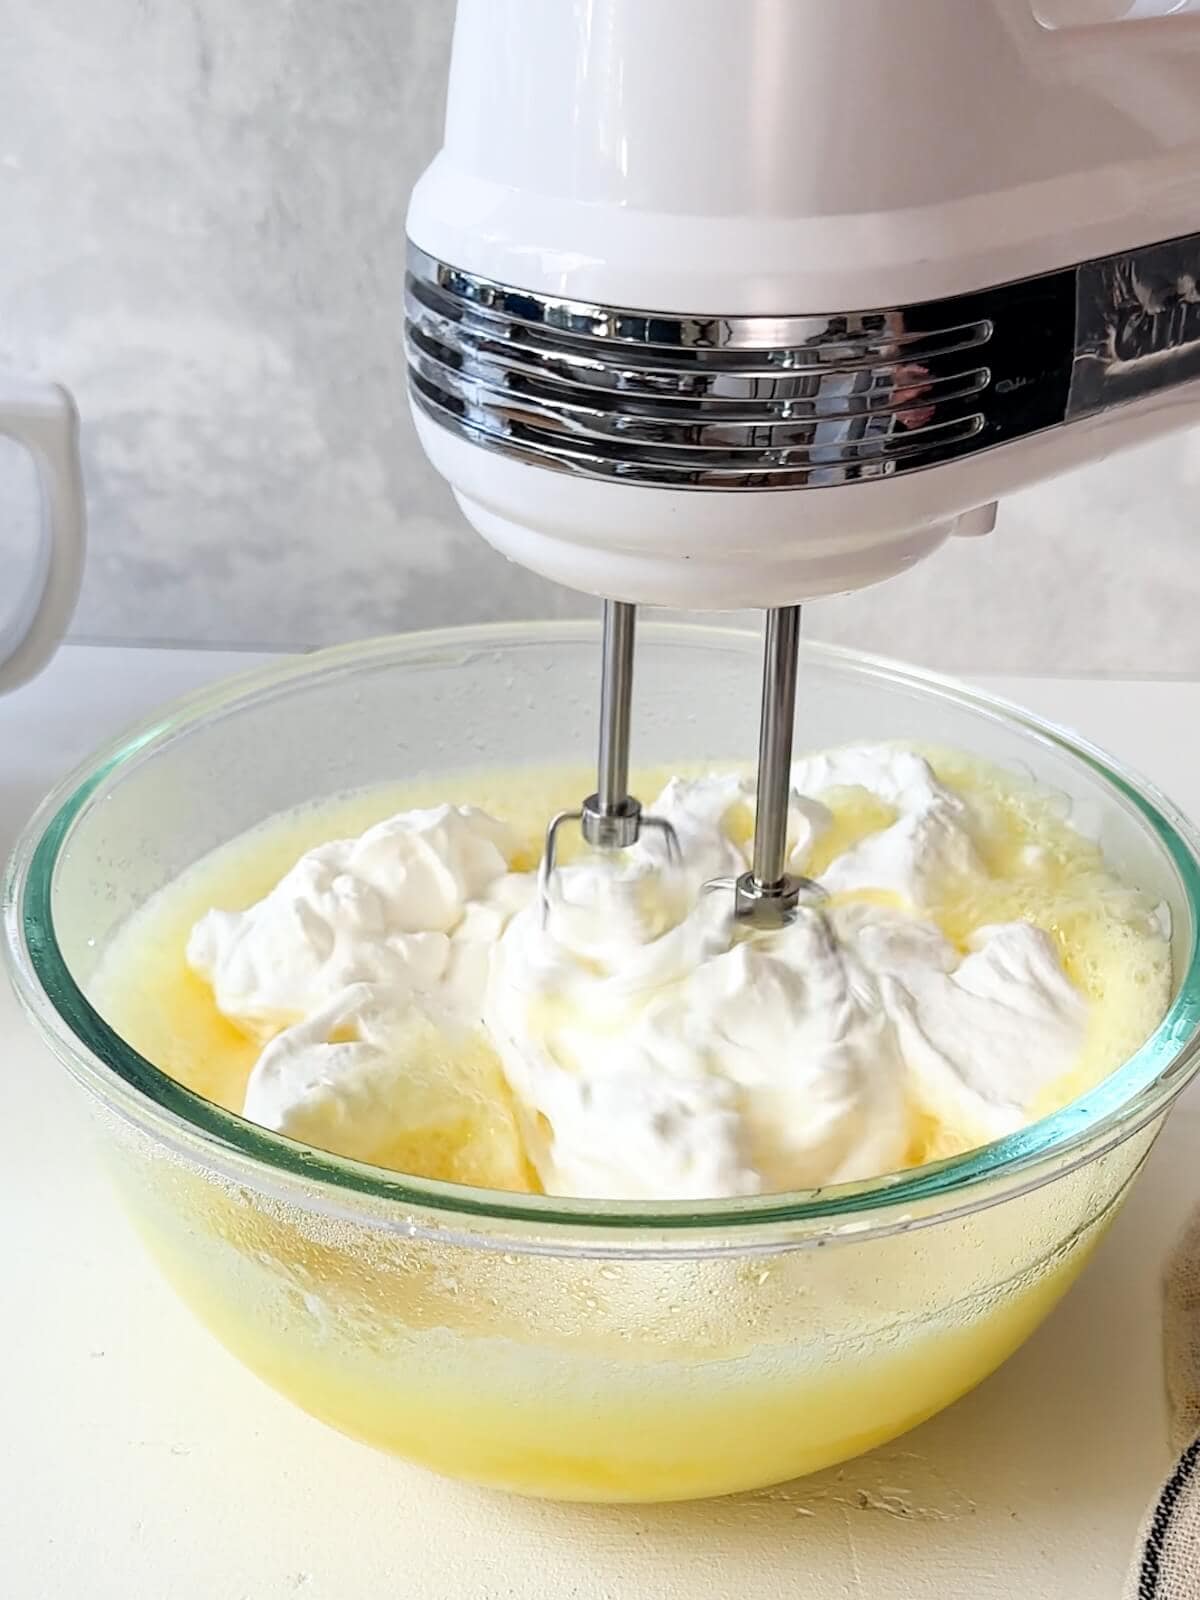
- Step 6: Add the whipped cream and fold in with a whisk or mixer to form the mousse filling.
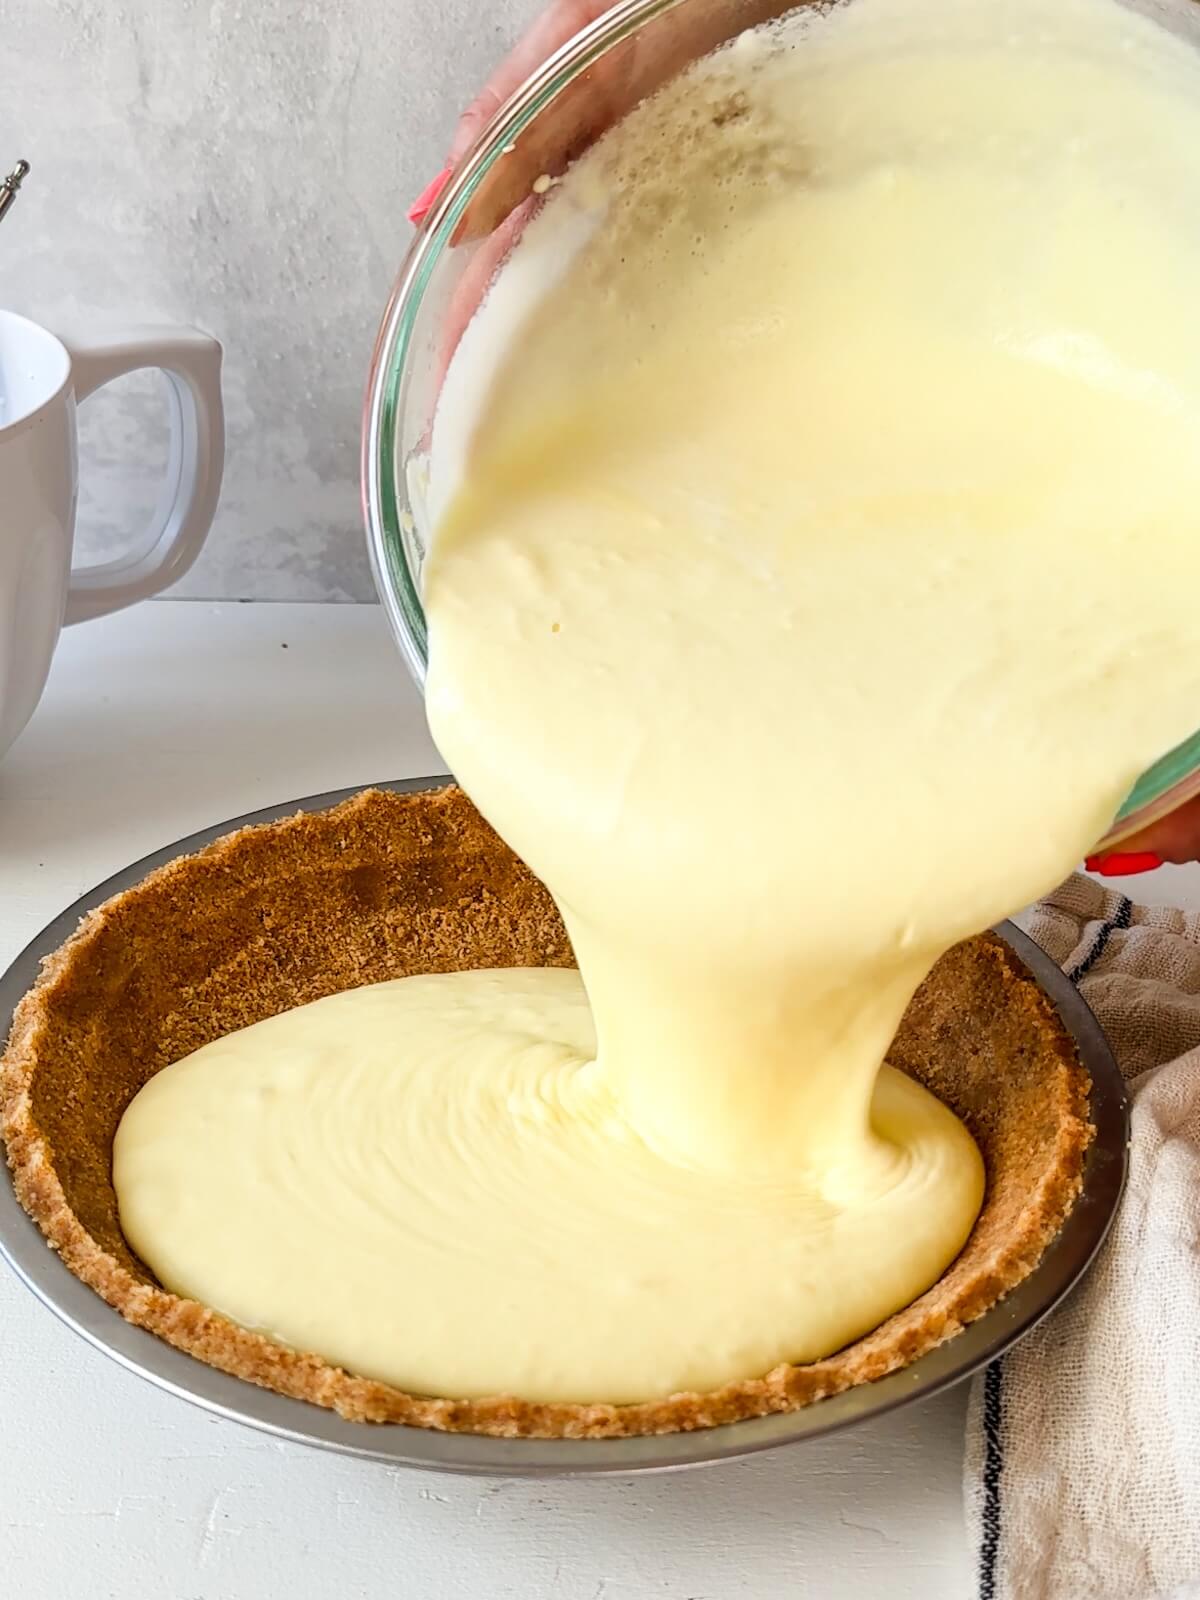
- Step 7: Add the mousse filling to the chilled crust and refrigerate until very set; at least 4 hours.
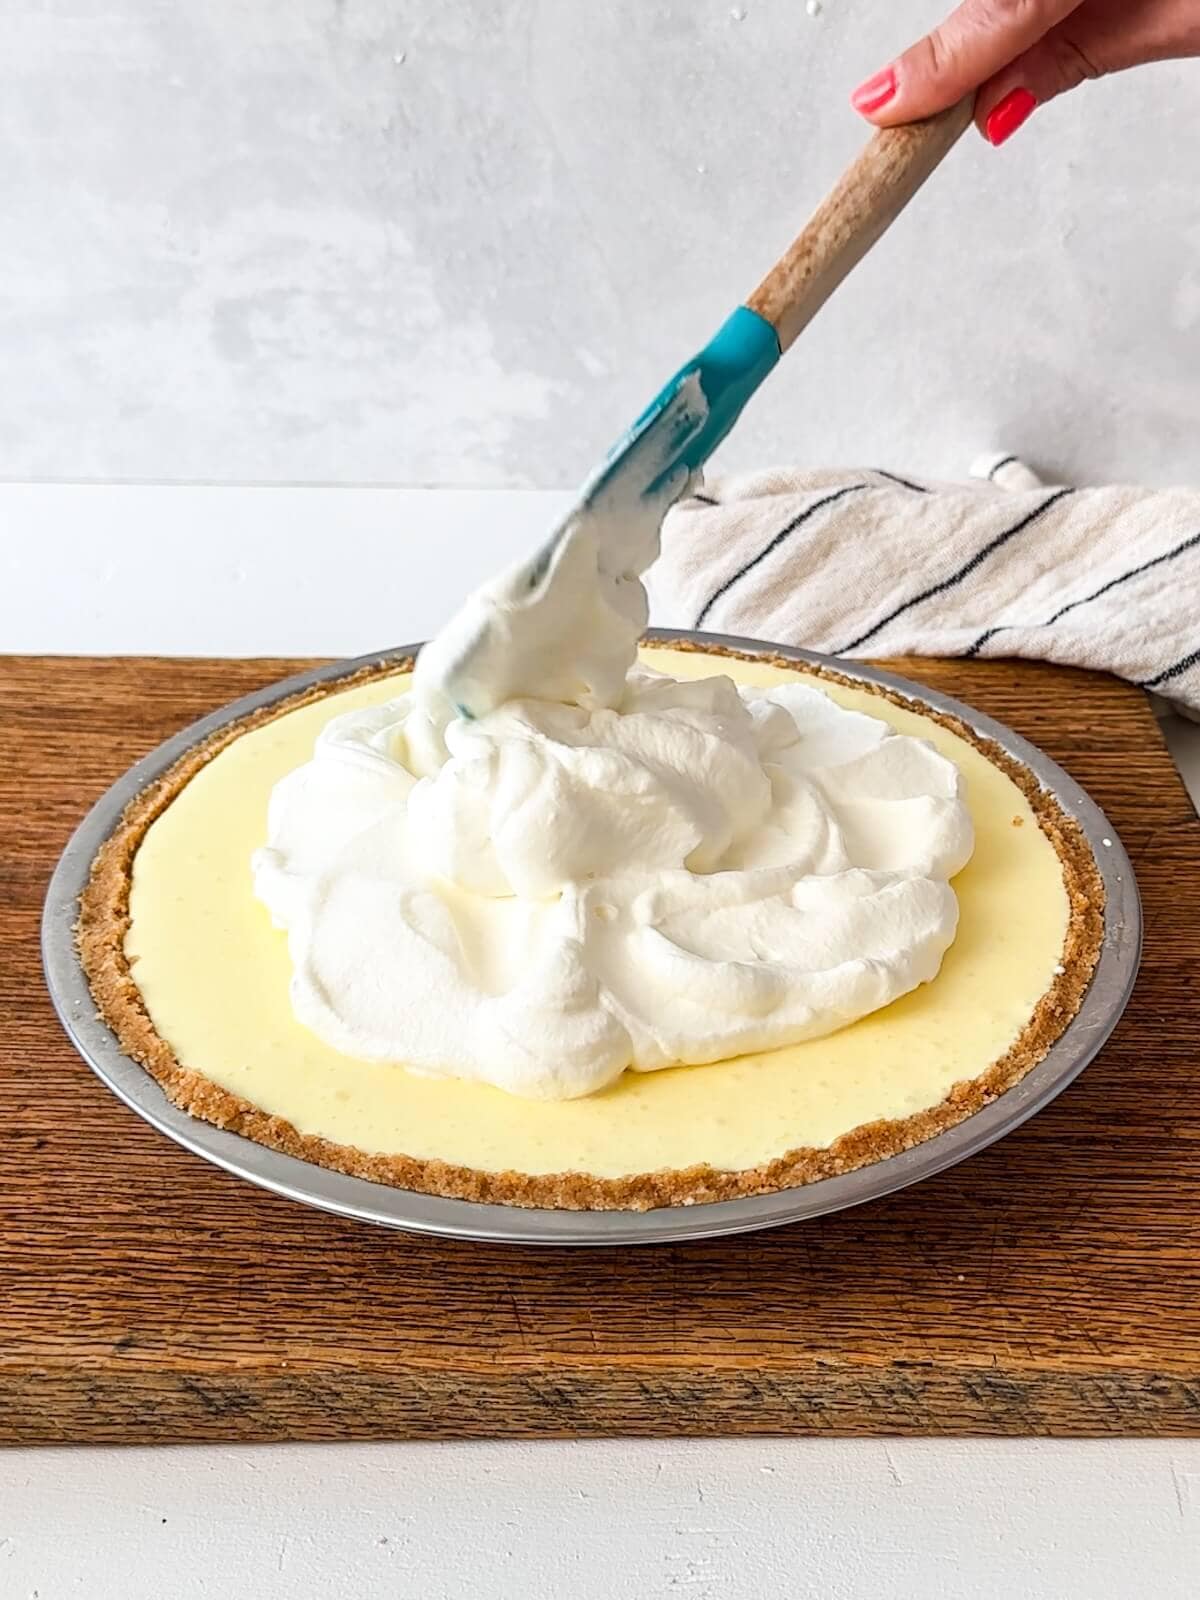
- Step 8: Top pie with sweetened whipped cream and serve, or chill another few hours.
Make it in a square pan
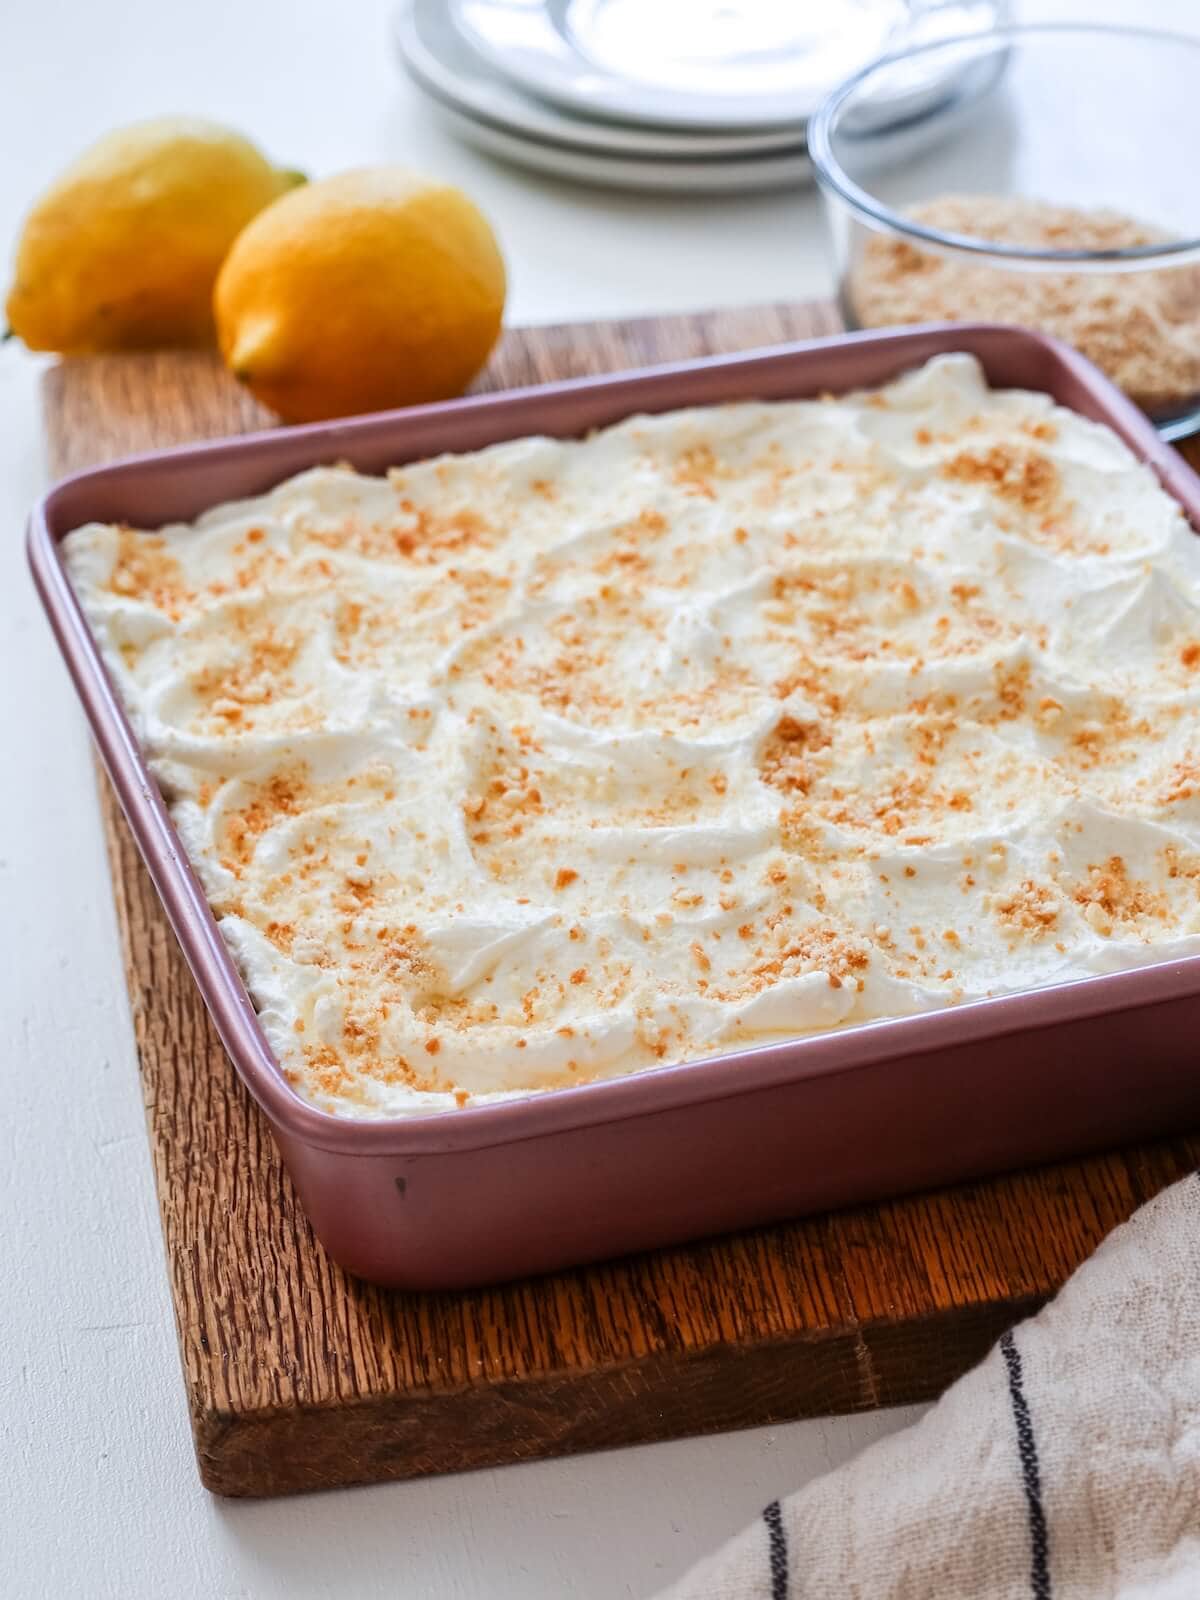
Mom made her classic lemon layer dessert in a rectangle pan, so I wanted this dessert to work well as both a pie and a square-sliced icebox dessert.
All you need to do is make the crust and filling on the recipe card, but place them in a 9-by-9-inch square pan. Easy-peasy!
Tara's top tips
Make your own cookie crumbs: If you don't have a food processor, place the cookies in a plastic zipper bag and crush them using a rolling pin.
Be careful with the no-bake crust: The crust for this pie is not your typical sturdy, cookie pie crust, but it's one of my favorite parts of the recipe. The crust isn't baked, so it's pretty fragile. To strengthen the crust, use the back of a flat measuring cup to really press it into the pan. Then, make sure to chill it in the fridge or freezer while the Jell-o sets, so it's ready for the filling. And, add the filling carefully so that the crust doesn't get broken.
Don't rush the gelatin: Give yourself some time to make and chill the homemade Jell-o. The secret to perfection is making sure the unflavored gelatin is completely dissolved in the lemonade before chilling in the fridge. This ensures the gelatin activates all of the lemonade evenly and you get a sturdy base for the mousse.
Partially set the gelatin: You'll know the gelatin is partially set when it is just starting to jiggle and solidify. Blend it until it's fluffed quite a bit (incorporating air is key for this dessert), and then fold in your whipped cream.
Whip to firm peaks: Cream goes through several stages as it is whipped. Firm peaks is the stage where the cream entirely holds its shape, giving structural integrity to the mousse. When you lift your beaters or whisk straight out of the bowl, the cream should stand up in a sharp point with the tip just barely flopping over. The cream should be matte (not glossy) and look thick with just a little flex.
Temperature matters: If you ask, "My mousse is lumpy, how do I fix it?" Here is your answer: The lemonade mixture should be cool to the touch (not cold, not warm) before folding in the cream. If it's too cold, the gelatin will set in "clumps" the moment the cold cream hits it.
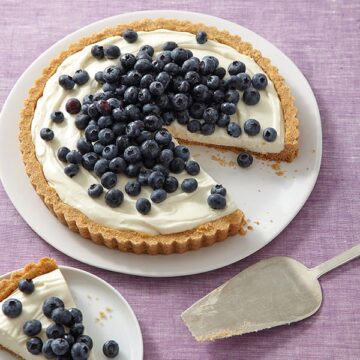
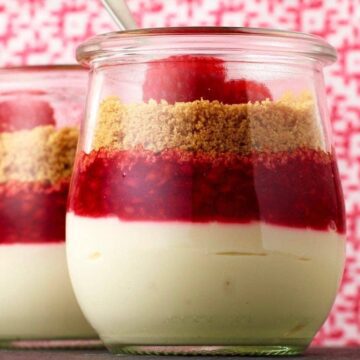
More no-bake desserts
Looking for more summer refreshment that won't heat up your kitchen? Try these no-bake treats:


Equipment
Food processor: A small 4-cup food processor is just fine for crushing the cookies. You can also use a rolling pin to crush them in a plastic bag.
Mixing bowl set: I never promised this dessert is a one-bowl creation! You'll use quite a few of your mixing bowls! But really, how hard is it to wash a few bowls? Not hard at all. I love this set of microwave-safe mixing bowls with lids! There is lemonade gelatin to make, cream to whip, and butter to melt! You won't regret it.
Hand mixer: A simple hand mixer is all you'll need.
Pie plate: The filling fits in a 10-inch pie plate or tin, or make a 9-inch pie and have a few spoonsful of filling leftover.
Make-ahead and storage
Make-ahead: This no bake lemon pie is actually best when made ahead of time. Chill the pie for at least 4 hours in the fridge; you can even make it up to a day before serving. I suggest topping with the fresh whipped cream just a few hours before serving.
Refrigerate: Since this is a chilled pie, cover and store leftovers in the refrigerator immediately. They will stay fresh for up to 3 days. After that, the cookie crust may begin to soften significantly, though it will still taste wonderful!
Freezer: I don't recommend freezing this pie, as it will compromise the gelatin texture.
FAQ
I purposefully used real ingredients, rather than pre-prepared items in this recipe. I don't suggest swapping cream for whipped topping, or my lemonade gelatin mixture for Jell-o. That is not this recipe, and I haven't tested the results.
While some icebox pie recipes use condensed milk, I wanted a much richer filling and decided heavy cream was the way to go. I don't recommend adding canned milk because it will change the texture of the filling and the pie won't set properly.
Your local grocery store should stock it on the baking aisle. You want to buy unflavored gelatin for this easy no-bake lemon pie recipe, NOT flavored Jell-o.
If your pie is still liquid after 4 hours there was likely a problem with the gelatin activation. Here's how to fix it:
- If the pie is just slightly soft, give it more time to set. It could take up to 6 hours or even overnight to reach a sliceable texture.
Here's how to prevent it next time
- Make sure to bloom the gelatin in room temperature water before fully dissolving it in boiling water. This is a two-step process that ensures all of the gelatin dissolves.
- Before folding in the the whipped cream, ensure the lemonade mixture has reached a loose-jelly consistency that is cool to the touch. If it’s too watery/warm when you combine them, the mousse won't stabilize.
No. My chilled lemon icebox pie has a light and fluffy mousse filling similar to the filling in a lemon chiffon pie. However, a classic chiffon filling gets its airy texture by folding egg whites into a lemon curd or thickened filling, whereas this classic mousse filling gets its equally airy texture by folding in whipped cream.
Variations for lemon icebox pie
Here are some easy ways to customize this recipe:
- Pink lemonade pie: Use pink lemonade concentrate in place of the standard lemonade and use a drop or two of red food coloring instead of yellow.
- Bright lime pie: Swap Limeade concentrate for the lemonade and use a drop of green food coloring to enhance the effect. It will be a fluffy icebox "key lime pie" version!
- Frozen icebox pie: While I haven't tested this, you could try freezing the pie for a short period of time to create a "semi-freddo" texture. You'll have to return leftovers to the freezer.
- Change the crust: Delicious alternative cookie crusts include swapping the Vanilla Wafers for Gingersnap cookies, graham crackers, or shortbread cookies.
More delicious lemon recipes
Keep the refreshing lemony vibes on repeat all summer long with more of my favorite lemon recipes:


Rate this recipe! ⭐⭐⭐⭐⭐
Scroll to the bottom of the page to rate and comment on this recipe. Leaving comments, questions, and ratings helps other too!
📖 Full Recipe

Lemon Icebox Pie (No Bake)
Ingredients
- 1½ cups vanilla wafer cookie crumbs (from about 50 cookies)
- 5 tablespoons unsalted butter (melted)
- ¾ cup frozen lemonade concentrate (thawed, but cold)
- ½ cup granulated sugar
- 1 cup water (DIVIDED)
- 1 envelope Knox unflavored gelatin (almost 2½ teaspoons / 7.2 grams)
- 2 cups heavy cream (DIVIDED)
- 4 to 7 drops yellow liquid food coloring (optional)
- ¼ cup confectioners' sugar
- ¼ teaspoon vanilla extract
- Garnishes: vanilla wafer cookie crumbs, lemon zest curls, or candied lemon zest (optional)
Instructions
Make the crust
- In a food processor, blend cookie crumbs with the 5 tablespoons melted butter. Evenly press into a 9- or 10-inch pie plate and chill or freeze while preparing the filling. (See Notes for making the recipe in a 9- by 9-inch pan.)
Make the filling
- In a medium bowl sprinkle gelatin over ½ cup of the room-temperature water. Let the gelatin bloom (or soften), so there are no dry bits visible. Boil the remaining ½ cup water in the microwave or on the stovetop and stir into gelatin mixture. Stir until gelatin is dissolved.
- Stir in cold lemonade concentrate, sugar, and food coloring (to desired color). Stir until sugar is dissolved and then refrigerate until mixture is the consistency of loose jelly, 2 to 2½ hours. Mixture will jiggle like just-setting Jell-o.
- In a separate bowl, whip 1 cup heavy cream to firm peaks. To test for firm peaks, lift your beaters straight out of the bowl, the cream should stand up in a sharp point with the tip just barely flopping over. Set aside.
- Whip barely-set lemonade gelatin to infuse it with air until frothy, about 1 minute on high speed. Add the whipped cream and fold into the gelatin just to combine.
- Gently pour filling into chilled crust and chill until set, 4 hours or more.
Finish the pie
- To serve, whip remaining 1 cup cream with confectioners' sugar to soft peaks. Top pie with whipped cream and garnish with extra cookie crumbs, lemon zest curls, or candied lemon zest. Serve immediately, or chill with cream on top for up to 2 hours.
Notes
Nutrition Per Serving

Tara Teaspoon
I’ve been in food publishing for over 25 years, creating recipes & food-styling for magazines, books, television, food brands, & advertising. With two cookbooks under my belt and thousands of my recipes at your fingertips, I hope you'll be inspired to spend more time in the kitchen!
Brianna says
I'm obsessed with lemon desserts and this delivered big time. Bright, creamy and refreshing this is the perfect summer dessert.
Jesseca says
The crust was perfectly crisp and the filling hit that sweet‑tart spot like a dream. Definitely adding this to my summer must‑make list. Thanks for the bright, breezy inspo, Tara!
Tara Teaspoon says
Glad to hear it!
Jill says
My grandma used to make a jello version of this when I was a child, and the lemon was always my favorite. Ahhhh, it brought back so many great memories! We served it on Sunday night when we had family in town but we used a graham cracker crust because we didn't have Nilla wafers on hand. I can't wait to make it again with the nilla wafer version!
Tara Teaspoon says
The jello version is a classic! Glad it worked with a graham cracker crust.
Mindy says
I've made this twice this summer! Once for a cookout and once just because I was craving it after the cookout!! Not having to turn on the oven and bake it in this hot Texas summer weather is really a plus.
Tara Teaspoon says
I'm so happy it was a hit!
Julie says
Made this for a party this weekend and it was a huge hit. So refreshing and light.
Tara T. says
Oh so good to hear! It's one of my faves.
alessandro pampolino says
love it.. delicious and easy to make
Paige says
wow, this is so nostalgic and beautiful too! I love lemon pie, any kind, and this one is going on my short list.
Kathryn Donangelo says
We loved this no-bake lemon icebox pie! It's creamy, luscious and just perfect. Lemon desserts are my favorite and definitely going to make this again. We only have a few slices left!
Amy Liu Dong says
Definitely a fun idea and I am so excited to make this recipe for everyone. So yum!
veenaazmanov says
Beautiful concept and a yummy dessert too. Love the Lemon Flavor too. Yum
Britney Fronk says
I had been looking for a light dessert to go with our Sunday dinner, and this was the end of my search! So good!
Megan Palmer says
Lemon is my grandma's favorite flavor. I am going to surprise her and make this for her next week.
Natalie says
I love anything with a wafer crust! This is the perfect option for a summer dessert.
Mary Bench says
Lemon anything is my fave! This will be a must-make!
Brittany says
What a fun idea! I love the idea of making a nice dessert but also beating the heat 🙂