
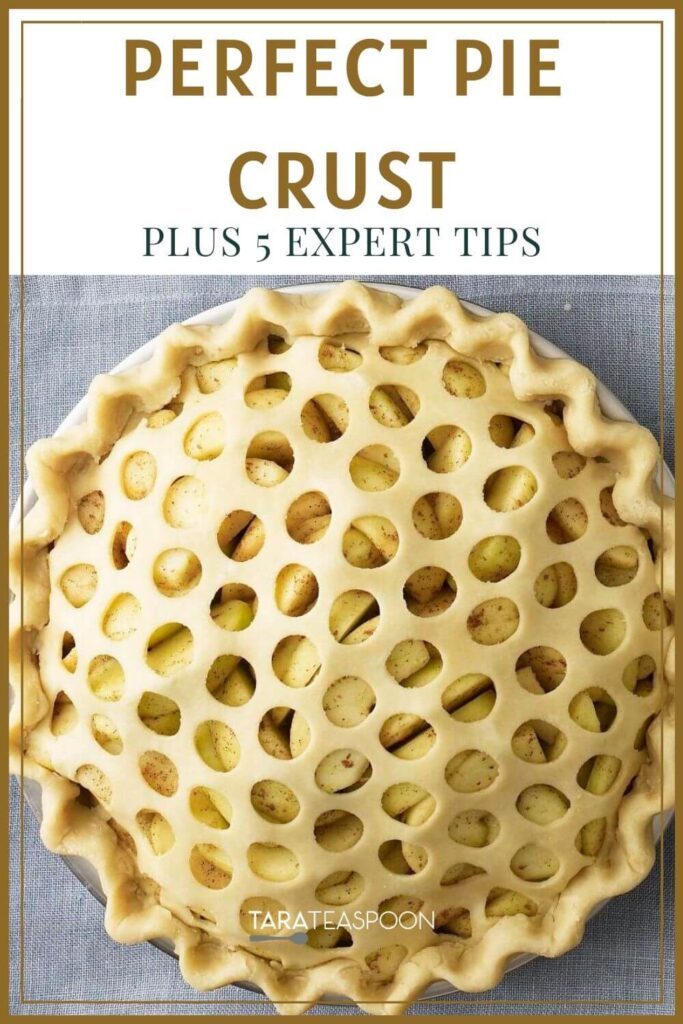

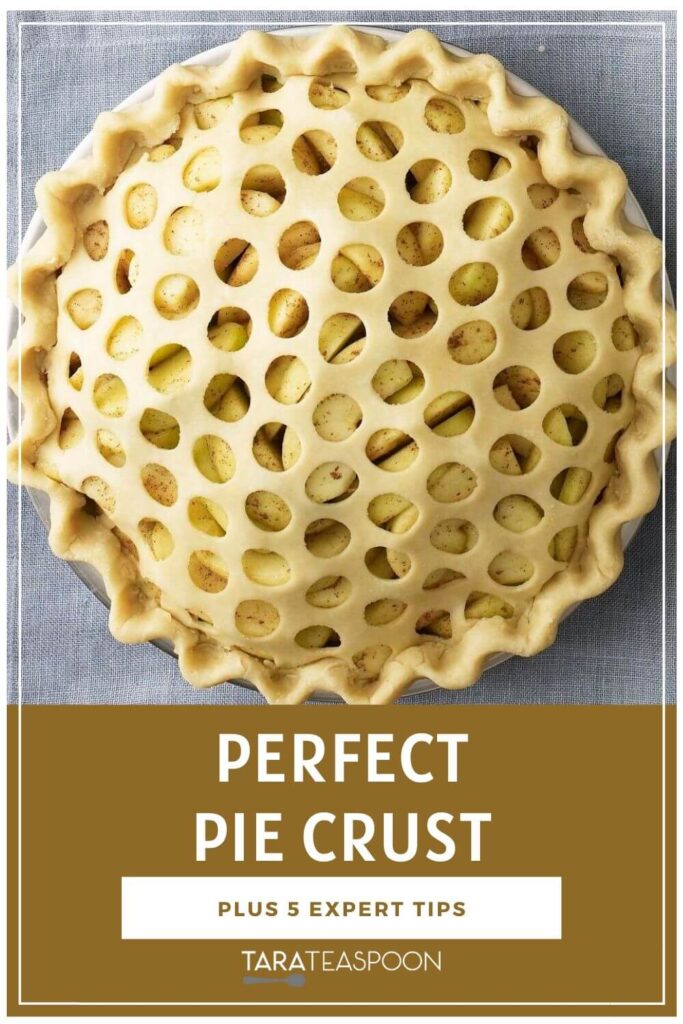
This Perfect Pie Crust is made with butter and shortening in a food processor. I've made it hundreds of times, and it always turns out buttery, tender, and flaky! Get all the tips to make it ahead and freeze it too!
There's no doubt about it, everyone looks forward to classic pie recipes around the holidays.
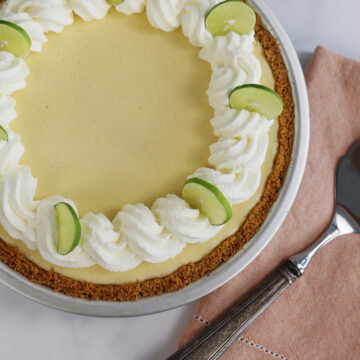
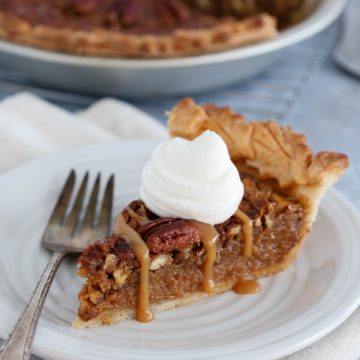
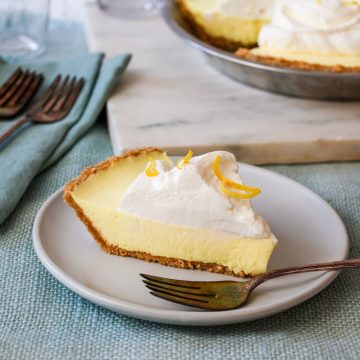
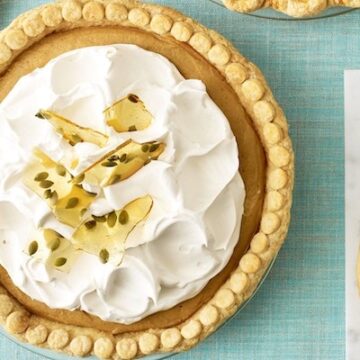
Just thinking about Thanksgiving gets me in the mood for a big slice of Pumpkin Cream Pie and Gingered Coconut Pecan Pie! But, pie really is a delicious dessert for anytime of the year.
Making pie crust can sometimes be intimidating (especially buttery, flaky pie crust!), but it doesn't have to be.
When I worked as a food editor, I made tons of pie every summer as we prepared Thanksgiving content for magazines. To say I learned a little about making pie crust is an understatement.
Jump to:
- Why you'll love this butter and shortening pie crust
- Ingredients
- Tara's tip: chill everything
- How to make the perfect pie crust
- How to use your butter and shortening pie crust
- Equipment you'll need for making this crust
- Storage and make-ahead instructions
- Top 5 tips for perfect crust
- FAQ
- 📖 Full Recipe
- 💬 Comments & Reviews
Why you'll love this butter and shortening pie crust
Along the way, I developed an award-winning, foolproof recipe that turns out perfectly every time. You'll be blown away by how easy it is to make and how much better it tastes than pre-made frozen crusts. I can't wait to share my behind-the-scenes, expert tips so that you can make the perfect pie crust, too!
It takes a few times to get the hang of making pie crust. Once you do it's as easy as, well, pie! Here's what you'll love about this recipe:
- Uses butter and shortening: A crust made with butter and shortening is the secret to perfection! The butter gives it amazing flavor and crispness, and the shortening makes it tender and flaky.
- Easy food processor method: Using a food processor takes all the work out of making pie crust. It's super fast, and it helps to prevent overhandling the dough which can make it tough.
- Make ahead and freezer friendly: I prefer the taste and texture of homemade pie crust, and this recipe makes pie prep easy at the holidays. Make it in advance and store it in the freezer until you are ready to bake.
This was my very first pie crust that I've ever made! ... I was so nervous it wouldn't come out ... It came out as the lightest, flakiest, most tasty crust I've ever had in my life. And I've tried, and disliked, a lot of pie crust in the last 35 years! Crisp bottom, light and airy texture, it practically came out like shortbread. I'll be using this recipe (and these tips) for the rest of my life! Now I just gotta write it down in my little recipe book so I don't forget the details, haha. Thank you so much.
- Jason
Ingredients
You'll likely have everything you need on hand for this butter and shortening pie crust. Check out these tips as you gather everything to get started.

- All-purpose flour: Measure your flour carefully. Use a spoon to scoop flour into a measuring cup so that it's not compacted. Level off the top for accuracy.
- Salt: Brings out the flavor of the butter.
- Sugar: Just a little sweetness brings out the flavor of the crust.
- Shortening: The key ingredient for making a tender, flaky crust! It's best to use chilled shortening.
- Unsalted butter: I recommend using cold, unsalted butter for the best flavor. Cube the butter before adding it to the food processor to make it easier to blend.
- White vinegar: Makes your crust crumble-proof and adds flavor and tenderness. The acid in the vinegar tenderizes the dough and like salt, brings out the flavor of the butter. It helps the dough brown and caramelize as well.
- Very cold water: Used to hold the dough together and adds to the texture of the final crust. Use a light hand to add just the right amount. Too much water will make your crust tough and too little will make it crumble and crack.
See recipe card for quantities.
Tara's tip: chill everything
Refrigerating everything—yes, even the flour—is key to creating tender, pliable dough. Warm ingredients make tough crust because they bind too quickly with the gluten in the flour.
How to make the perfect pie crust
Don't you love a good step-by-step photo tutorial? Me too! Here's everything you need to know to make perfect pie crust.
- Mix dry ingredients: In a food processor, pulse together 2½ cups flour, 1 teaspoon salt, and 1 teaspoon sugar.
- Begin adding fats: Add ¼ cup chilled shortening and half the cubed, unsalted butter (6 tablespoons).
- Make coarse mixture: Pulse 8 to 10 times to make coarse crumbs with pea-sized chunks of butter.
- Add remaining butter and liquid: Mix 1 tablespoon of vinegar into a ½ cup of very cold water. Add the remaining butter to the food processor, and while pulsing processor, drizzle in just enough water mixture (5 to 8 tablespoons) to form dough.
- Test the dough: After adding 5 tablespoons of the vinegar-water, pinch test the dough. It should feel slightly dry but hold together when pinched. If it falls apart, add another tablespoon of the water mixture, pulse, and test again until you reach the right consistency.
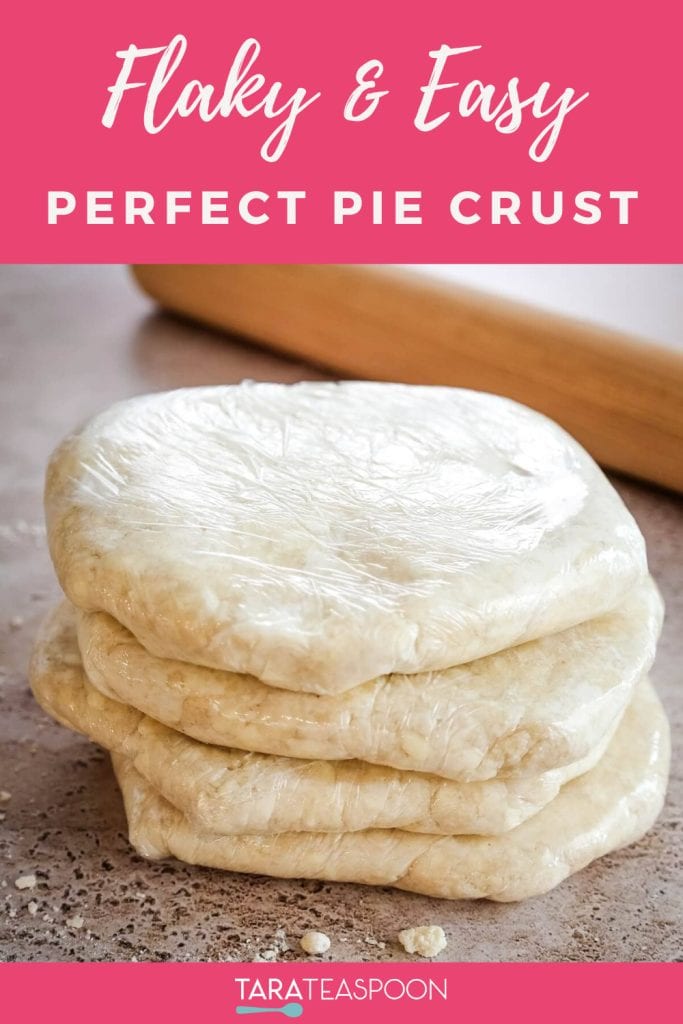
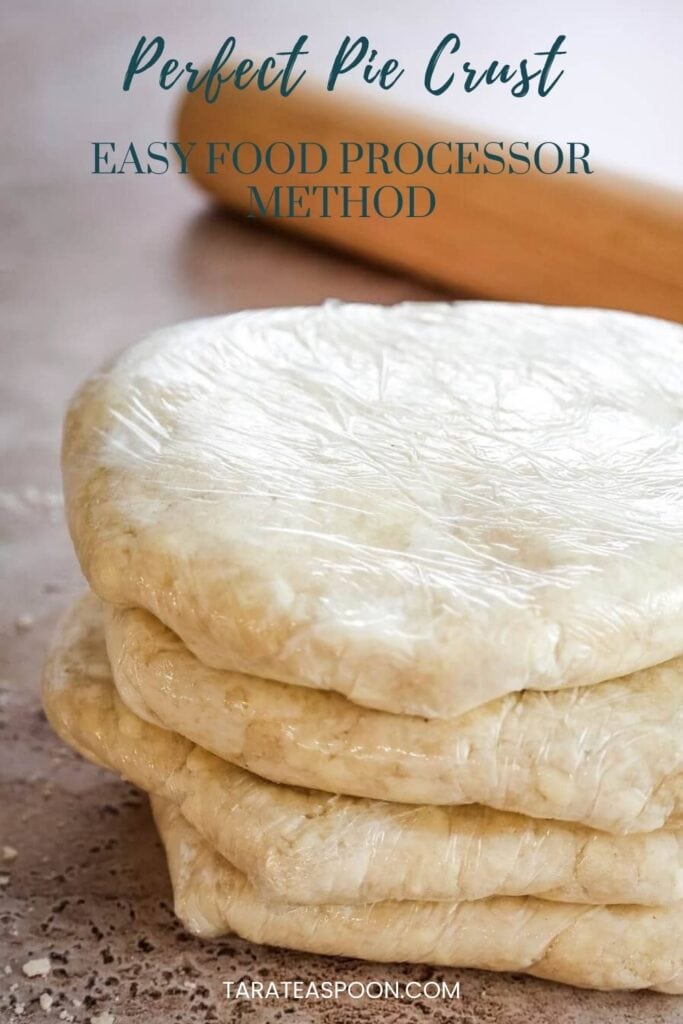
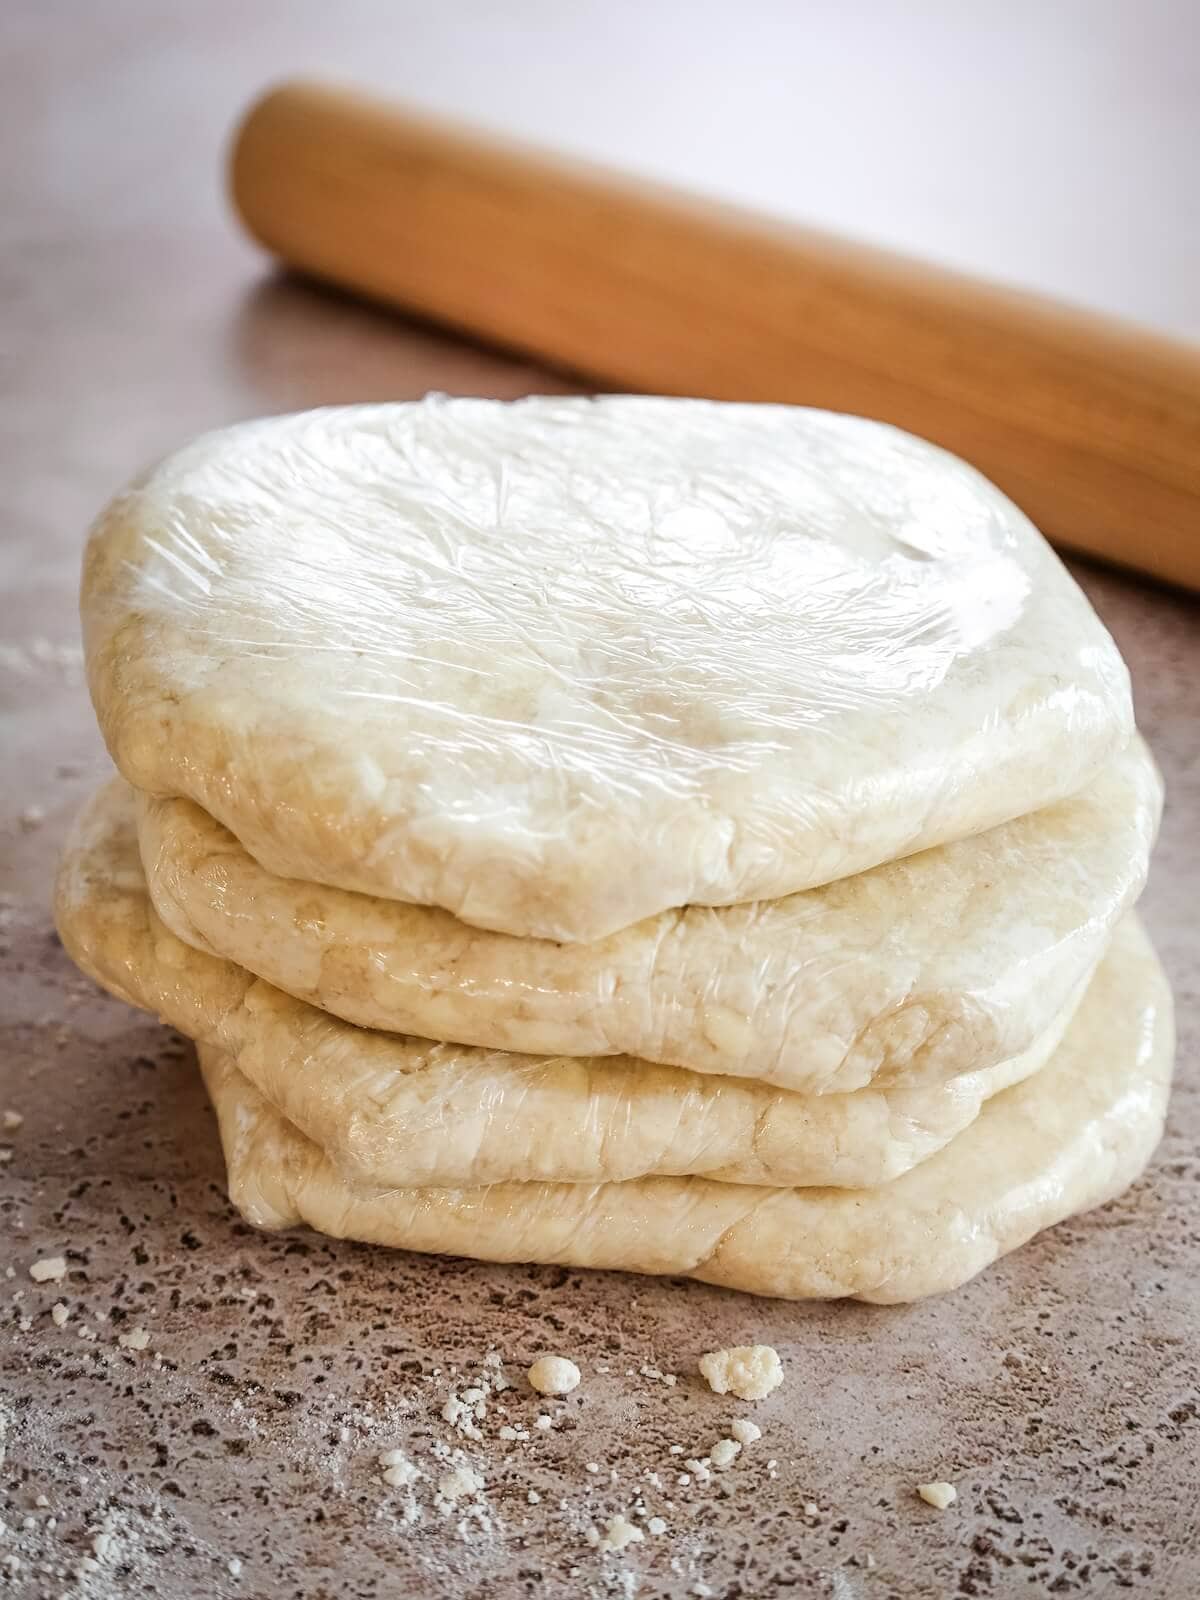
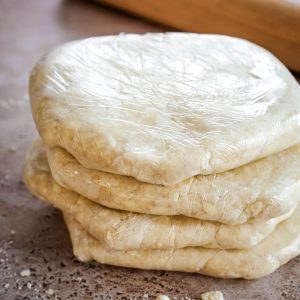
- Form dough ball: Transfer the dough to a sheet of plastic wrap and use the wrap to bring it together into a ball. Handle the dough with your hands as little as possible.
- Halve dough: Use a sharp chef's knife or dough cutter to divide the dough ball in two equal halves.
- Wrap and chill: Wrap each half in plastic wrap and press into discs. Chill in the refrigerator for at least 1 hour before using.
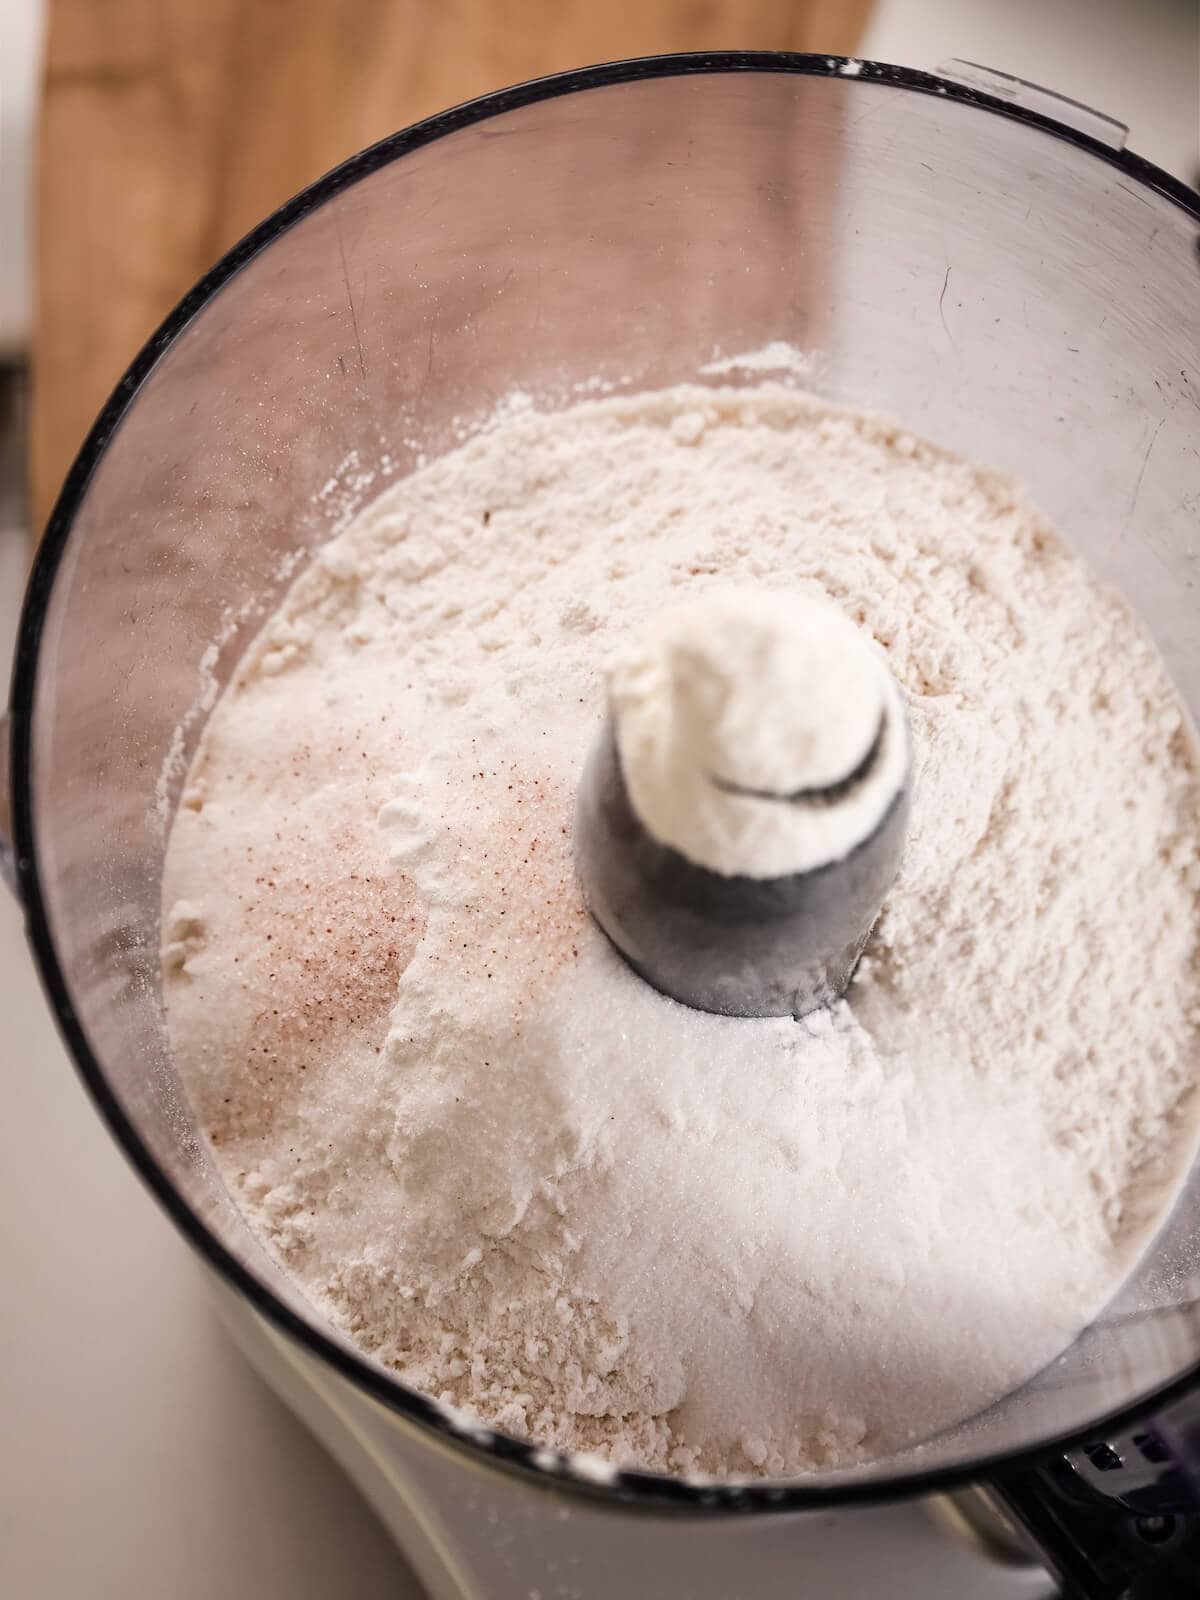
- Pulse dry ingredients: Quickly pulse together the flour, sugar, and salt.
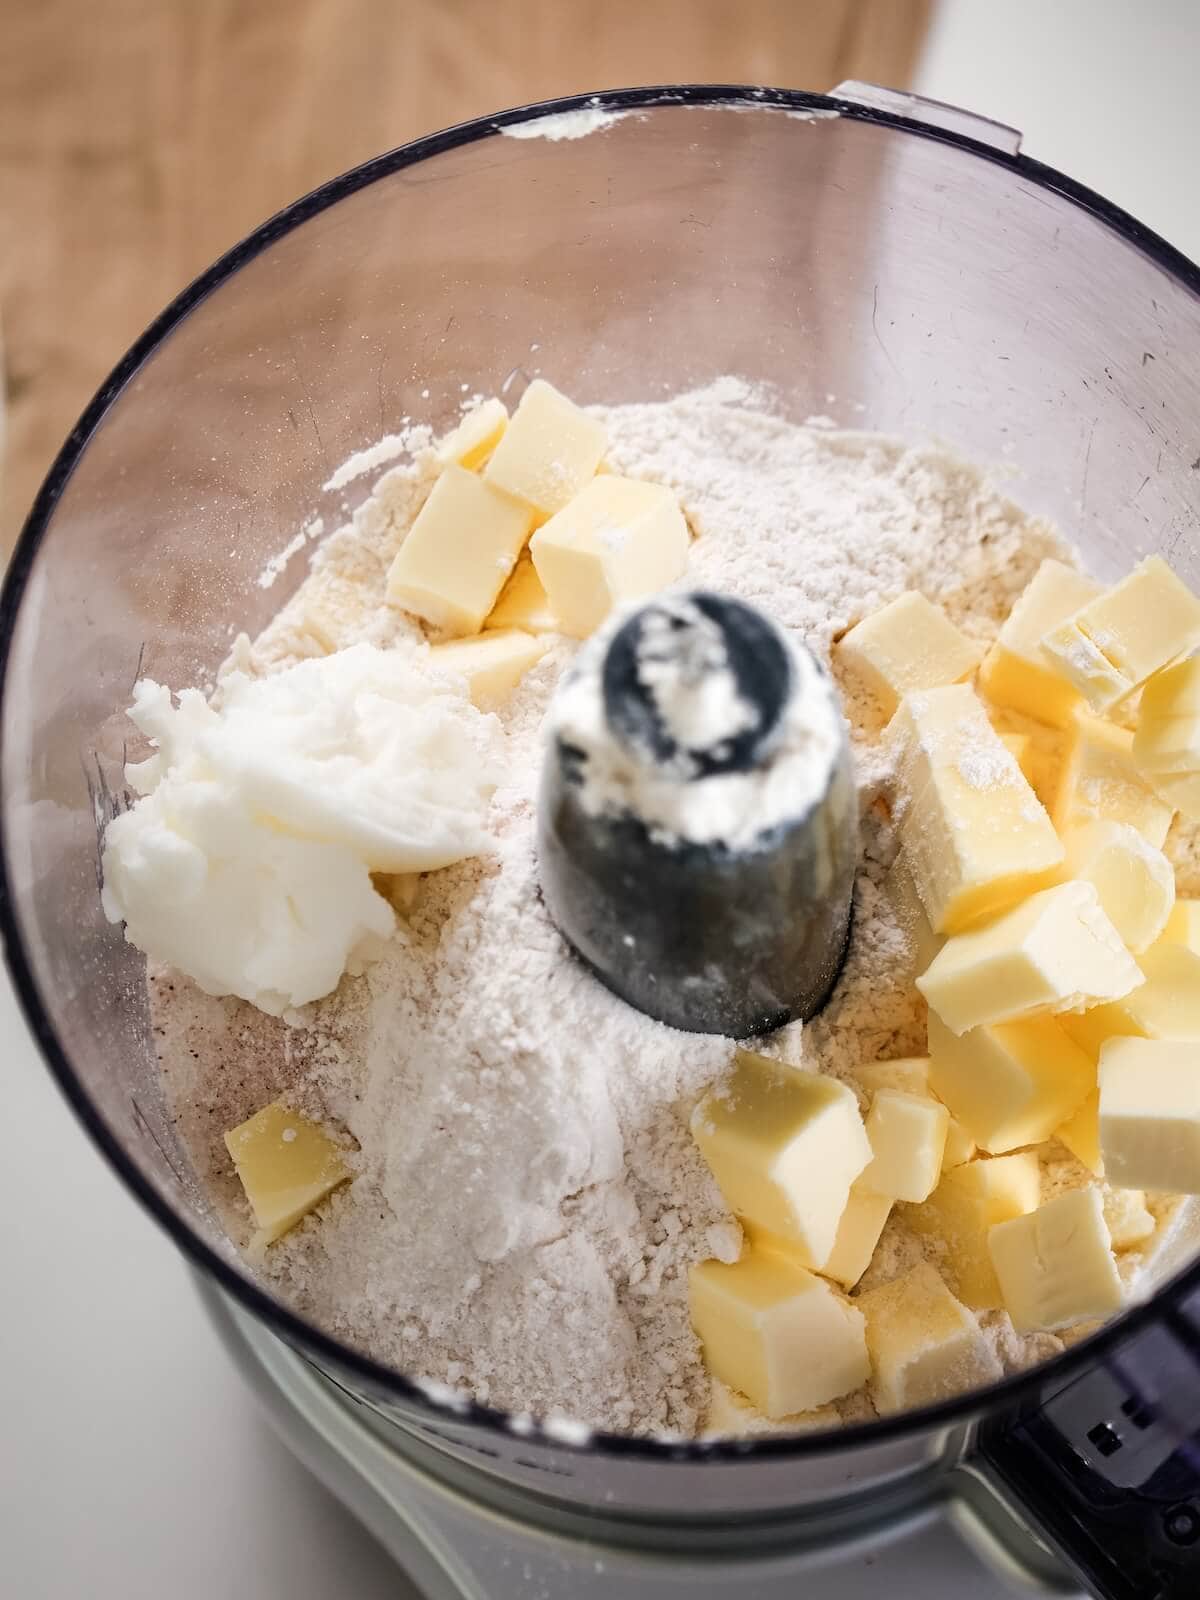
- Start adding fats: Add the shortening and half of the butter.
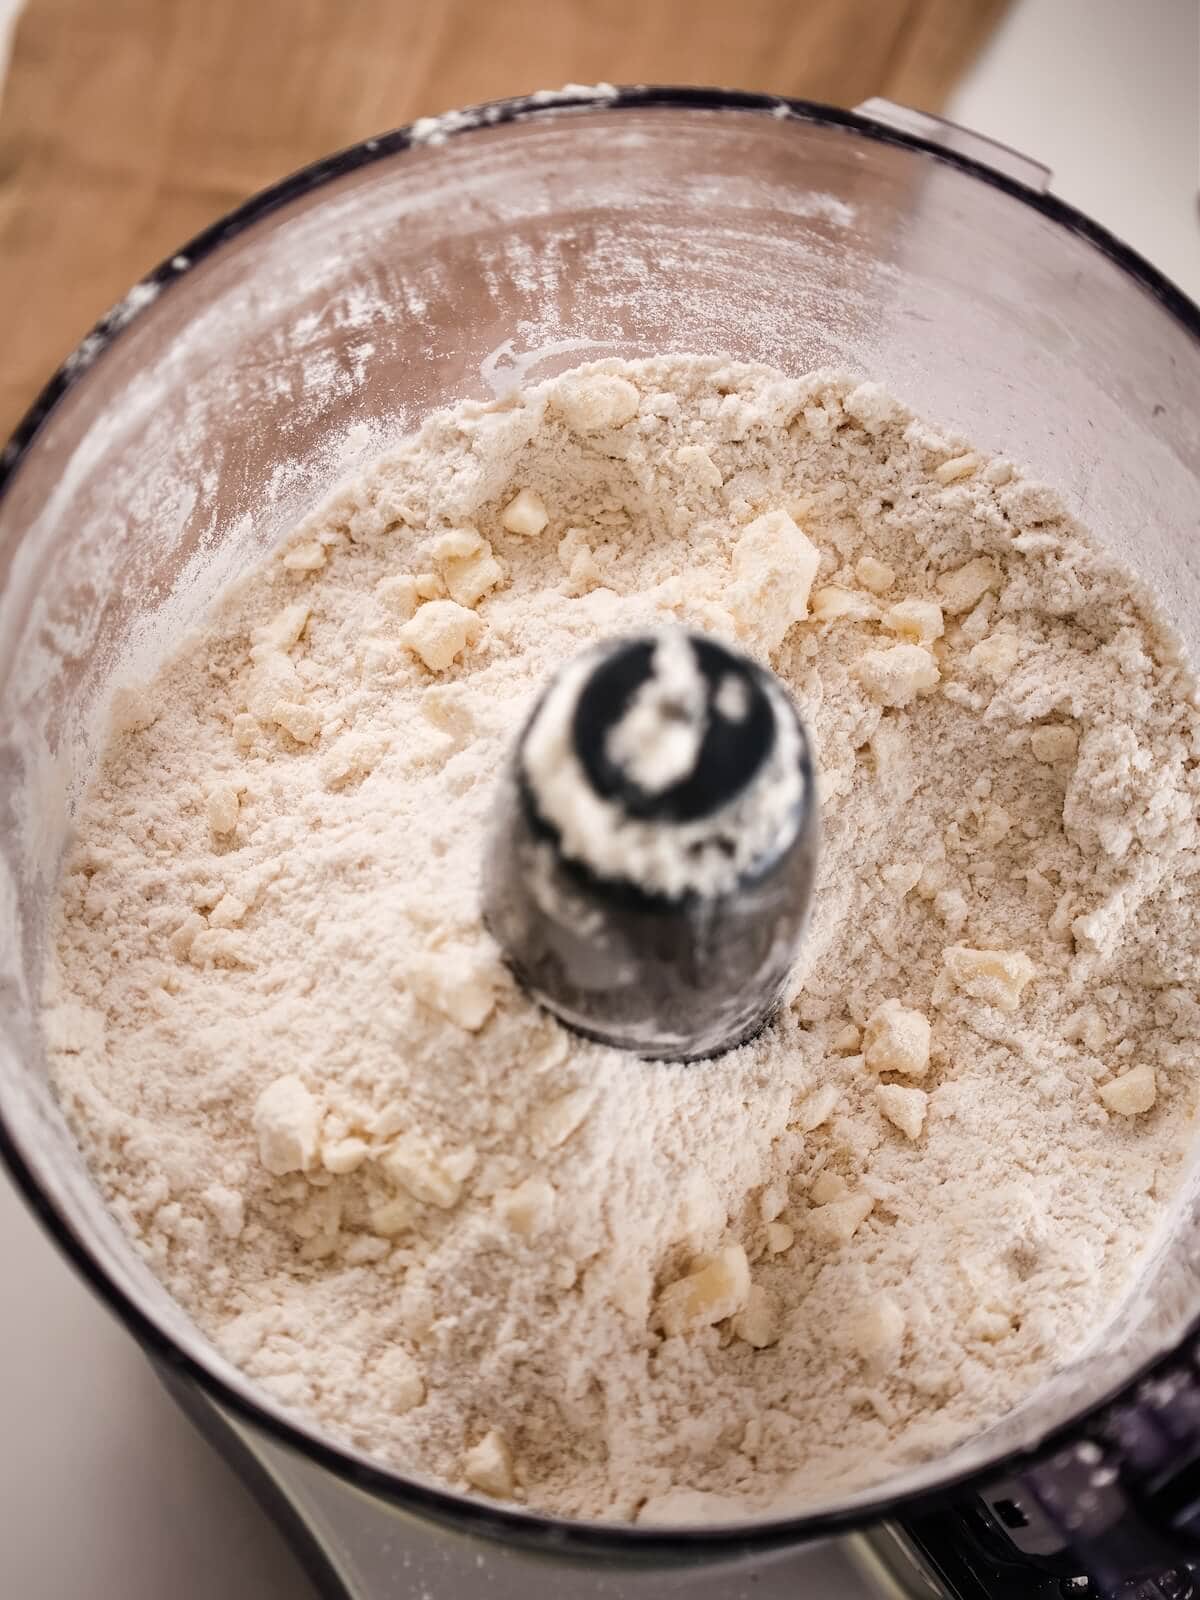
- Pulse until coarse: Pulse 8 to 10 times to make coarse crumbs with pea-sized chunks of butter.
- Add remaining butter and liquid: Add remaining butter to the food processor. Mix together the water and vinegar, and add it to the dough a little at a time (about 5 to 8 tbsp) until it just holds together .
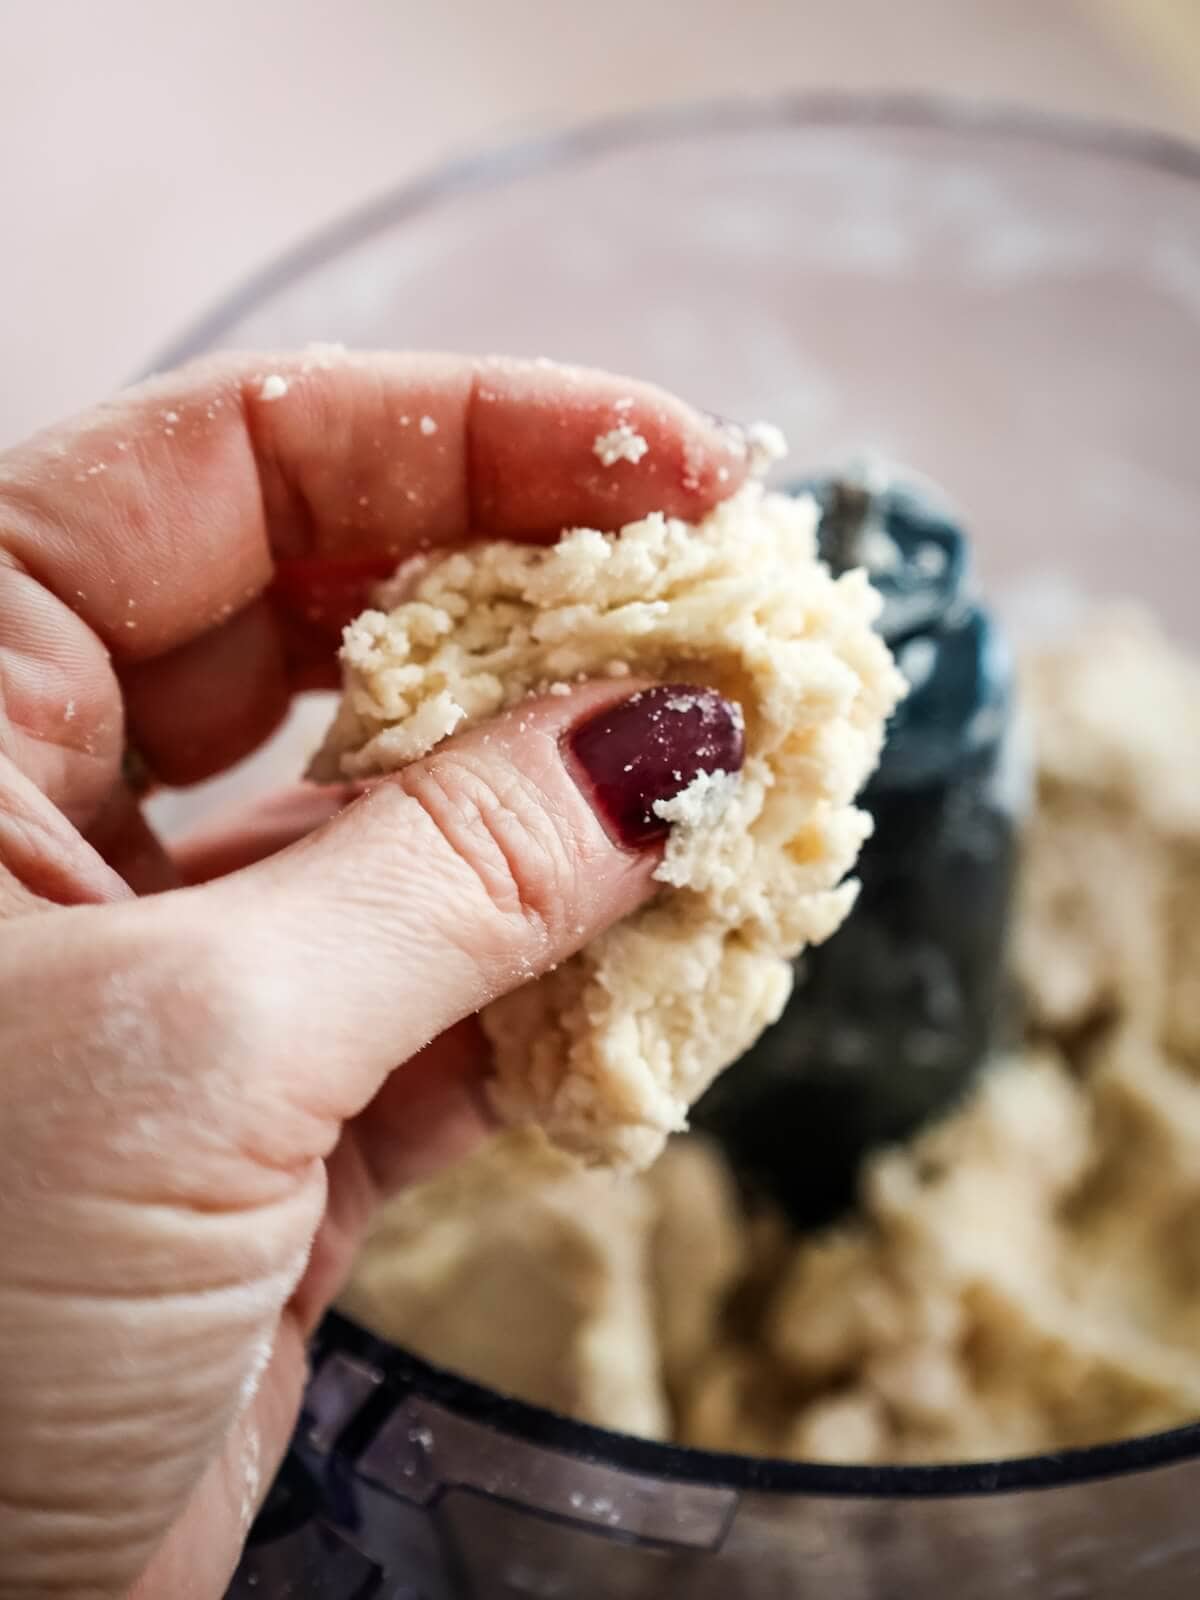
- Pinch test: Check to see if you've added enough liquid by pinching the dough. It should be slightly dry but hold together when pinched.
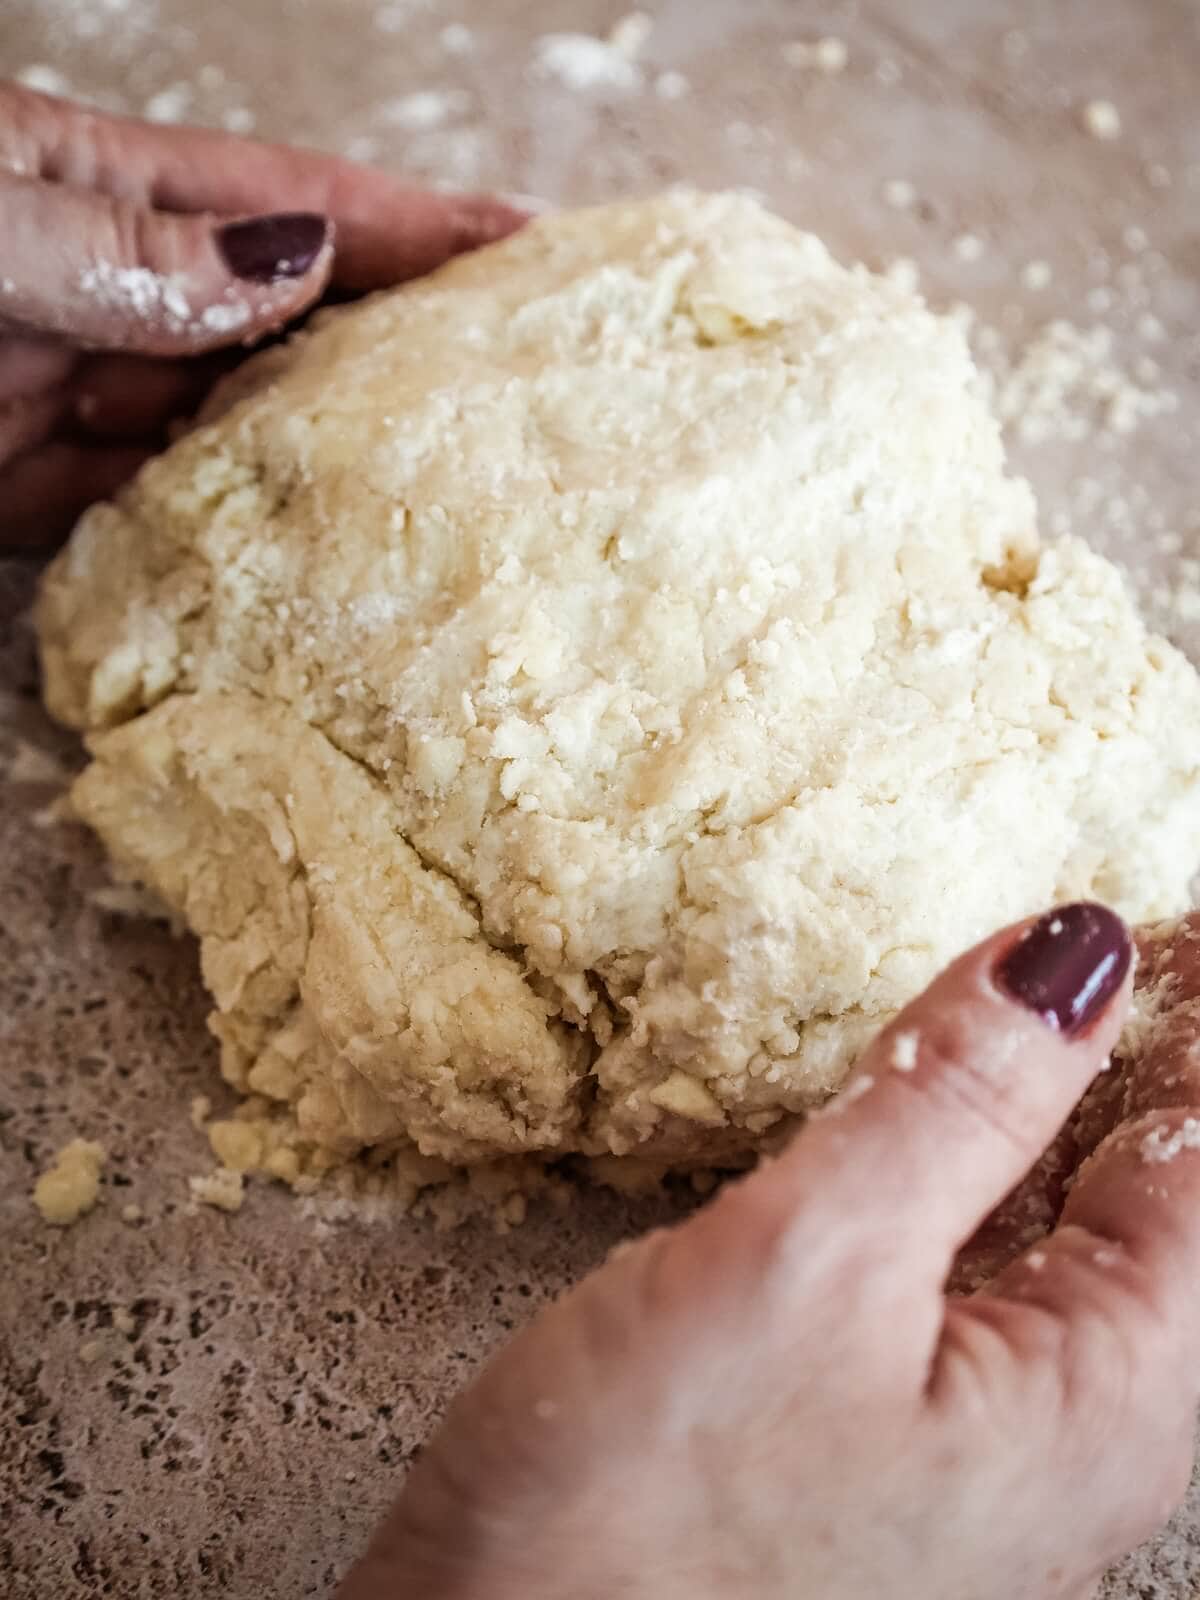
- Make dough ball: Transfer the dough onto a sheet of plastic wrap and form the dough into a ball.
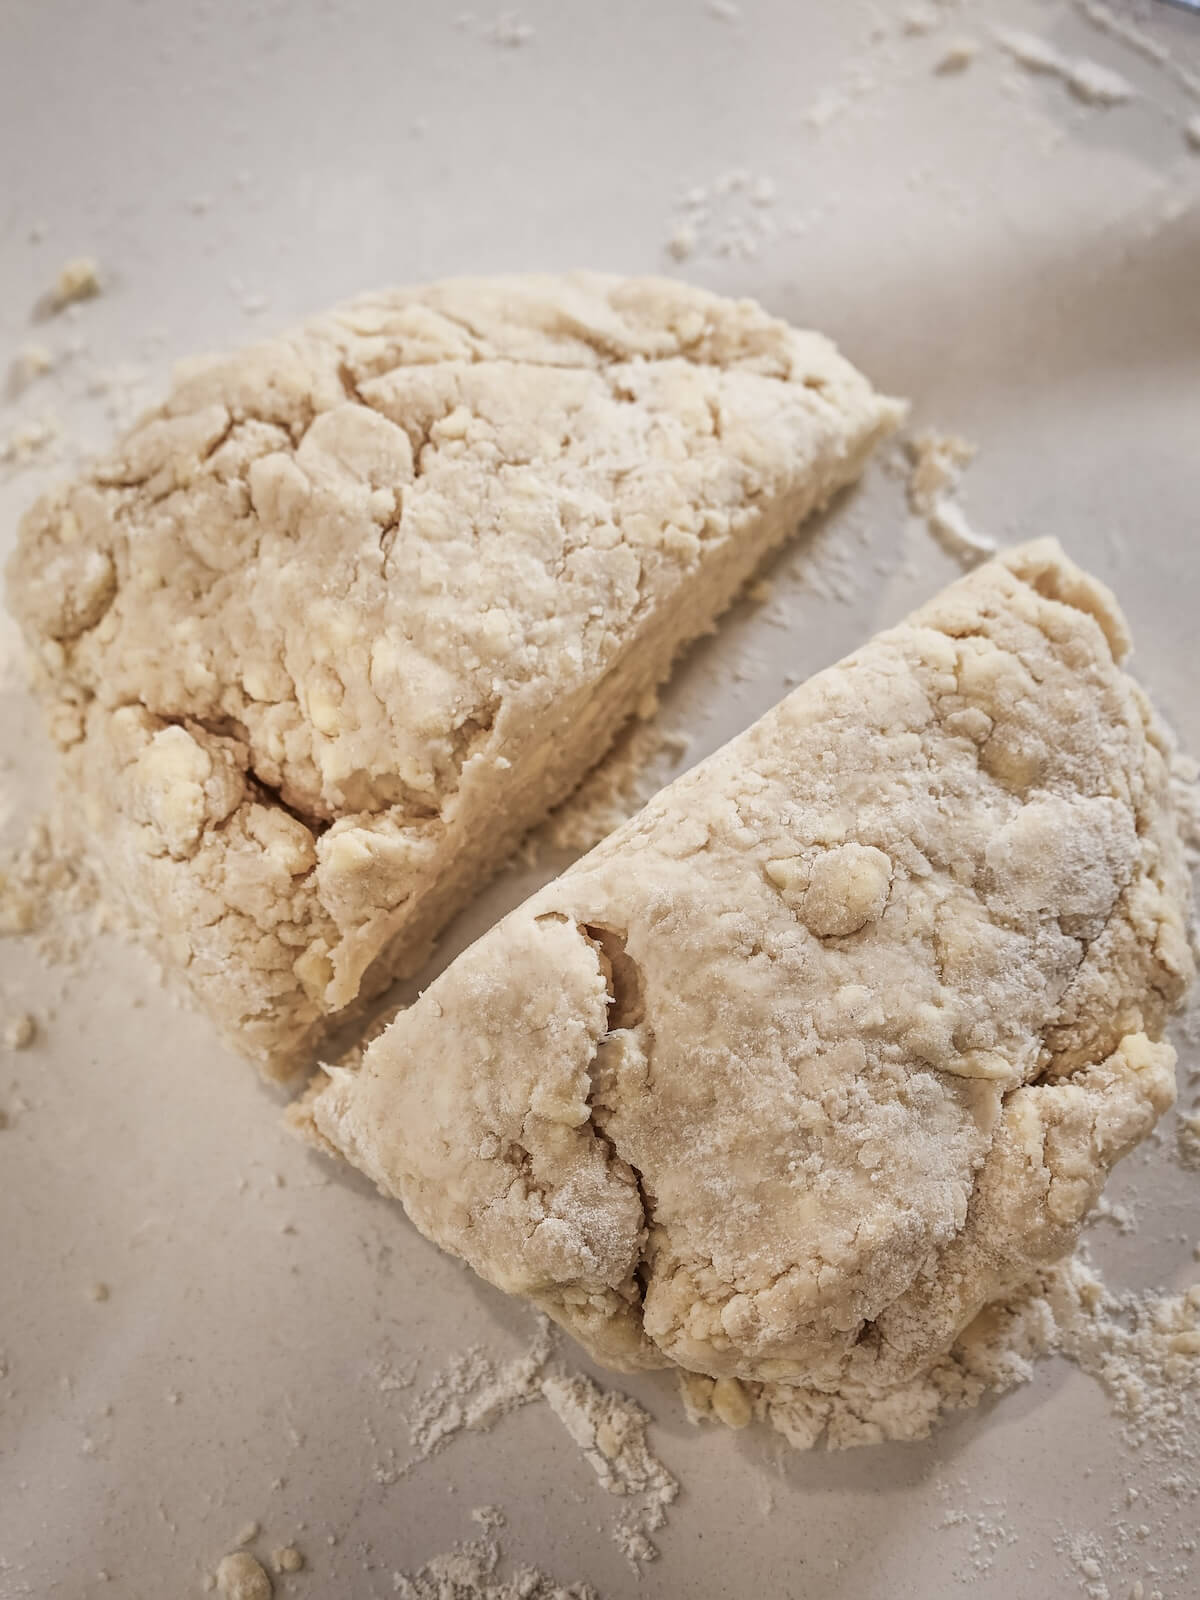
- Divide dough: Cut the dough into two equal halves.
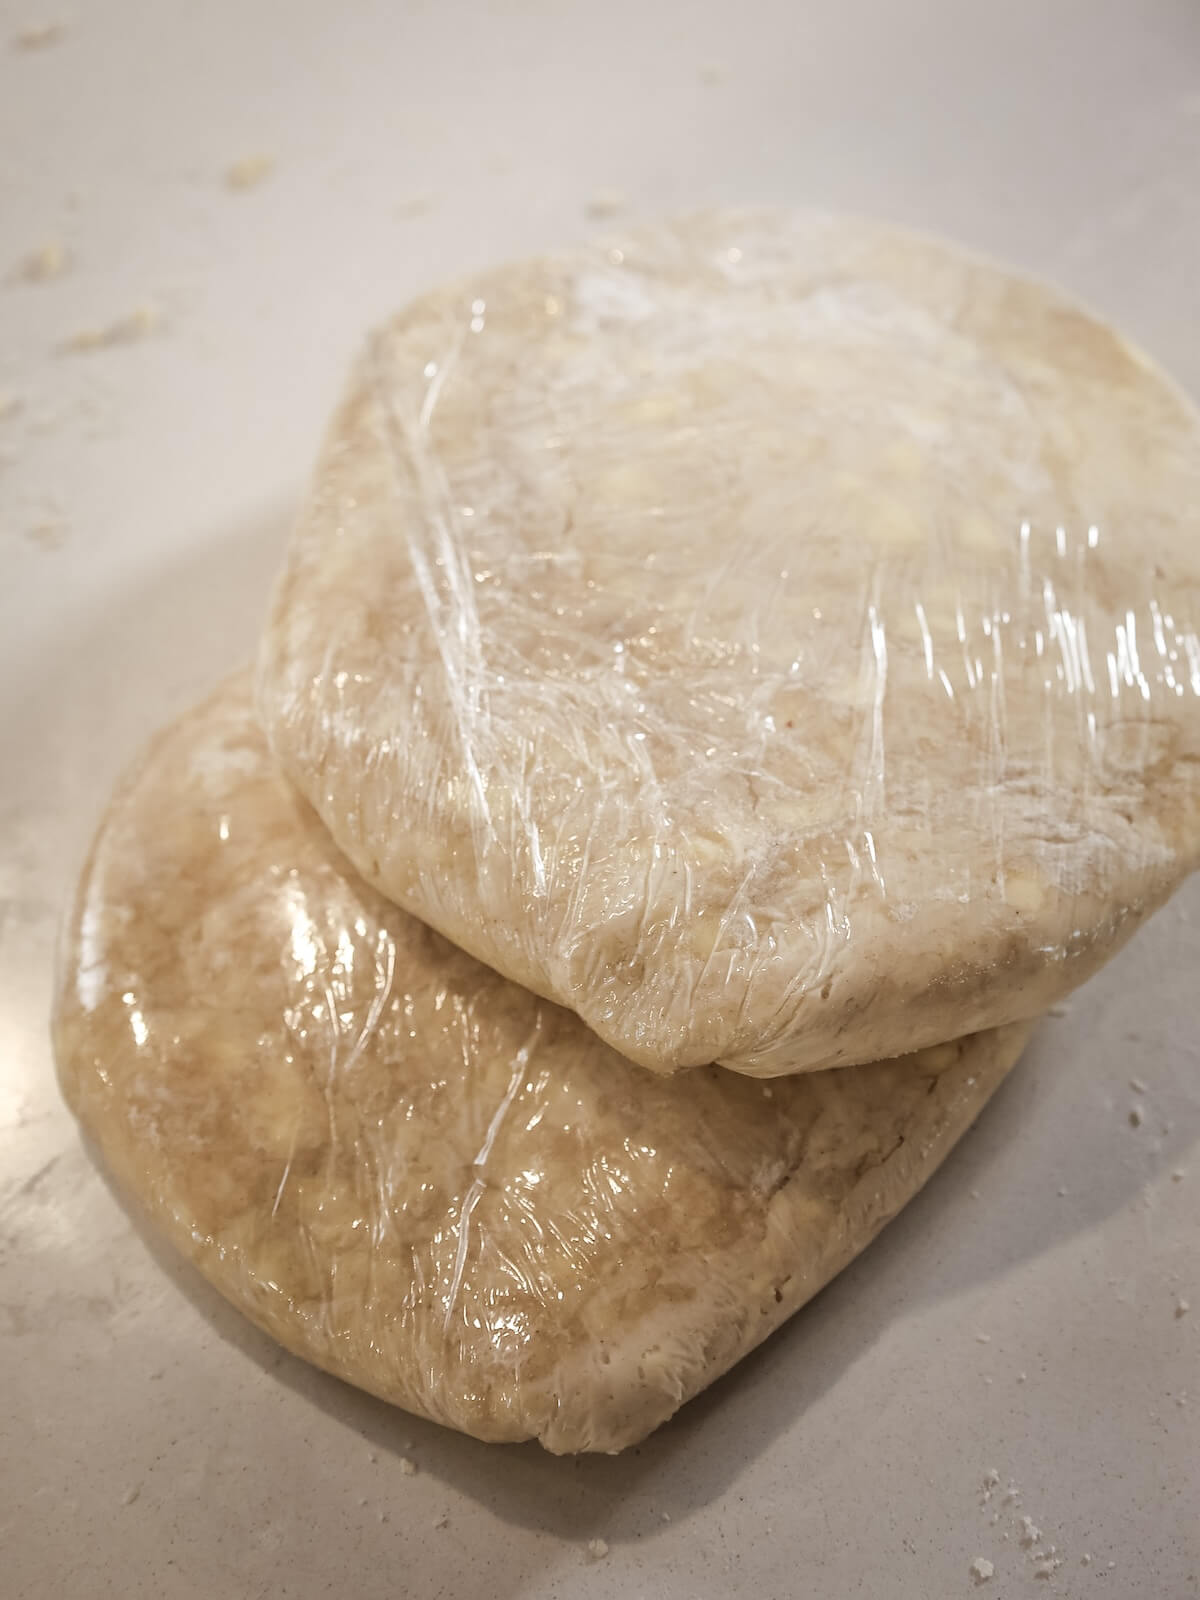
- Wrap and chill: Tightly wrap each half in plastic wrap and press into a disc. Chill for 1 hour before using.
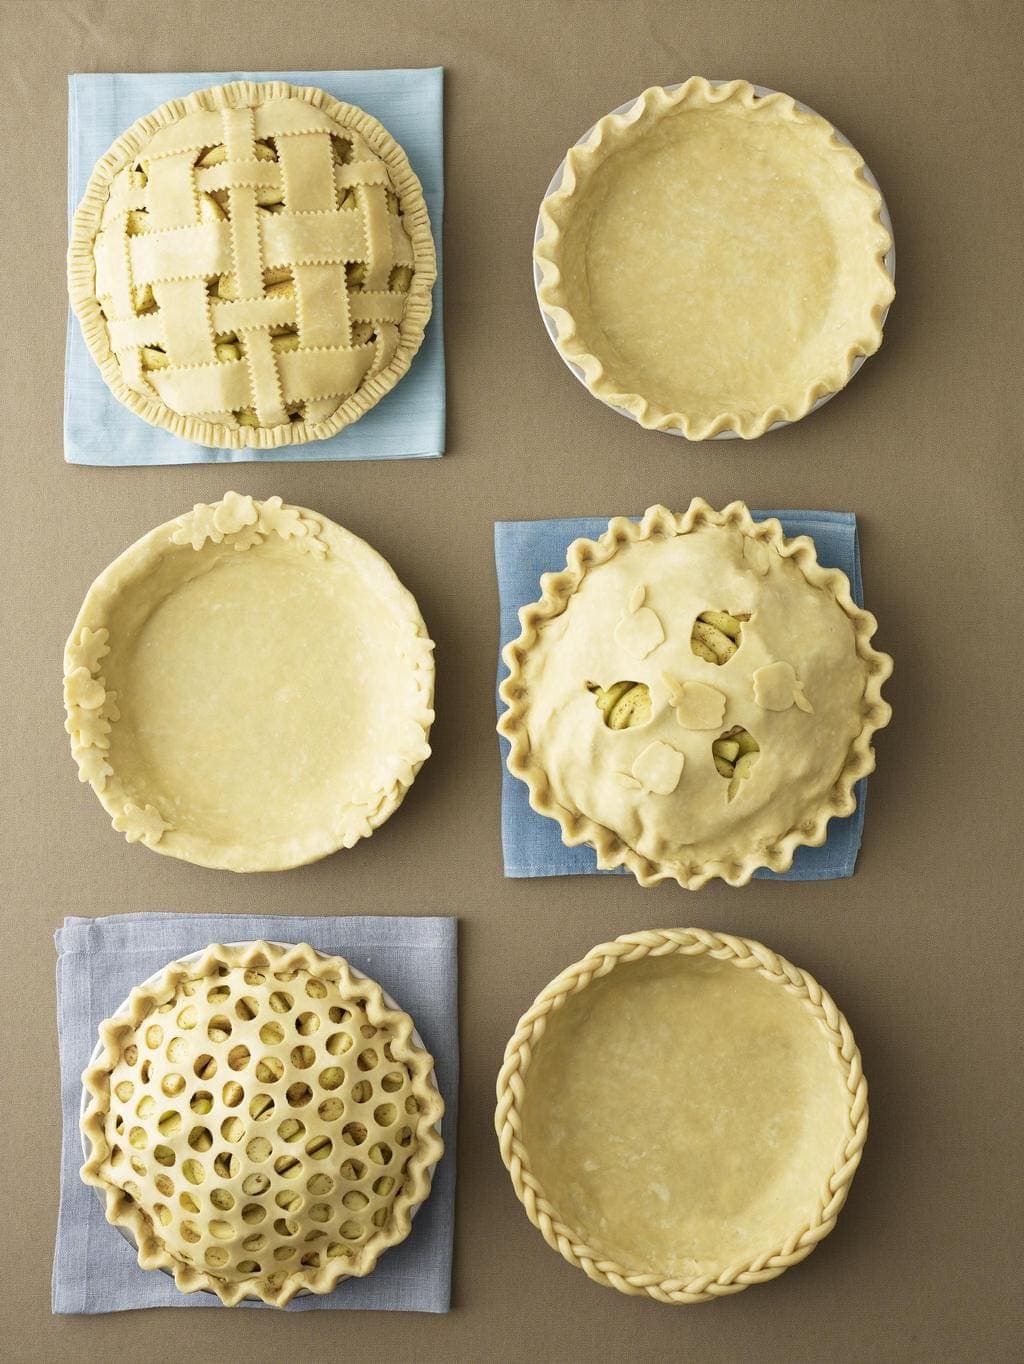
How to use your butter and shortening pie crust
Now that you've made your perfect crust, it's time to make some delicious pies!
How to roll the perfect crust: Rolling out pie dough can be equally intimidating as making it! If you're feeling nervous, head over to my post about how to roll out pie crust, and learn how to avoid common problems.
How to make beautiful crusts: Now that you've mastered making pie crust, put your creativity to use and start embellishing your pies with fancy edges and toppings. My pie crust decorating tutorial will get you started.
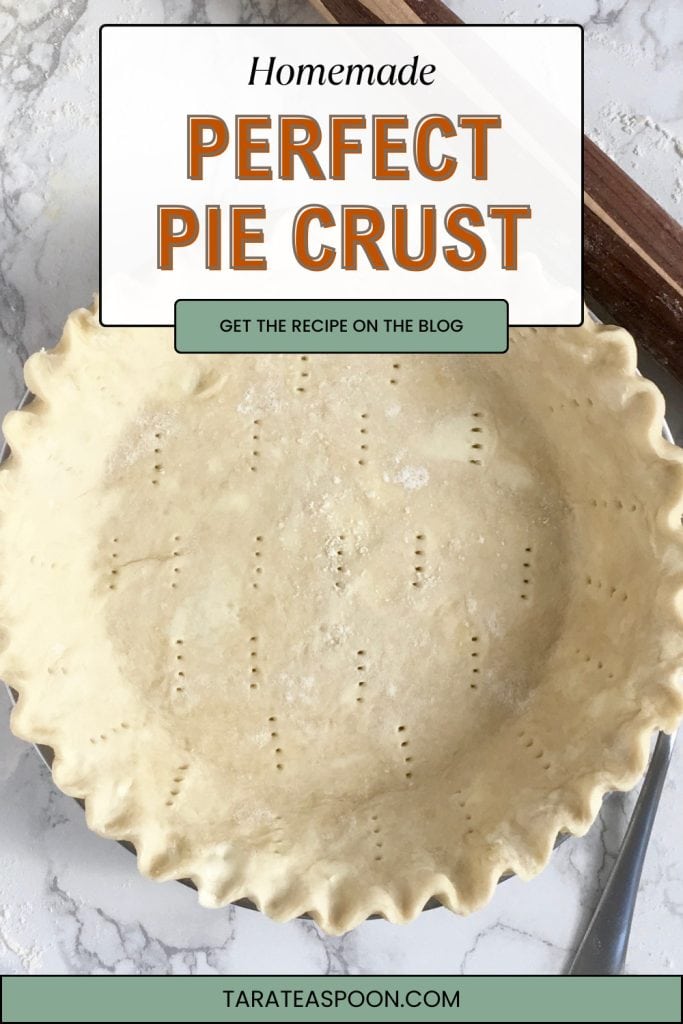
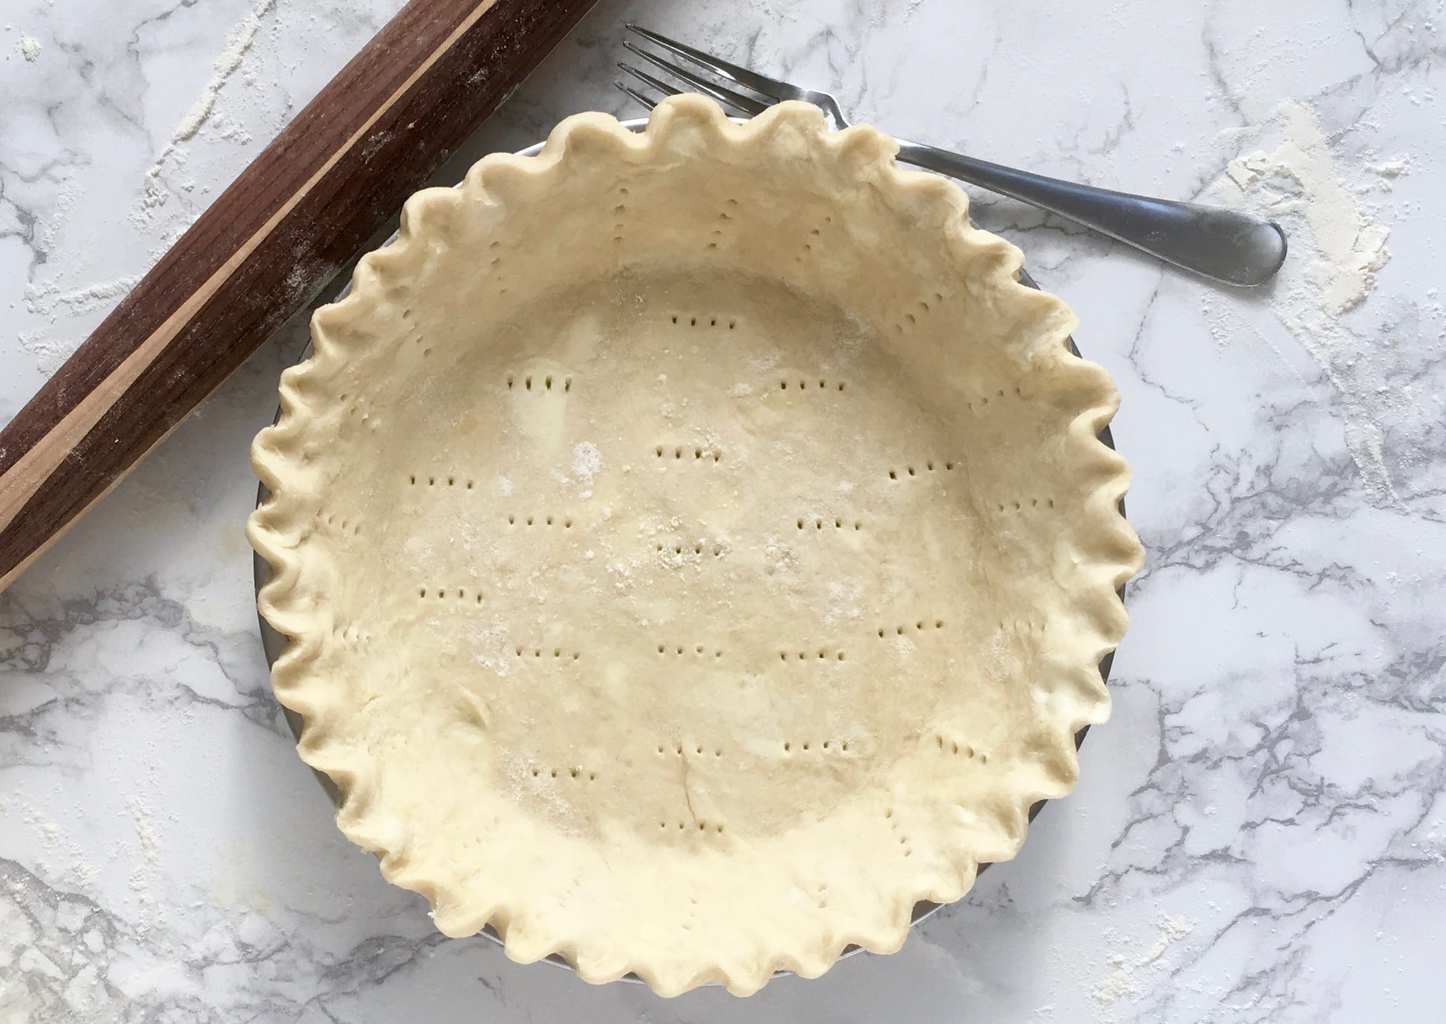
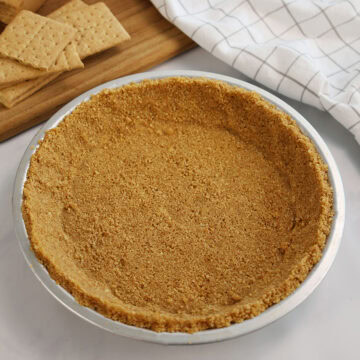
How to pre-bake a crust: Pre-baking your crust is necessary when you're making a pie with a pre-made or no-bake filling. To pre-bake crust, roll into a 12- to 13-inch circle and gently transfer to pie plate. Trim edges (or decorate as desired) and chill or freeze until very cold. Line cold crust with a double thickness of foil or line with parchment. Fill with pie weights or dry beans and bake at 375ºF until edges are just golden, 12 minutes. Remove foil or parchment and weights; bake another 10 to 12 minutes until cooked through. Let cool before filling.
Equipment you'll need for making this crust
A food processor is great for quick preparation.
If you don't use a food processor, make sure to have a pastry blender.
I like a rod rolling pin, but you may prefer a standard rolling pin or one with tapered edges like this French style rolling pin.
You can use a glass pie plate or metal pie tins for the final pie.
Storage and make-ahead instructions
Keep in mind that this pie crust needs to be chilled for at least 1 hour before use.
Refrigerate: The dough can be wrapped in plastic and stored in the refrigerator for 3-4 days.
Freeze: Or, freeze your wrapped dough discs for up to 4 months. Thaw in the refrigerator and then use as normal.
Top 5 tips for perfect crust
1 Start with chilled ingredients
Chilled ingredients won't bind as quickly with the gluten in the flour and help to make soft, pliable dough.
2 Use shortening and butter
Shortening provides flakiness while butter adds flavor; combining the two gets you the best of both worlds.
3 Add water carefully
Adding the right amount of water is crucial: too much water makes the crust tough and not enough makes it crack and fall apart. Add conservatively until the dough holds together when pinched.
4 Crumble-proof your crust
Don't leave out the salt and vinegar! They tenderize the crust and add flavor.
5 Roll the right way
Lightly flour your work surface, then roll dough from the center outward to create a circle. Lift and move the dough frequently as you work so it doesn’t stick to the surface. Avoid stretching it: stretched dough shrinks during baking.
FAQ
Everyone has different methods and different types of recipes for making pie crust. I actually like to make several different kinds of pie crust depending on the type of dessert I'm making. Sometimes I use an all butter crust when I want a sturdy and crisp shell. My amazing-baker mother uses an all shortening recipe when she wants a very tender crust. So, it's hard to say that one type of crust is better than another universally. They all have a place.
However, a butter and shortening crust is my go-to for the ideal combination of flavor and texture that can be used with almost anything, It's forgiving to work with, easy to roll out, and practically impossible to mess up.
White vinegar is used in this recipe to add flavor and make it crumble-proof (tenderized). There are several different ingredients that you can use to replace white vinegar such as vodka, lemon juice, or even apple cider vinegar. Each provides a different hint of flavor, but since they are acidic liquids, they will tenderize your crust just like white vinegar. I personally like the flavor of white vinegar the best, but feel free to experiment to see what you prefer.
Rate this recipe! ⭐⭐⭐⭐⭐
Scroll to the bottom of the page to rate and comment on this recipe. Leaving comments, questions, and ratings helps other too!
Recipes for Pies and Tarts
📖 Full Recipe
Perfect Pie Crust (Butter and Shortening)
Video
Ingredients
- 2½ cups all-purpose flour
- 1 teaspoon salt
- 1 teaspoon granulated sugar (can add up to 1 tablespoon, if desired)
- ¼ cup chilled shortening
- 12 tablespoons (1½ sticks) cold, unsalted butter (cut into pieces)
- 1 tablespoon white vinegar
- ½ cup very cold water
Instructions
- In a food processor, pulse together the flour, salt and sugar.
- Add the shortening and half the butter. Pulse 8 to 10 times or until mixture is coarse crumbs and some of the butter is pea-size. (Alternatively, combine in a bowl using a pastry blender or a fork.)
- In a measuring cup, combine the vinegar with the very cold water. Add the remaining butter to the food processor, and while pulsing the processor, drizzle in just enough water mixture to form dough, 5 to 8 tablespoons.
- After adding about 5 tablespoons of the vinegar-water, pinch test the dough. It should feel slightly dry but hold together when pinched. If it falls apart, add another tablespoon of the water mixture, pulse, and test again until you reach the right consistency.
- Transfer dough to a sheet of plastic wrap and use the wrap to bring the dough together in one ball.
- Halve dough, wrap each half in plastic wrap and press into discs. Chill 1 hour or until ready to use. May be kept refrigerated for 3 to 4 days or frozen for up to 4 months.
- To pre-bake crust, roll into a 12- to 13-inch circle and gently transfer to pie plate. Trim edges (or decorate as desired) and chill or freeze until very cold. Line cold crust with a double thickness of foil or line with parchment. Fill with pie weights or dry beans and bake at 375ºF until edges are just golden, 12 minutes. Remove foil or parchment and weights; bake another 10 to 12 minutes until cooked through. Let cool before filling.
- Follow instructions in individual pie recipes for other preparations.
Notes
Nutrition Per Serving

Tara Teaspoon
I’ve been in food publishing for over 25 years, creating recipes & food-styling for magazines, books, television, food brands, & advertising. With two cookbooks under my belt and thousands of my recipes at your fingertips, I hope you'll be inspired to spend more time in the kitchen!
Renata Feyen says
Sounds perfect. Never ate those pies, because they are not that common in Belgium, but it sounds great that you can keep this dough for 3 to 4 days in the fridge
joy says
my dad loves making pies. i shared your recipe with him. also, i wanted to share that i love your FAQs and Tips section.
Tara Teaspoon says
Oh good! Thanks for letting me know. I hope it all helps!
SONIA SEIVWRIGHT says
I’m making a fruit pie for a family gathering soon and I’ll be using your recipe. I might even make a few extra crusts to freeze like you suggested!
Catalina says
This recipe sounds like a total game-changer! I’ve always been nervous about making pie crust from scratch, but the way you explain it makes it seem so easy!
Bedabrata says
The tips for making the perfect pie crust are helpful. Using cold butter and chilling the dough really makes a difference.
Tara Teaspoon says
I agree! I'm glad the tips are helpful.
Rosey says
I didn't know white vinegar was the key to making a pie crust crumble-proof. That is a good tip, and this is a good recipe!
Tara Teaspoon says
Rosey vinegar definitely helps keep the dough tender. Depending on if you put the right amount of water in, the dough will be crumble-proof!
Beth says
Butter and shortening are always the best combo for pie crusts. They always make a dough that gets so tender and so golden.
LisaLisa says
I haven't made pie crest in years; I think I'm going to try your recipe over the weekend since I have some peaches. I hope mine turn out right...lol I'll let your know.
Michelle says
When cherries are in season, I always love to make cherry pie. I need to try this crust recipe when I make it this spring/summer!
Emily says
This sounds like such a fantastic recipe for a delicious pie crust! I've been thinking about making an apple pie for some time now; this is a sign!
Kristen McFarland says
Your recipe calls for one tsp of sugar, but your video says 1 TBSP.
Which is it?
Tara Teaspoon says
Hi Kristen, my apologies, looks like I will need to update that video. You will want to use 1 teaspoon of sugar.
Tara
Jason Dean says
This was my very first pie crust that I've ever made! I halved the recipe to make a single tart, but accidentally kept salt/sugar the same (oops). I also changed from shortening to coconut oil since it's what I had on hand, and it's a titch bit healthier. I was so nervous it wouldn't come out, or it'd just be a disappointment because normally I don't particularly like pie, nor the crusts I've had before (not even storebought).
It came out as the lightest, flakiest, most tasty crust I've ever had in my life. And I've tried, and disliked, a lot of pie crust in the last 35 years! Crisp bottom, light and airy texture, it practically came out like shortbread. I'll be using this recipe (and these tips) for the rest of my life! Now I just gotta write it down in my little recipe book so I don't forget the details, haha. Thank you so much.
Tara Teaspoon says
Thank you for sharing Jason and I'm thrilled to hear you are enjoying my pie crust recipe. So appreciate my readers and am grateful when you let me know how your experience was.
Tara
Terri Anderson says
Thank you so much for your recipe. I have been baking for 45 years and have never made a pie crust. It intimidated me so I always went with the store bought crust. UNTIL I RAN ACROSS YOUR RECIPE. I tried it and it turned out perfectly. You made an old lady a happy baker.
Tara Teaspoon says
So glad you decided to try making pie crust and that it turned out well! Thrilled to hear about your success, Tara
sikis izle says
Your blog is a success, very complete. Ahhh when passion is there, everything is 🙂
Melissa Taylor says
I’m excited to try this!! I’ve always used either shortening or butter and was frustrated that I liked the taste of one but the texture of the other. I love the idea of combining them. I’d be interested to know when you use vinegar or lemon juice and why. Also why water instead of milk? I love hearing the science behind your answers. Thanks!!
Brittany Smart says
Great tips! I'll need to try them the next time I make pie
Mary Bench says
A perfect crust is the most important and this one takes the cake! No, pie!
Antonia Okwu says
Excellent description and recipe! I look forward to trying this. My mouth waters as I write this 🥰
Thank you for sharing
Valerie says
Could you convert your recipes to Imperial or metric please .. no idea what a stick of butter is
Tara T. says
HiValerie, as a US based content creator, I don't test my recipes in metric conversions, but you are welcome to look that up on your browser and find the conversions.
That being said, thank you for bringing to my attention that my conversion button isn't visible on my recipes and I will reach out to my tech team.
Tara