
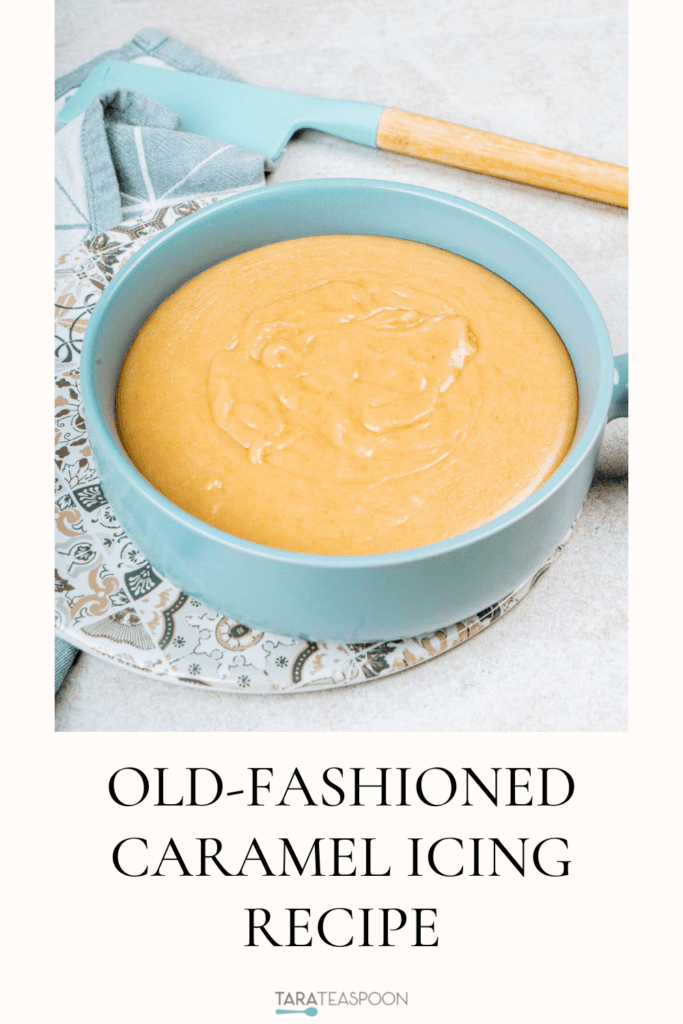
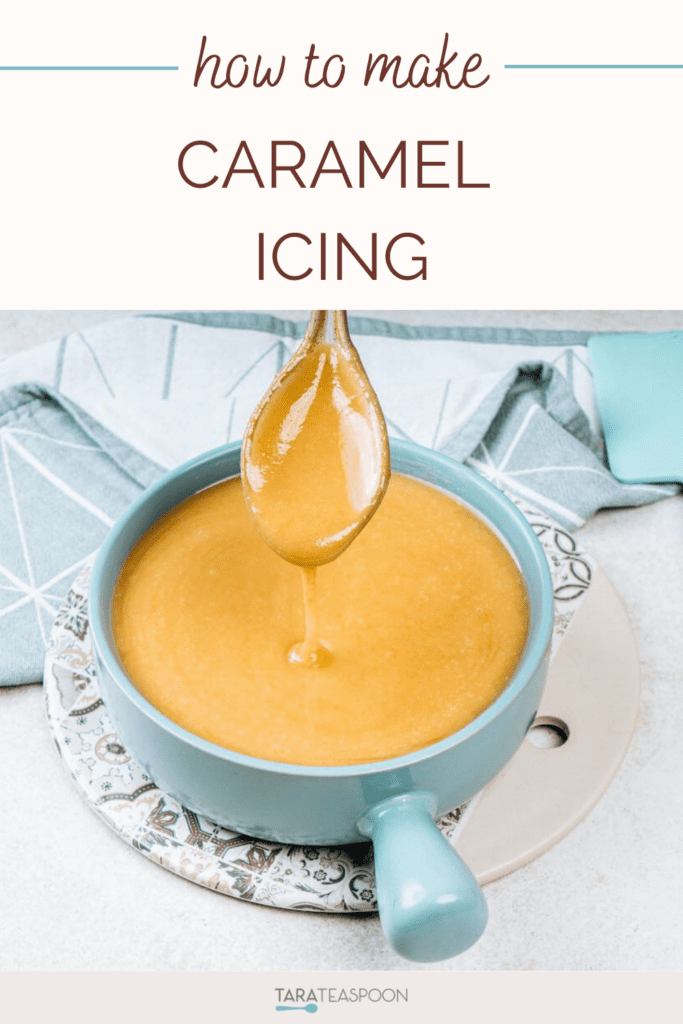
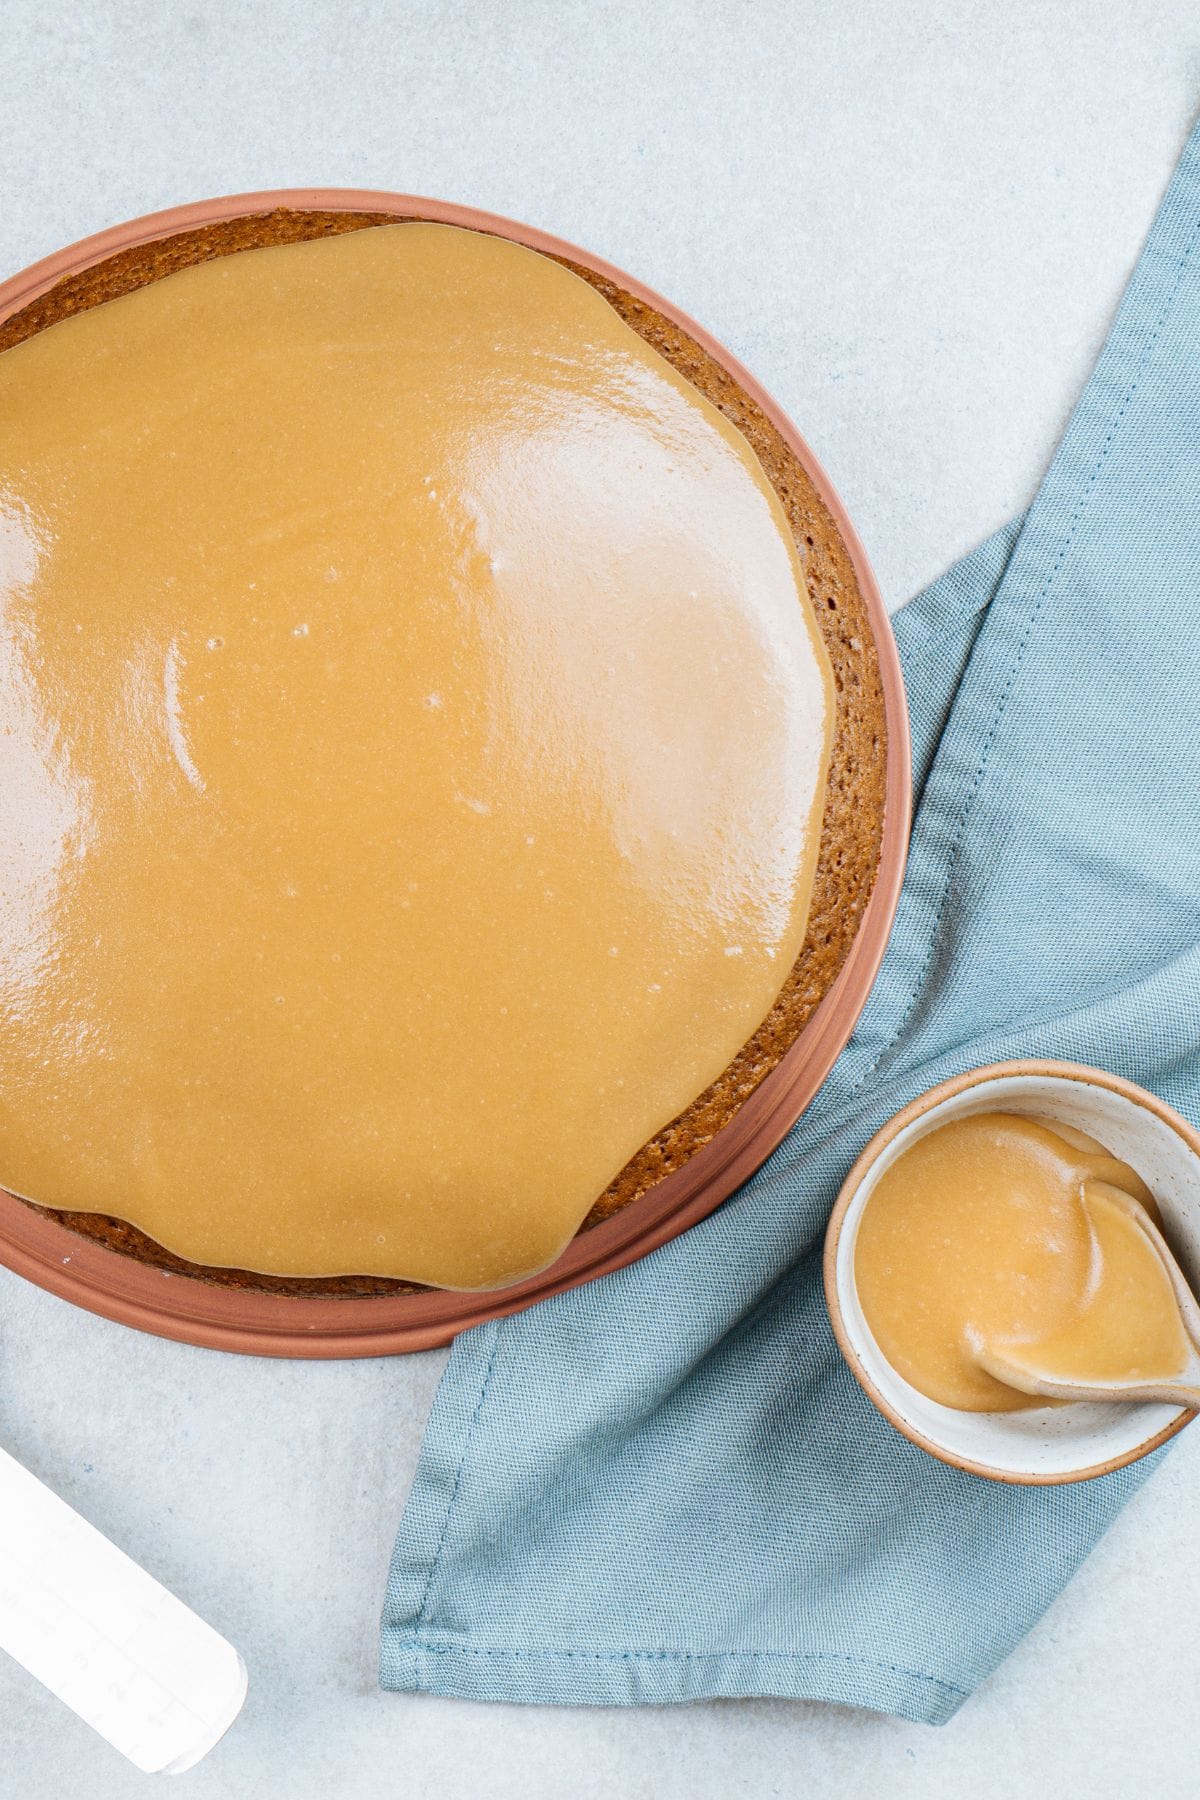
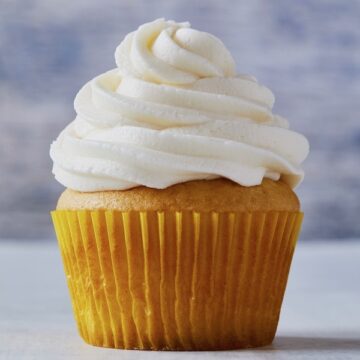
This decadent Creamy Caramel Icing is an easy cooked frosting for cakes and cupcakes. In less than 30 minutes, get silky smooth, professional quality icing that tastes like old-fashioned brown sugar fudge. Perfect for spice cakes and gingerbread.
In this article you'll learn:
- How to make an easy stovetop caramel frosting recipe that only takes 15 minutes of prep and 12 minutes of cooking, for a total of less than 30 minutes.
- Get the perfect texture by following the classic boiled method to achieve a silky, fudge-like consistency that sets beautifully on a cake.
- Using shortening over butter ensures the icing is stable and holds it's professional gloss.
- It's best to use a candy thermometer to know when the boiled mixture reaching 235ºF soft-ball stage.
- Simple pro tips to revive stiff or broken icing with temperature adjustments and hot water.
Generated with AI and experts from the Tara Teaspoon team.
The simple stovetop method for this homemade caramel icing elevates your frosting game. It is absolutely genius paired with a vintage Spice Cake, dense Almond Pound Cake, or simple Vanilla Cupcakes.
If you ask me, the difference between a good dessert and an unforgettable one almost always comes down to the frosting. I’ve always had a deep love for that perfect, sugary finish. Frosting is the crowning glory that can take a simple cake and turn it into a bakery-quality masterpiece.
Whether it’s a rich, fudgy chocolate frosting or light buttercream, having fail-proof frosting recipes at your fingertips is essential for adding that extra layer of texture and flavor to your favorite desserts.
Vintage find
This incredible old fashioned recipe for caramel icing comes from Susan LaRosa's personal vintage recipe collection. After finding a box of old recipes at an antique store, she began collecting old fashioned cookbooks and boxes of handwritten recipes. Susan baked them one by one and shared them on her blog, A Cake Bakes In Brooklyn.
Jump to:
Classic caramel flavor made easy on the stovetop
If you've ever shied away from a complex frosting recipe for fear of messing it up, you'll find that this vintage creamy caramel icing recipe is a total game-changer.
I've streamlined the directions for this classic cooked frosting to make modern bakers feel empowered in the kitchen. I retested this recipe as a professional food editor and fine-tuned the steps and temperatures to work perfectly every single time.
More reasons to try this old-fashioned favorite:
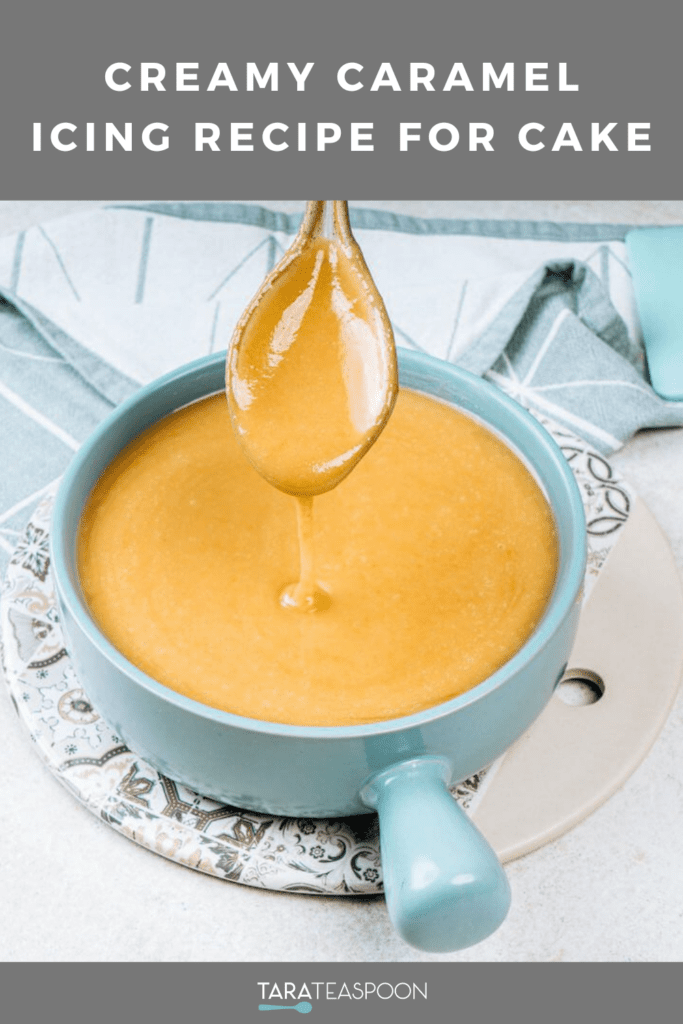
- Bakery-quality texture: The stovetop cooking technique creates a silky-smooth finish with a fudge-like consistency that sets beautifully on any dessert.
- Incredible flavor: It's rich, dense, and packed with rich caramel flavor reminiscent of old fashioned brown sugar fudge.
- Simple pantry staples: You do not need specialty ingredients or equipment, just a saucepan, candy thermometer, and basic staples are all it takes to achieve this professional result.
- Versatile pairing: It's absolutely delicious paired with a spice cake, vanilla cake, or even gingerbread.
This icing takes me back to my mother's kitchen! It is delicious!
- Mary
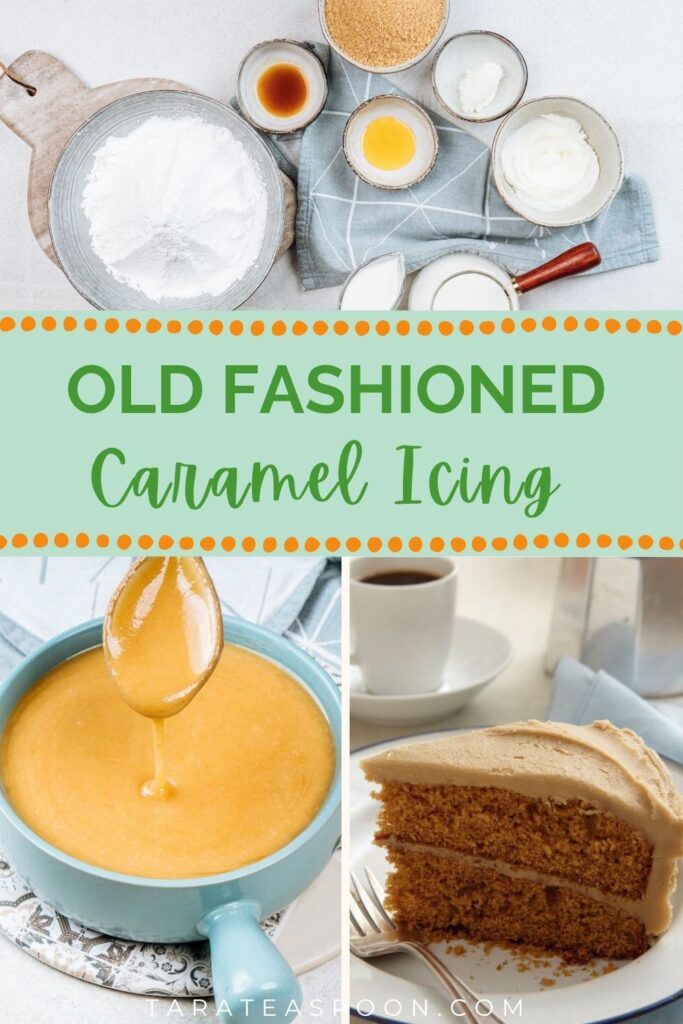
Ingredients and variations
Because this is such a simple icing recipe, I do not recommend substituting any of the ingredients. It's a vintage recipe that works perfectly as is! See recipe card for full list of ingredients and quantities.
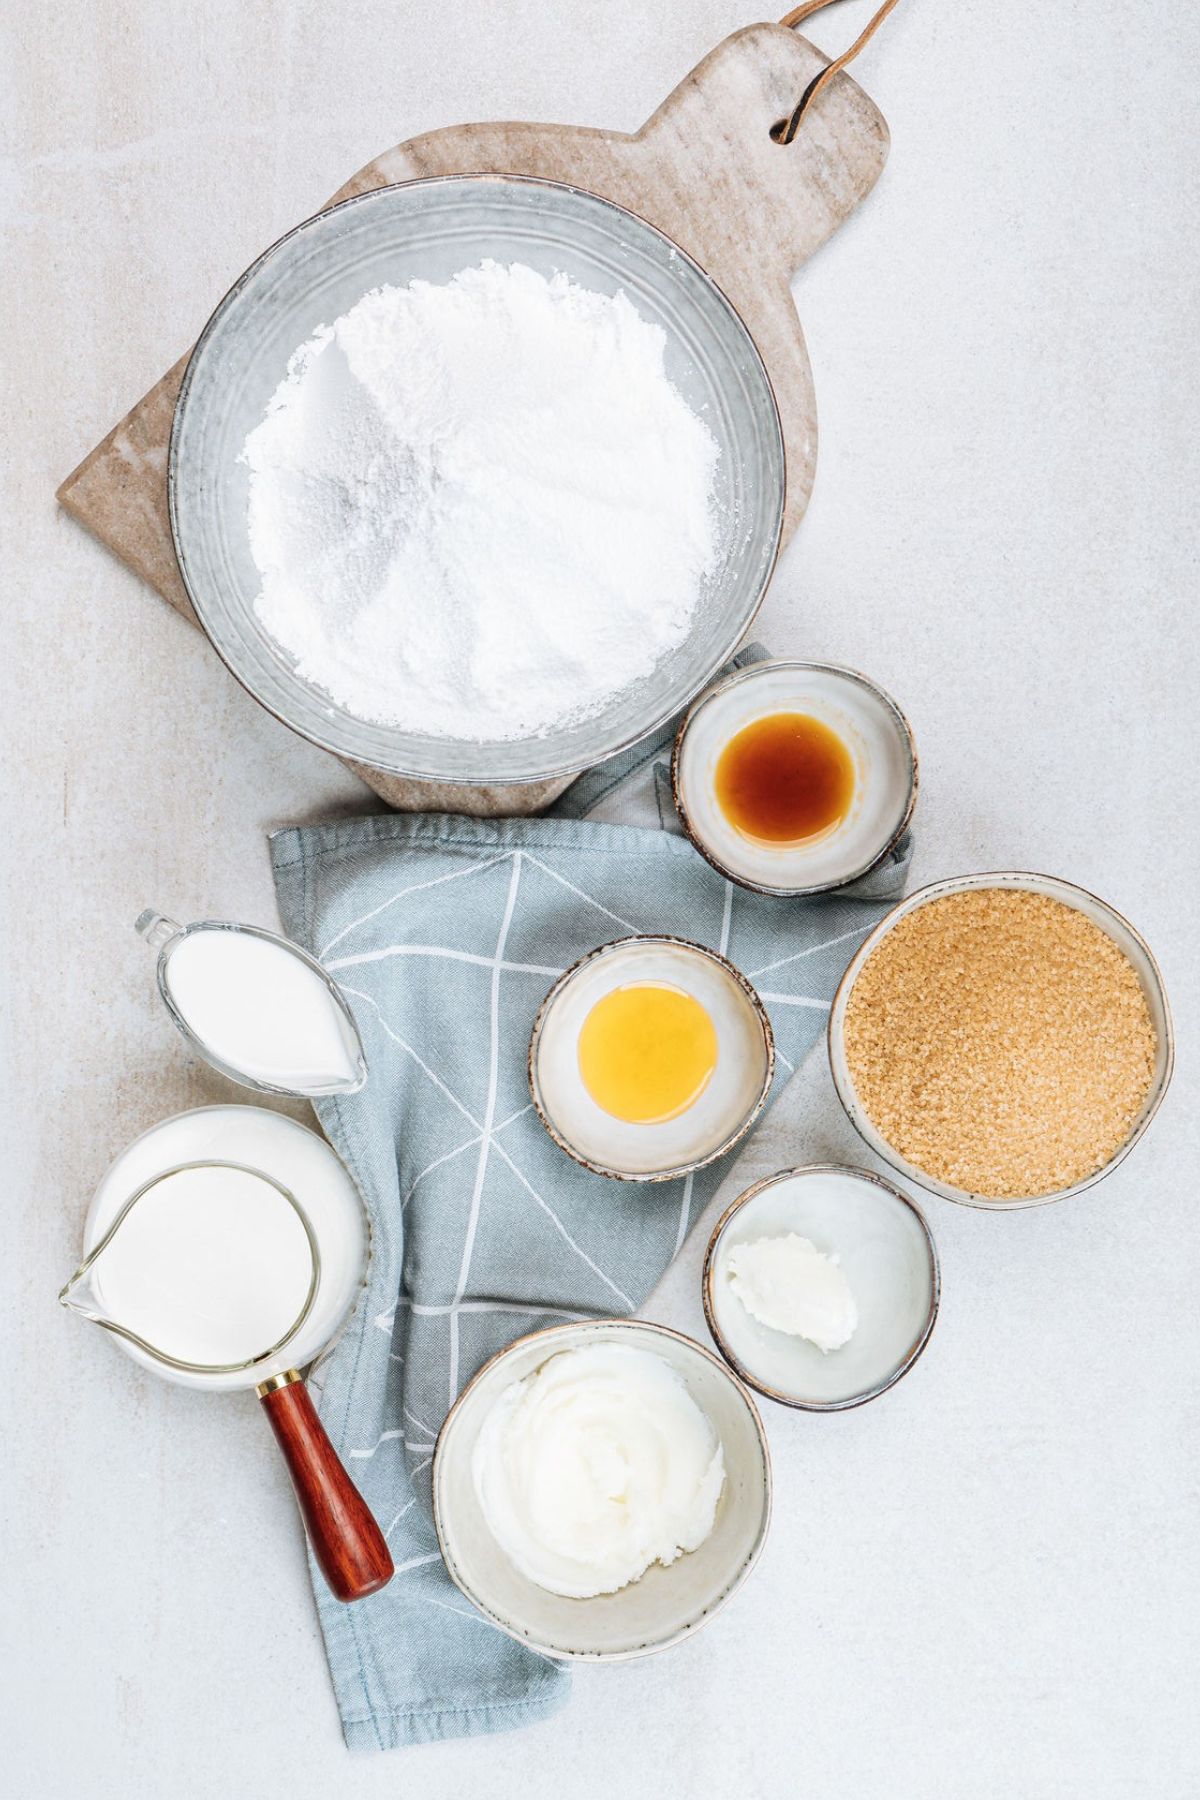
- Shortening: While I usually reach for butter, shortening is the secret to the stability and fudge-like set of this vintage recipe. Using butter (or coconut oil) will change the water content and may prevent it from setting properly.
- Whole milk: Using hot milk to dissolve the confectioners' sugar ensures a silky base, while using cold milk in the saucepan allows the brown sugar to heat gradually without scorching.
- Confectioners' sugar
- Vanilla extract
- Light corn syrup: Helps to prevent crystallization and gives the icing a glossy finish.
- Light brown sugar: Gives the frosting its rich caramel flavor and color. Granulated sugar will not provide the same depth of flavor.
Love how quickly and easily this recipe came together! Thanks for the recipe!
- Ashley
How to make caramel icing
This never-fail creamy caramel icing is made using a cooked frosting technique, sometimes called boiled icing. This technique for making icing has been around for ages, but was quite popular in the early and mid 1900s.
Making classic boiled icing requires a few more steps than most modern frosting recipes. So, grab your candy thermometer, and follow these step-by-step instructions to guide you through the process. See recipe card for comprehensive directions.
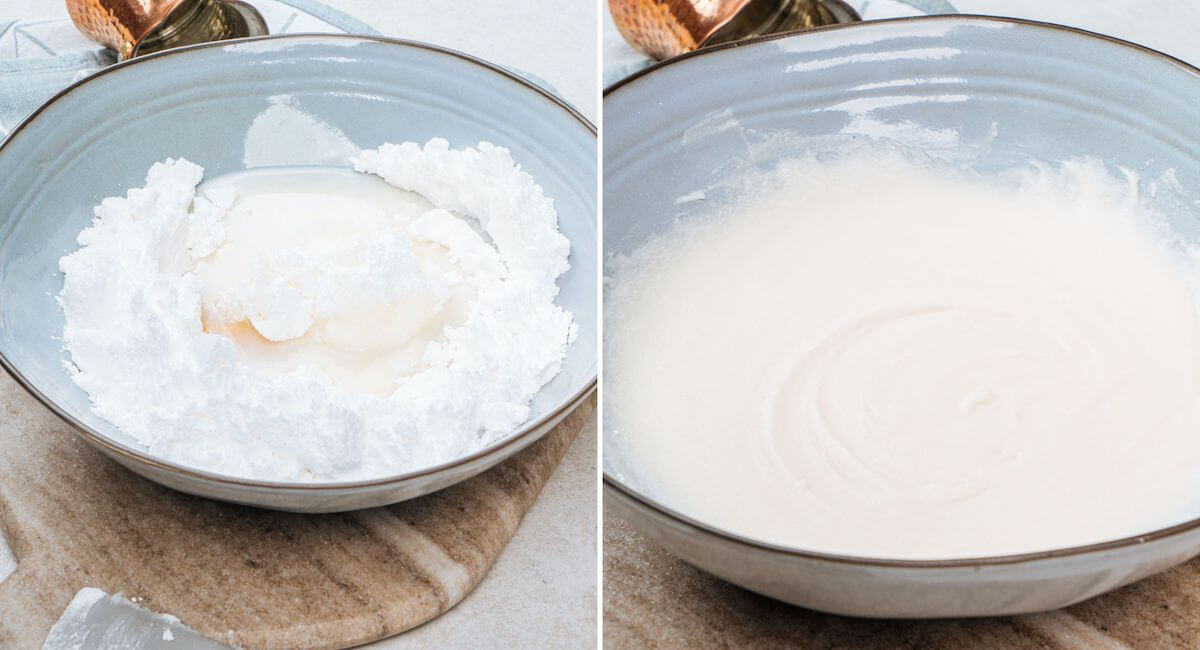
- Step 1: Place shortening, vanilla, hot milk, and confectioners' sugar in a bowl.
- Step 2: Mix until dissolved and smooth, then set it aside.
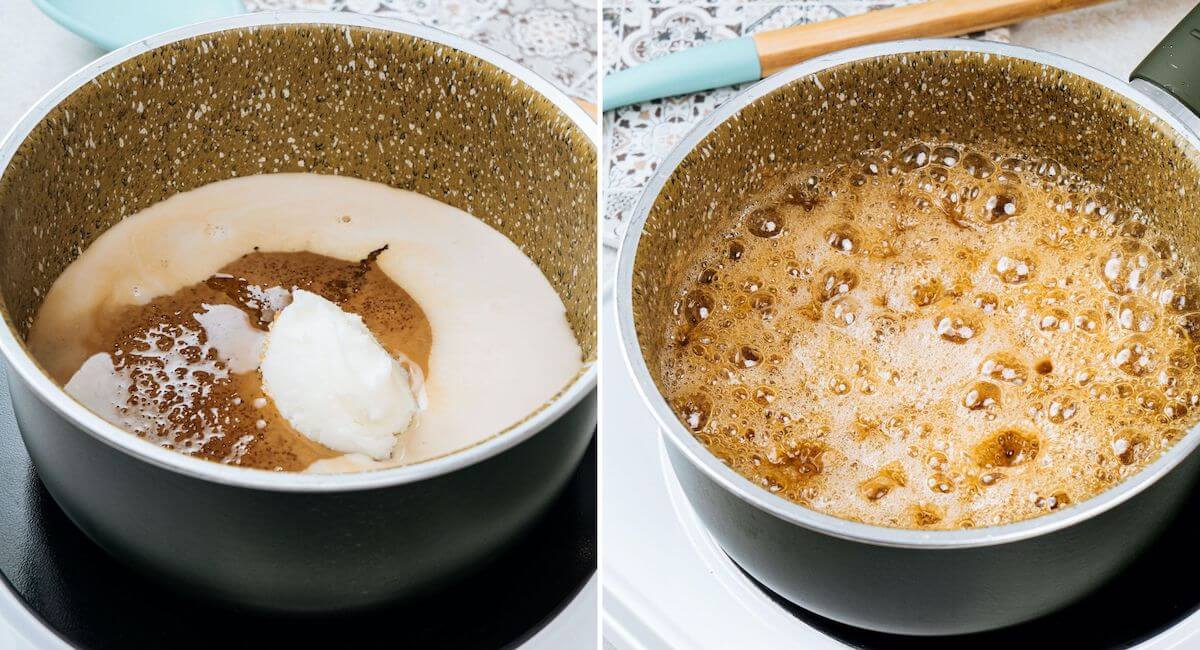
- Step 3: Stir together the brown sugar, cold milk, a bit of shortening, and corn syrup in a saucepan. Stir to dissolve the sugar.
- Step 4: Allow the mixture to boil, without stirring, until it reaches 235°F (soft-ball stage) on a candy thermometer. The mixture should have large, slow bubbles.

- Step 5: Pour the hot mixture over the confectioners' sugar mixture.
- Step 6: Use an electric mixer to beat the icing until it's smooth and starts to thicken. Use while still warm.
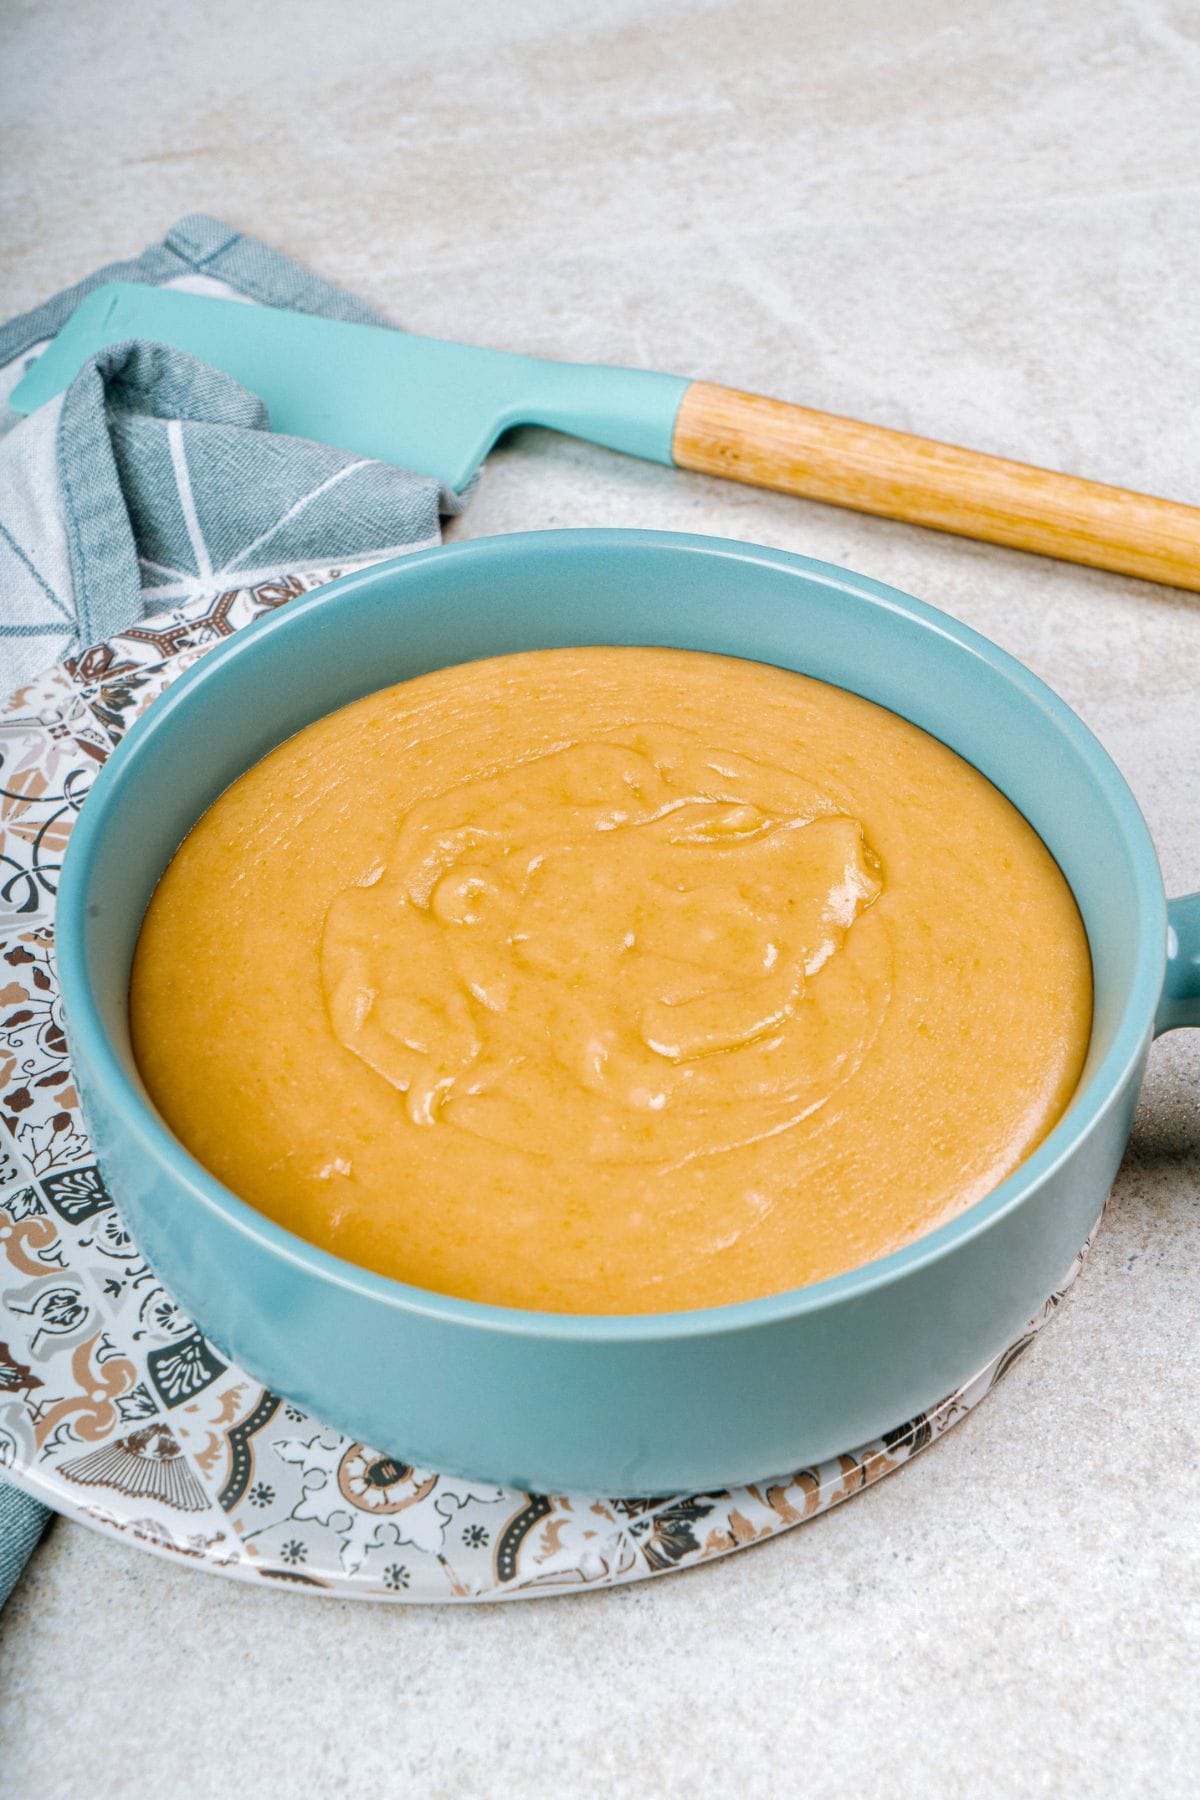
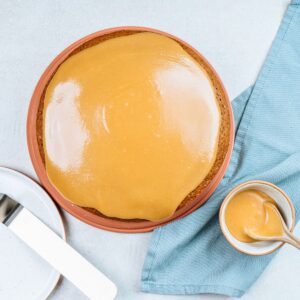
How to know when it's ready: The mixture will change from a translucent brown liquid to an opaque, creamy tan as you beat air into it. This transformation should happen in 2 to 4 minutes.
Tara's top tips
Milk temperature matters: Using hot milk to dissolve the confectioners' sugar ensures a silky base, while using cold milk in the saucepan allows the brown sugar to heat gradually, preventing scorching before it reaches 235°F.
Use a thermometer: It's essential use a candy thermometer when making this recipe. Without one, it will be extremely difficult to know when the mixture reaches the soft-ball stage (235ºF) needed to finish the icing. However, if you attempt the recipe without a thermometer, you can test the syrup by dropping a small amount into a bowl of very cold water. It has reached the soft-ball stage when it forms a soft, malleable ball that flattens once removed from the water.
Keep stirring: When the hot mixture is poured over the confectioners' sugar mixture it will melt and structurally change the shortening. At this point, the frosting will look like a thin liquid. As the icing is whipped and air is added, it will begin cooling, get thicker, and change to a light creamy brown color. It should happen in 2 to 4 minutes.
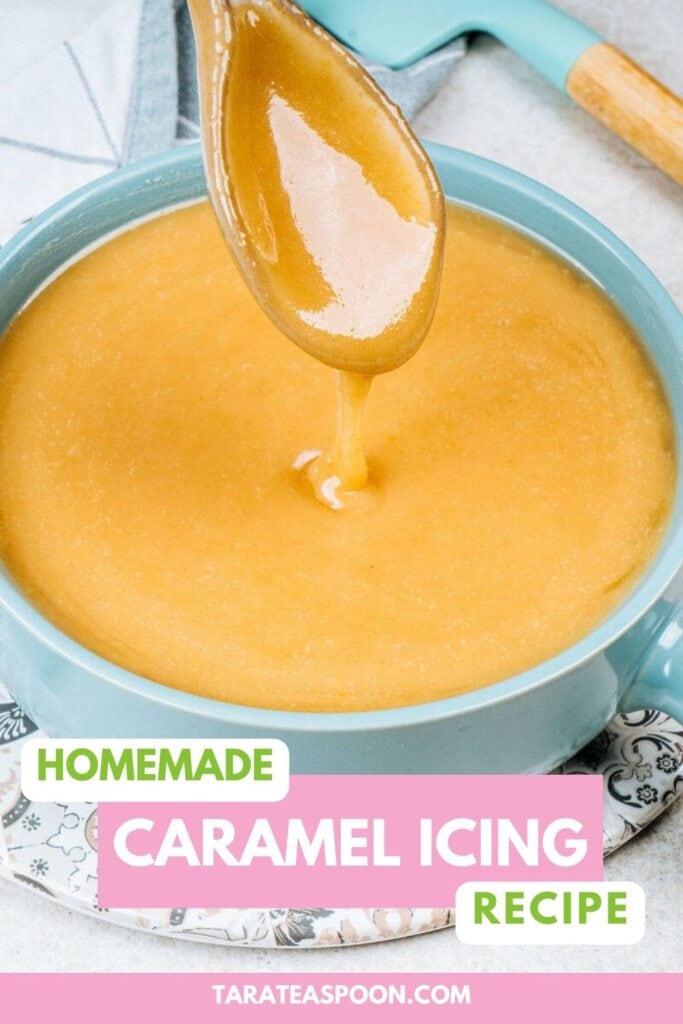
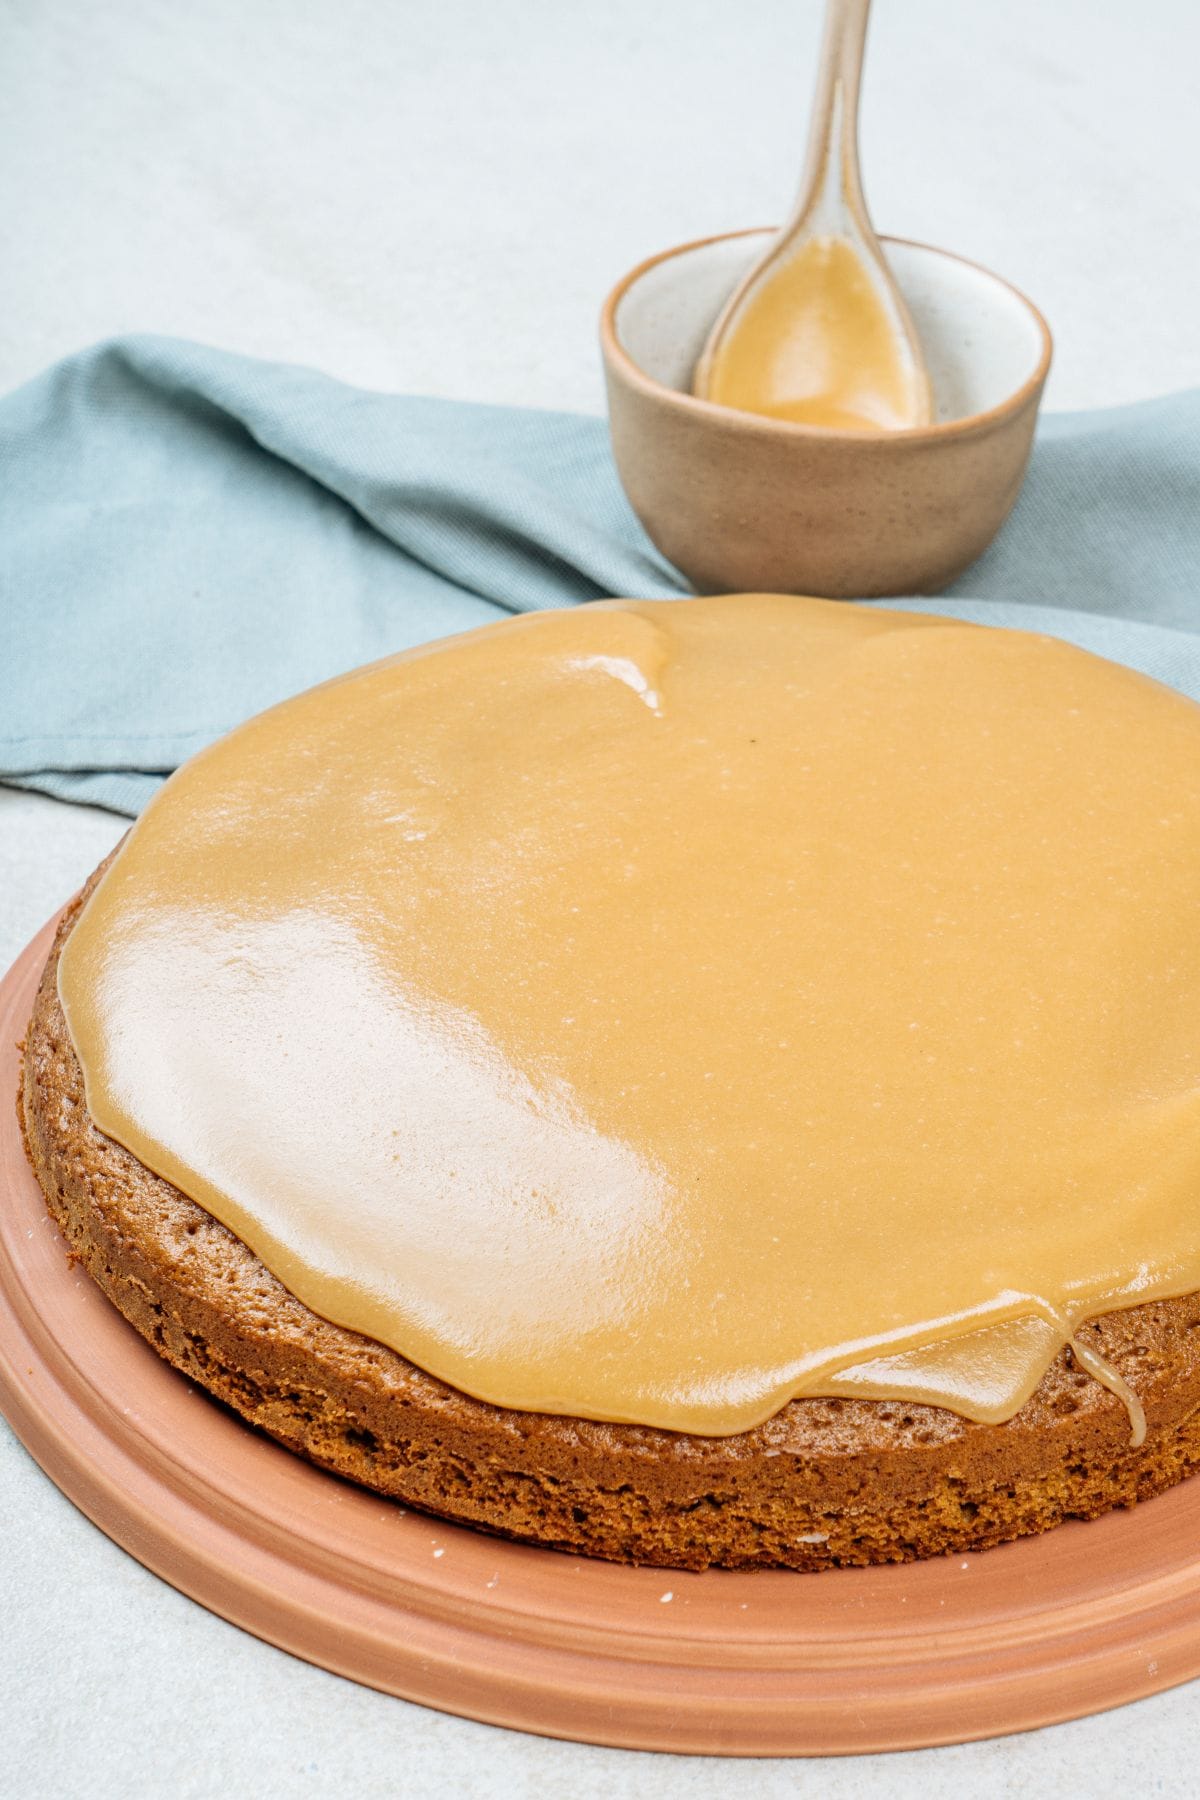
Spread warm: Because this is an old-fashioned boiled icing, it must be spread while still warm. As it sets on cake and begins to cool, it develops the consistency of smooth fudge! If you try to spread the icing after it has already cooled, it won't be easy to spread and will look lumpy.
Fix broken caramel icing: If the icing gets too firm before you are able to use it, beat in a teaspoon of hot water at a time to restore the spreadable consistency without losing the glossy finish.
This icing is versatile! Use it on your favorite cakes and cupcakes, as well as quick breads like One Banana Banana Bread or Pumpkin Banana Muffins.
Make it salted: Try sprinkling the top with a little flaked sea salt for trendy salted caramel flavor!
Equipment
- Candy thermometer
- Saucepan
- Mixer: While you can whisk by hand, an electric hand mixer or stand mixer is the best way to incorporate enough air to achieve that signature fudge-like texture without wearing out your arm.
Storage
Room temperature: Since the sugar acts as a preservative, you can keep the icing (or a frosted cake) covered at room temperature for up to 3 days. This keeps the texture exactly where you want it—silky and fudge-like. It's not a good idea to store leftover frosting in the fridge because it will harden and become stiff.
Freezer: I do not recommend freezing the icing on its own, but a fully frosted cake can be frozen if wrapped tightly in plastic wrap.
Use your leftovers: If you have just a small amount of icing left over, don't worry about trying to save it for a future cake. It makes an incredible warm topping for ice cream or a dip for apple slices! Simply warm it up until it's pourable and enjoy it as a decadent caramel sauce.
FAQ
Unfortunately, it cannot. Since butter and shortening have different fat and moisture ratios, they are not interchangeable in this recipe. I don't recommend substituting coconut oil for the same reasons. Although I rarely use shortening in my cooking, this vintage recipe was developed with it.
No, the icing must be prepared and spread over the cake immediately. As it cools, it becomes almost fudge-like in texture and more difficult to smooth.
If your icing begins to set in the bowl before you’ve finished frosting, simply beat in a teaspoon of hot water at a time until the spreadable, glossy consistency returns. Because this is a boiled icing, it is very sensitive to temperature, so working quickly while it is warm is key.
If your icing is too thin, continue to beat the mixture with your mixer. As air is incorporated and the temperature drops, it will naturally thicken. If it's still too runny after 5 minutes of beating, you can add a tablespoon of sifted confectioners' sugar.
If it is too thick, it usually means the mixture reached the soft-ball stage too quickly or cooled too much. Add hot water, one teaspoon at a time, and beat until it reaches a pourable or spreadable state.
More easy frosting recipes
Elevate your next bake with a sweet swirl of creamy frosting. Try these classic recipes:

Rate this recipe! ⭐⭐⭐⭐⭐
Scroll to the bottom of the page to rate and comment on this recipe. Leaving comments, questions, and ratings helps other too!
📖 Full Recipe
Caramel Icing Recipe for Cake
Video
Ingredients
- ⅓ cup + 1 tablespoon shortening (divided use)
- ¼ cup hot whole milk
- ½ cup cold whole milk
- 2½ cups confectioners' sugar
- 1 teaspoon vanilla extract
- 1 tablespoon light corn syrup
- 2 cups light brown sugar
Instructions
- In a bowl, combine ⅓ cup shortening, ¼ cup hot milk, confectioners' sugar, and vanilla and beat until smooth, about 2 min. Set aside.
- In a saucepan over medium-low, heat 1 tablespoon shortening, ½ cup cold milk, corn syrup, and brown sugar. Stir to dissolve the sugar.
- Once the sugar has dissolved, increase the temperature to medium and allow the mixture to boil until the temperature reaches 235°F (soft-ball stage) on a candy thermometer, about 10 minutes. In the pan, you’ll notice the bubbles become larger, slower, and more syrupy.Tip: If you don't have a thermometer, you can test the syrup by dropping a small amount into a bowl of very cold water. It should form a soft, pliable ball that flattens when removed from the water.
- Pour the boiled mixture over shortening mixture. Use an electric mixer to beat until smooth and creamy, 2 to 4 minutes. Watch the mixture to transform from a translucent brown liquid to an opaque, creamy tan as you beat air into it.
- As soon as it holds its shape and looks like thick, spreadable fudge, stop beating and frost immediately. If the icing becomes too thick, add up to 1 tablespoon hot water to thin it.
Notes
Nutrition Per Serving
Tara Teaspoon
I’ve been in food publishing for over 25 years, creating recipes & food-styling for magazines, books, television, food brands, & advertising. With two cookbooks under my belt and thousands of my recipes at your fingertips, I hope you'll be inspired to spend more time in the kitchen!
Mia says
I love this recipe! So happy to have found it-it takes me back to my grandmother’s kitchen. Thanks Tara!
Tara Teaspoon Admin says
Hi Mia! Thank you your comment. So glad you enjoyed the recipe!
Ashley says
Love how quickly and easily this recipe came together! I did hold an ice pack on my KitchenAid bowl while it mixed to help cool it down and it came together in less than 10 mins. Thanks for the recipe!
Tara T. says
Great idea with the ice pack! So glad to hear it was a success for you.
Tara
SUSAN HAYDEN says
Delicious! I had a couple glitches, but all pulled together in the end.
Glitch 1: I forgot to put in the baking powder! It was separate on the recipe card, which was difficult to read 😉 So it turned out more like bars instead of cake. No problem ~ it's no one's birthday but mine, and it tastes delicious!
Glitch 2: Needed it soy free, so used coconut oil. Made it too runny. Did not thicken enough as it cooled. So little by little, I whipped in extra powdered sugar, but not to stiffness.
All in all, a scrumptious treat!
Tara Teaspoon says
Hi Susan,
I checked the recipe card and the baking soda and the baking powder are listed along with all the other dry ingredients, so I'm not sure how to change this to make it easier to read. It's just a standard recipe. Can you give me more information about where you are seeing the baking powder separately?
Coconut oil is not a good substitute to for shortening as you've discovered. If you must substitute shortening, I would suggest using butter or vegan butter. The cake & icing will be a slightly different texture with butter. Ultimately coconut oil and shortening are not interchangeable in baking.
Thank you, Tara
Karen says
My icing was also a little too ‘liquidy’, so I added just a little more powdered sugar, one tablespoon at a time. Turned out beautifully. I also sprinkled a tiny bit of coarse sea salt on top for a ‘salted caramel’ effect. Delish!
Tara Teaspoon says
Great to hear Karen! So glad it worked out and I love the addition of the course salt. Tara
Lauren Behl says
I have not tried your recipe as I have been using my grandmother's recipe for 50+ years..
Your vintage recipe is so much more complicated than need be and would be daunting for even an experienced baker as my self.
My recipe calls for 3/4 cup unsalted butter cut in cubes.
Add 1 1/2 dark cup dark brown sugar
Melt together over low heat
Once melted, increase heat and bring to a slow boil. Boil for 5 minutes.
Mixture should be stirred,but not constantly.
Remove from heat
Add 1/3 cup cream
Add 1 tsp vanilla
Remove from heat and cool slightly
Gradually add 2 cups sifted powdered sugarand stir until well blended. If too thick,add more cream.
If you prefer more of a glaze,use less powdered sugar.
A glaze works well on a bundt cake. Try this and you will agree it tastes wonderful and it's simplicity is hard to beat
Tara says
Lauren, I'm glad you have a recipe that has worked for you for over 50 years. Were you looking for a different recipe or did you just want to comment that my recipe looks hard for you?
Sharon Toji says
I should have added to my Magic Spice Cake comment that I now make my own yogurt at least weekly in my Instant Pot so have a lot of whey. It is a wonderful substitute for buttermilk or sour milk in just about any baking recipe.
Tara Teaspoon says
Thank you for all the wonderful information Sharon! I love getting inspiration from tried and true recipes like the ones you mentioned. Tara
Sharon Toji says
This would go very well with my own personal heritage spice cake recipe, Magic Spice Cake. About 75years ago, when I was about 8 or 9 SoftAsSilk came out with a little folder of one bowl cake recipes, and this one was included, Magic Spice Cake. It became my favorite and I won first prize at the Umatilla (Oregon) county fair with it more than once. You can find it now on the internet by googling Magic Space Cake and looking at Heritage Recipes for the recipe or just going here: http://www.heritagerecipes.com/cake-recipes/magic-spice-cake.htm
It is much lighter than the usual spice cake, with no molasses, more light and delicate but with just enough spice to make it special.
Tami says
Will butter work instead of shortening? I cannot eat shortening for health reasons.
Tara says
Unfortunately you will not get the same result with butter. Butter and shortening have different fat and moisture ratios. You could try solidified coconut oil. I'm just suggesting that, as I haven't tried it. This recipe is vintage and I didn't re-develop it to not use shortening. I rarely use shortening! All the best!
'
Jaime Moellman says
Look up a recipe for Kentucky Blackberry Jam Cake with Caramel Icing. It’s very similar and uses butter.
Mary Bench says
This icing takes me back to my mother's kitchen! It is delicious!
David Millage says
Followed the instructions .. dribbled the hot mixture on top the whipped shortening mixture and it turned to liquid.
Tara says
Yes, the hot mixture will structurally melt the shortening, but as the icing is stirred and whipped it will cool and get thicker. It’s all about the cooling with this frosting. It is quite liquid when hot, and then forms a thicker, fudge-like frosting as it cools and air is beaten into it. I hope you kept stirring, or will try it again. It should come together without a hitch.
Mona S says
I just had the same problem. At 2mins the frosting is still extremely hot. I let the mixer continue for ~ 20mins. The frosting poured out like thick batter over the top of the cake. Made it very easy to frost the cake. I know from making other spice cake/caramel frosting recipes, it is best to let the frosted cake sit over night before serving. So, I now have to smell this amazing cake all night and try to wait until tomorrow before taking a bite. I may have licked the bowl clean. :). Very delicious frosting.
Tara says
It is delicious! One of my favorites. I'm glad you have a method for getting the frosting to work the way you want! That's perfect.