
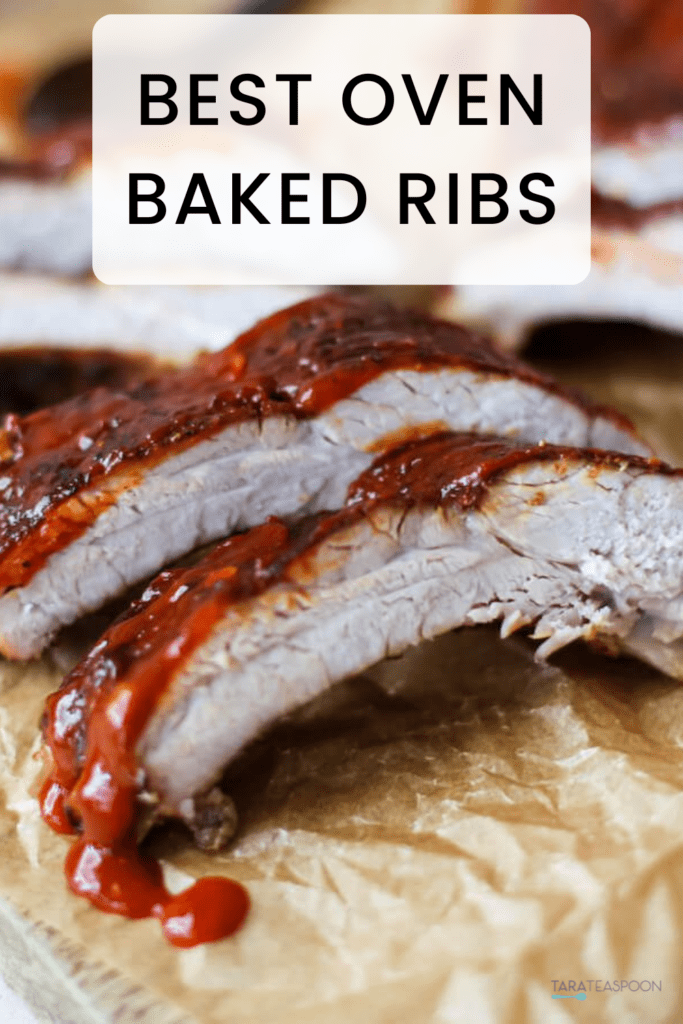
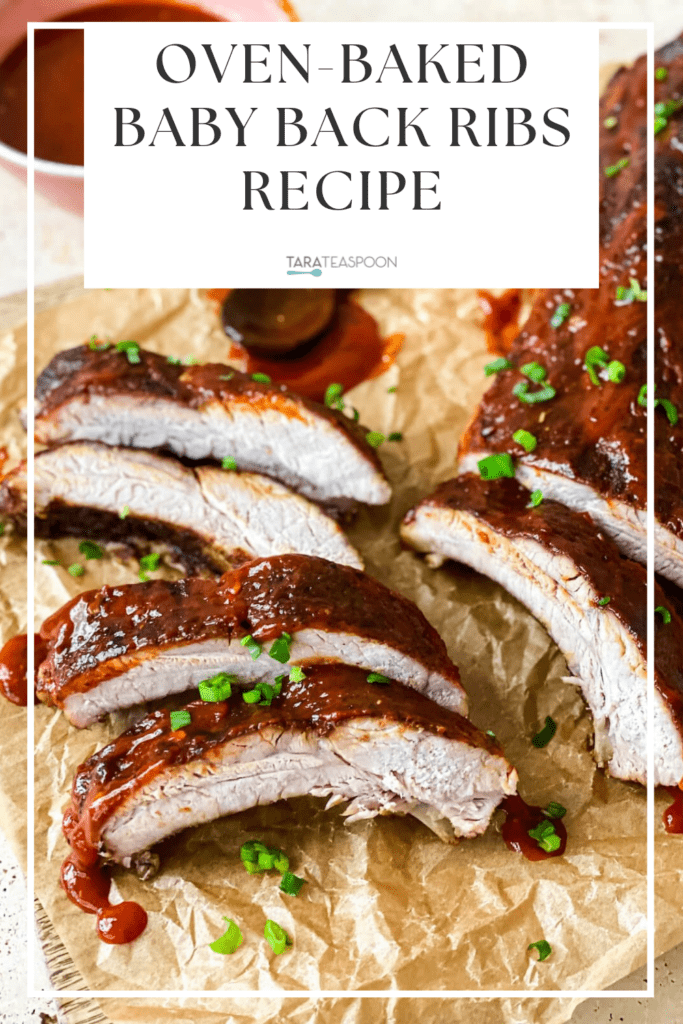
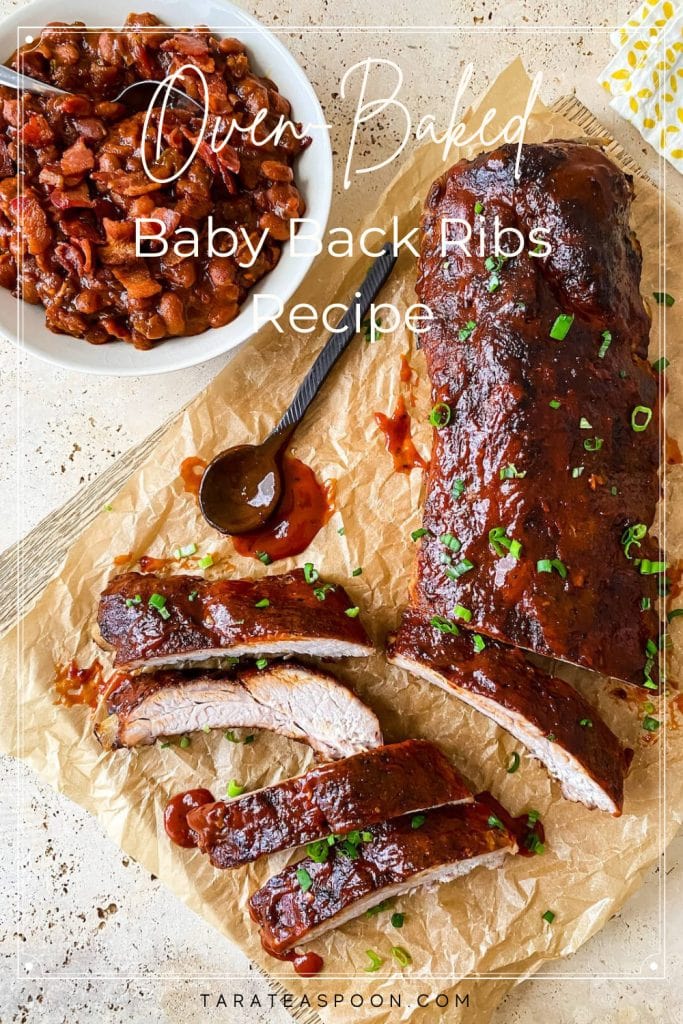
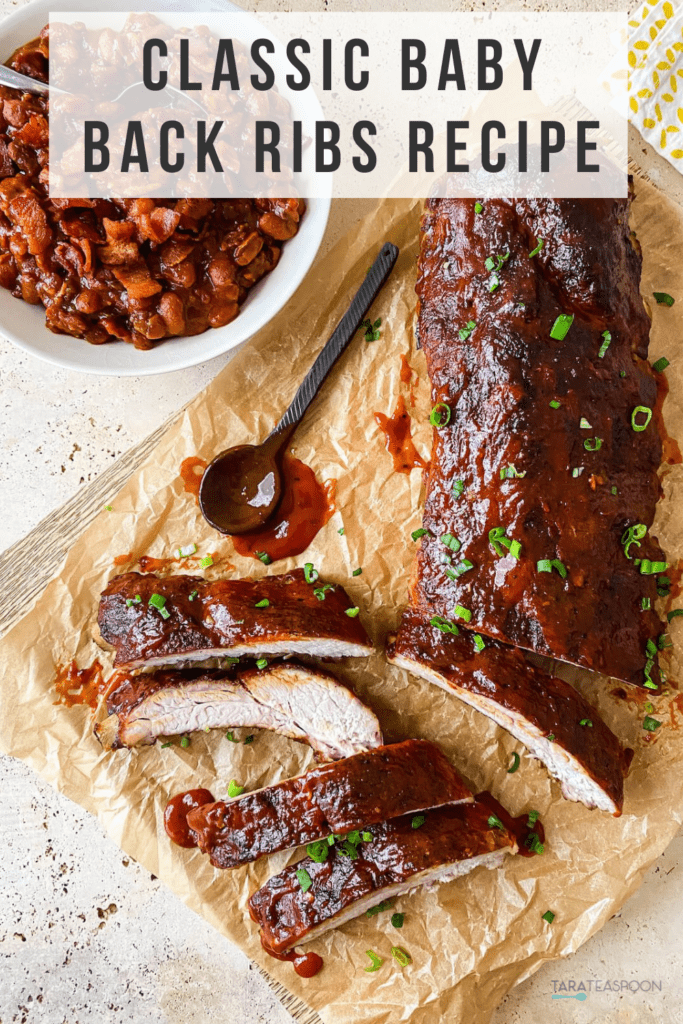
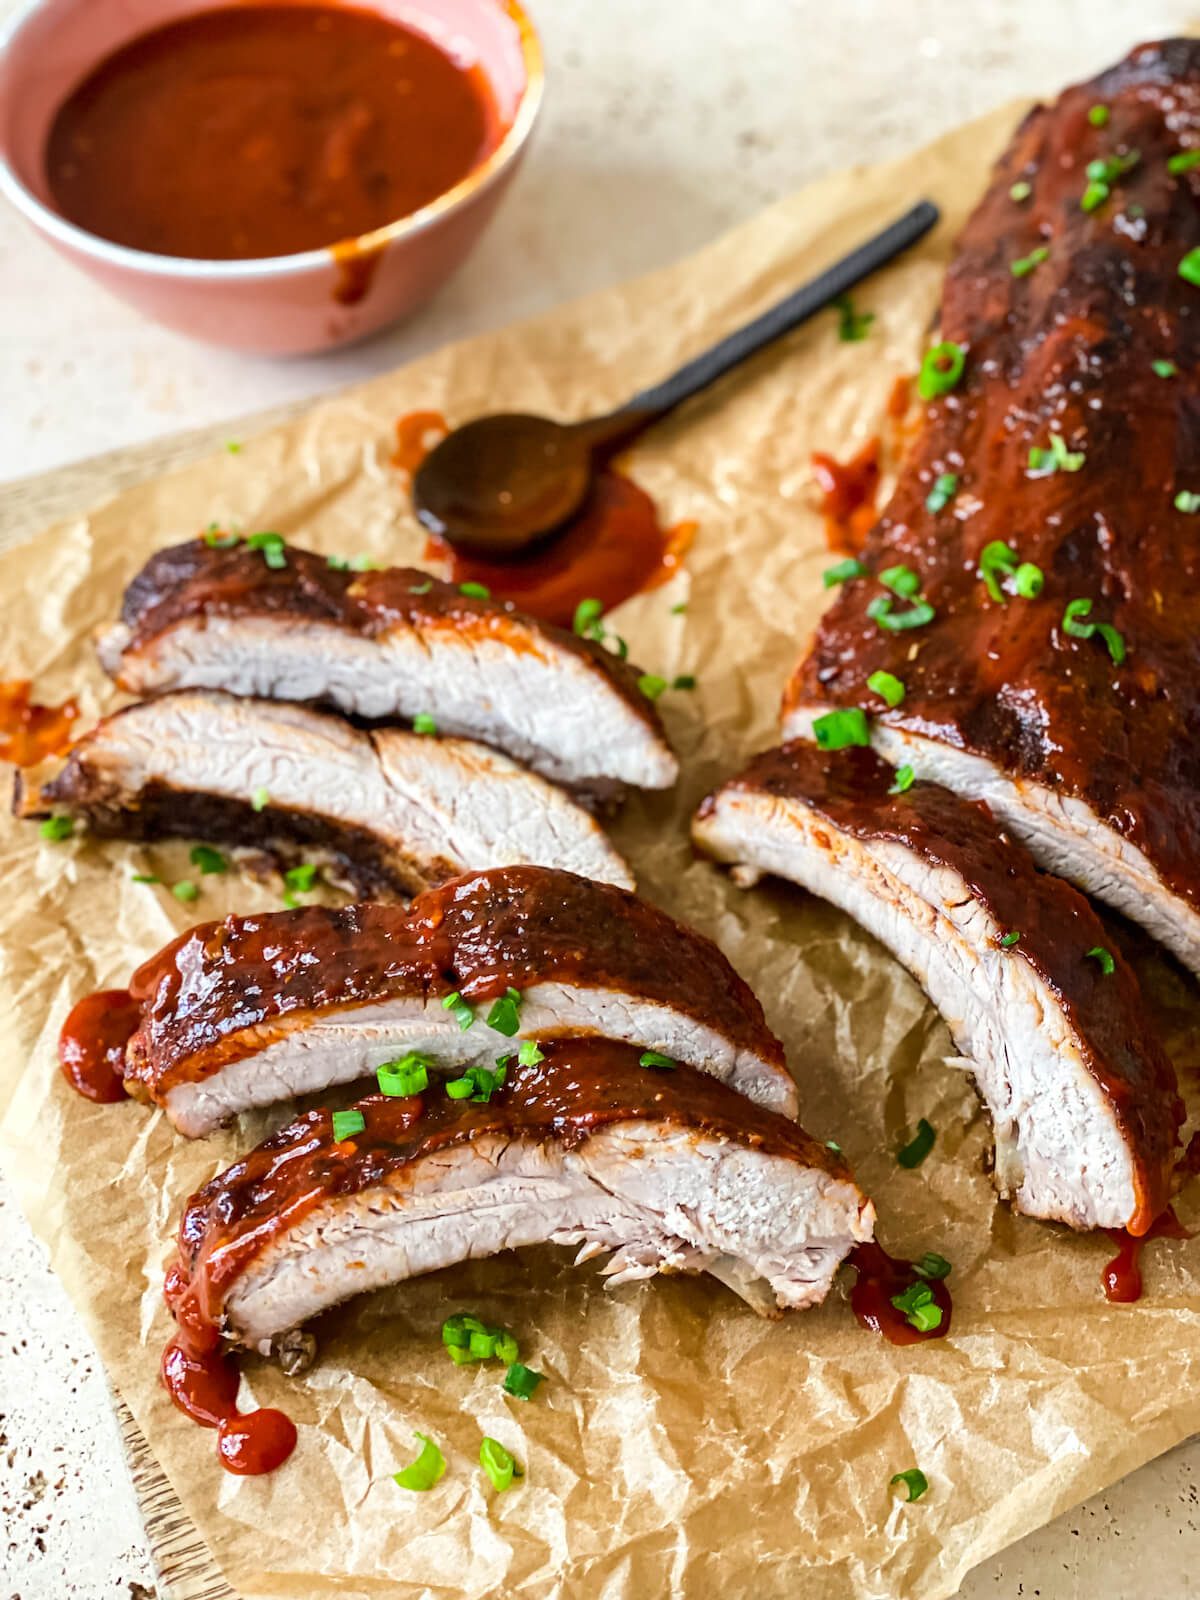
These mess-free Oven-Baked Baby Back Ribs are easy to make—no smoker or grill needed! Cook them in the oven and enjoy tender, crowd-pleasing ribs all year round with this 4-ingredient recipe.
I'm a BBQ fanatic. I think grilling outside should start when the weather is just warm enough to tolerate being out by the grill!
If you thought only barbecue aficionados could make amazing ribs, you haven't tried my oven-to-grill 3-Ingredient Ribs or these Kansas City Style Ribs. Plus, my authentic Texas Beef Brisket with Spicy Sauce, and North Carolina Pulled Pork are slow-cooked to perfection, but EASILY MADE completely on the grill!
Now that you know I walk the BBQ walk, let me tell you about these fall-off-the-bone ribs IN THE OVEN!
Why you'll love this recipe
BUT, let's skip the grill this time. Yes, I said it, no grill or smoker required. This oven-baked ribs recipe SKIPS THE GRILL completely, and is made totally IN THE OVEN!
More reasons to love this recipe:
- Mess-free: Grilling can get a little messy, but this oven-baked recipe is practically mess-free since the ribs are cooked in foil.
- Feeds a crowd: From family gatherings to potlucks, this recipe feeds a lot of people. It makes 2 full racks of baby back ribs, but they'll disappear right before your eyes!
- Make-ahead recipe: If you are looking for ways to meal prep, this is a fantastic recipe to use. The ribs can be prepared in advance and stored in the refrigerator until you're ready to start baking.
Jump to:
Ingredients
You'll only need 4 ingredients to get started on the ribs. Don't miss my ingredient tips. See recipe card for quantities.
- Baby back pork ribs: You'll need 2 racks or about 5 pounds. You can also use boneless pork ribs if preferred.
- Seasoning: You can either use a mix of salt and pepper or a BBQ dry rub.
- BBQ sauce: Use any type you like. See below for some of my favorite sauces!
- Garnish: I like to use sliced scallions or fresh, chopped herbs.
Hint: Use a gluten-free rub and sauce to make the ribs gluten-free.
Prep-Ahead Tip
If you're planning ahead, baby back ribs are a great prep-ahead option. You can prepare them in advance—cleaned, seasoned and ready to go—and store them in the fridge until bake time.
Place the ribs on a stainless steel tray and cover them tightly with plastic wrap. While you may want to wrap them in their baking foil, keep in mind that it can react with salty marinades or rubs, which isn’t ideal. This little tweak keeps your ribs perfectly prepped and your fridge for up to 24 hours!
How to make ribs in the oven
Although these ribs are made in the oven, they will be prepared the same as you would for the grill. These step-by-step instructions will help you get familiar with the preparation process and baking technique.
- Pat the ribs dry and cut off excess fat from the top side.
- Remove the membrane from the bottom of the ribs as shown below: use a paring knife to lift and remove the membrane, and/or a paper towel to grasp it and pull it away.
- Lay each rack of ribs on a large piece of heavy duty foil, or doubled standard foil. It should be large enough to wrap the rack completely. If it's not large enough, you may use another piece to seal the top.
- Before sealing, season the ribs with salt and pepper or a BBQ rub. Then oven-bake the ribs according to the recipe.
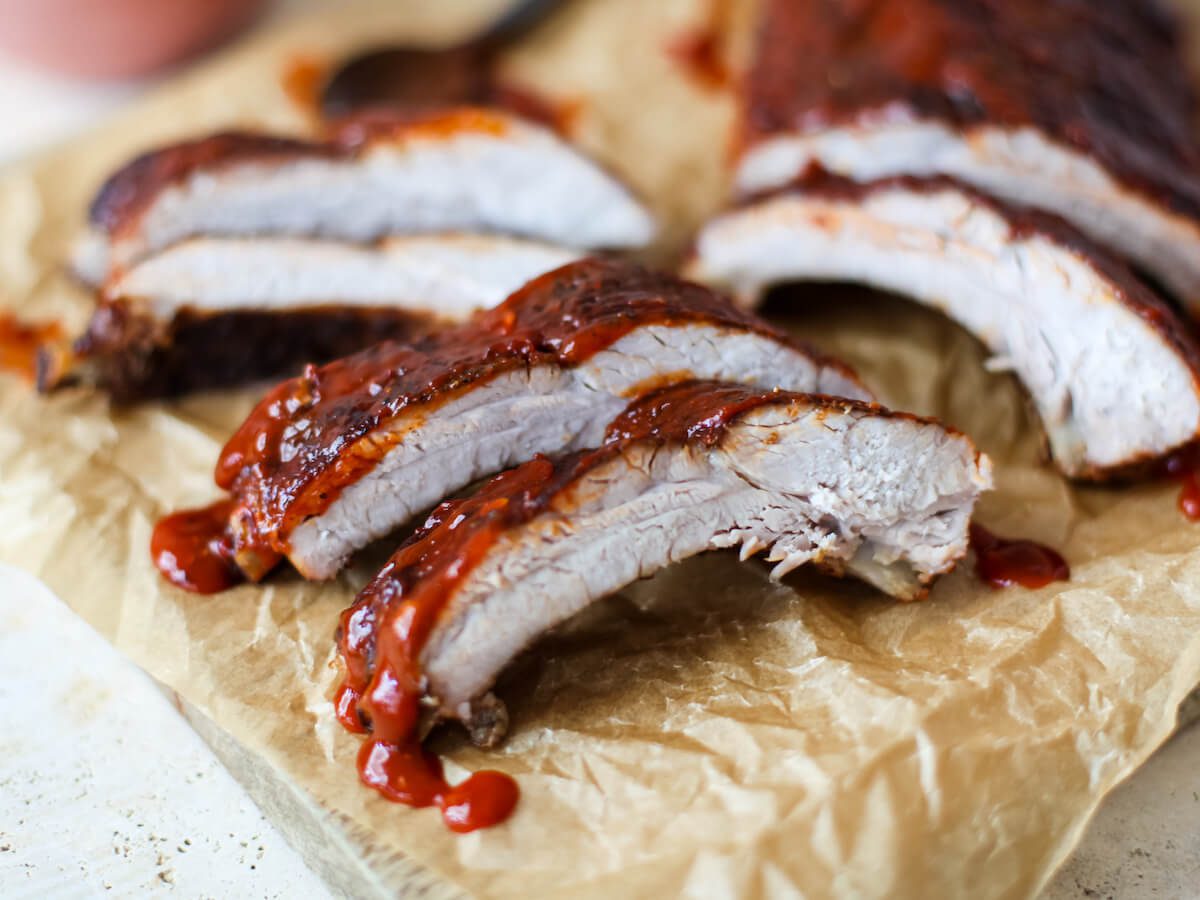
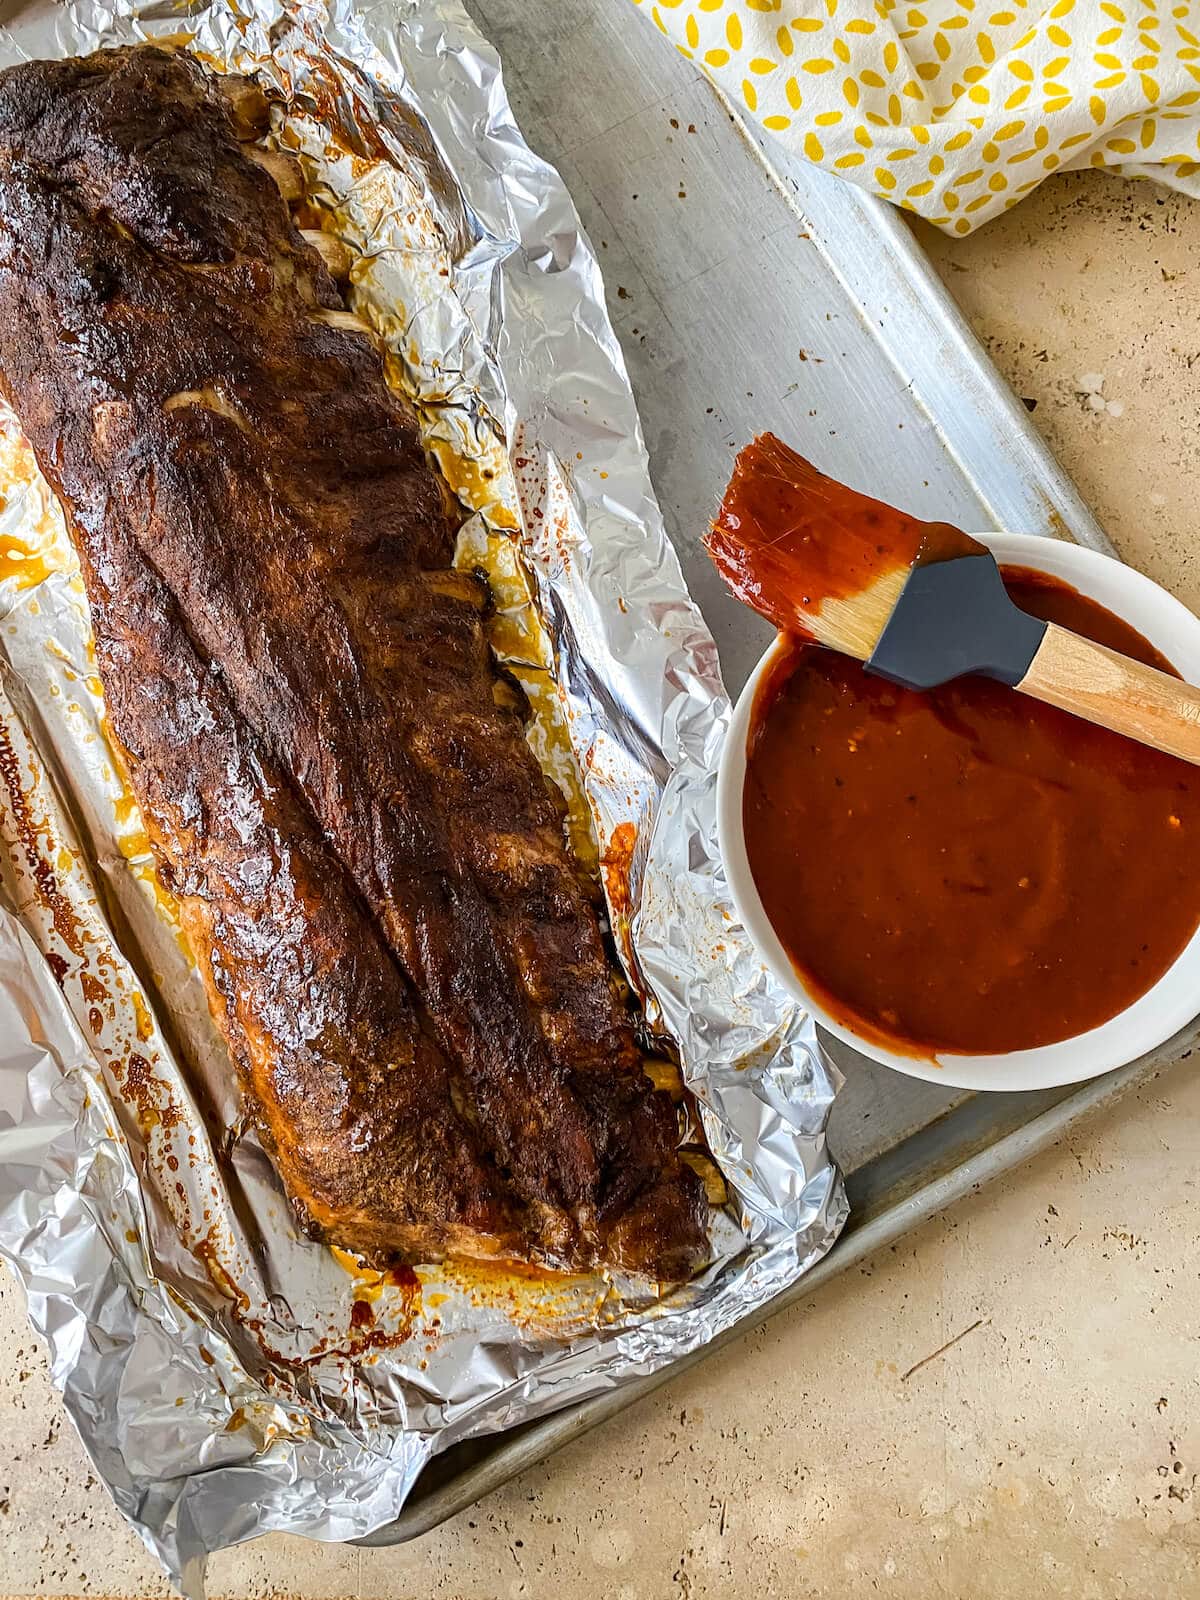
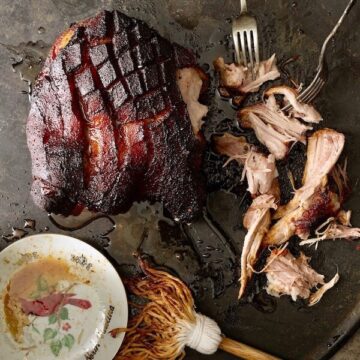
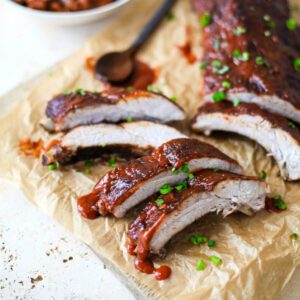
- After the ribs have baked to tender fall-off-the-bone perfection, carefully unwrap from the foil and baste with BBQ sauce.
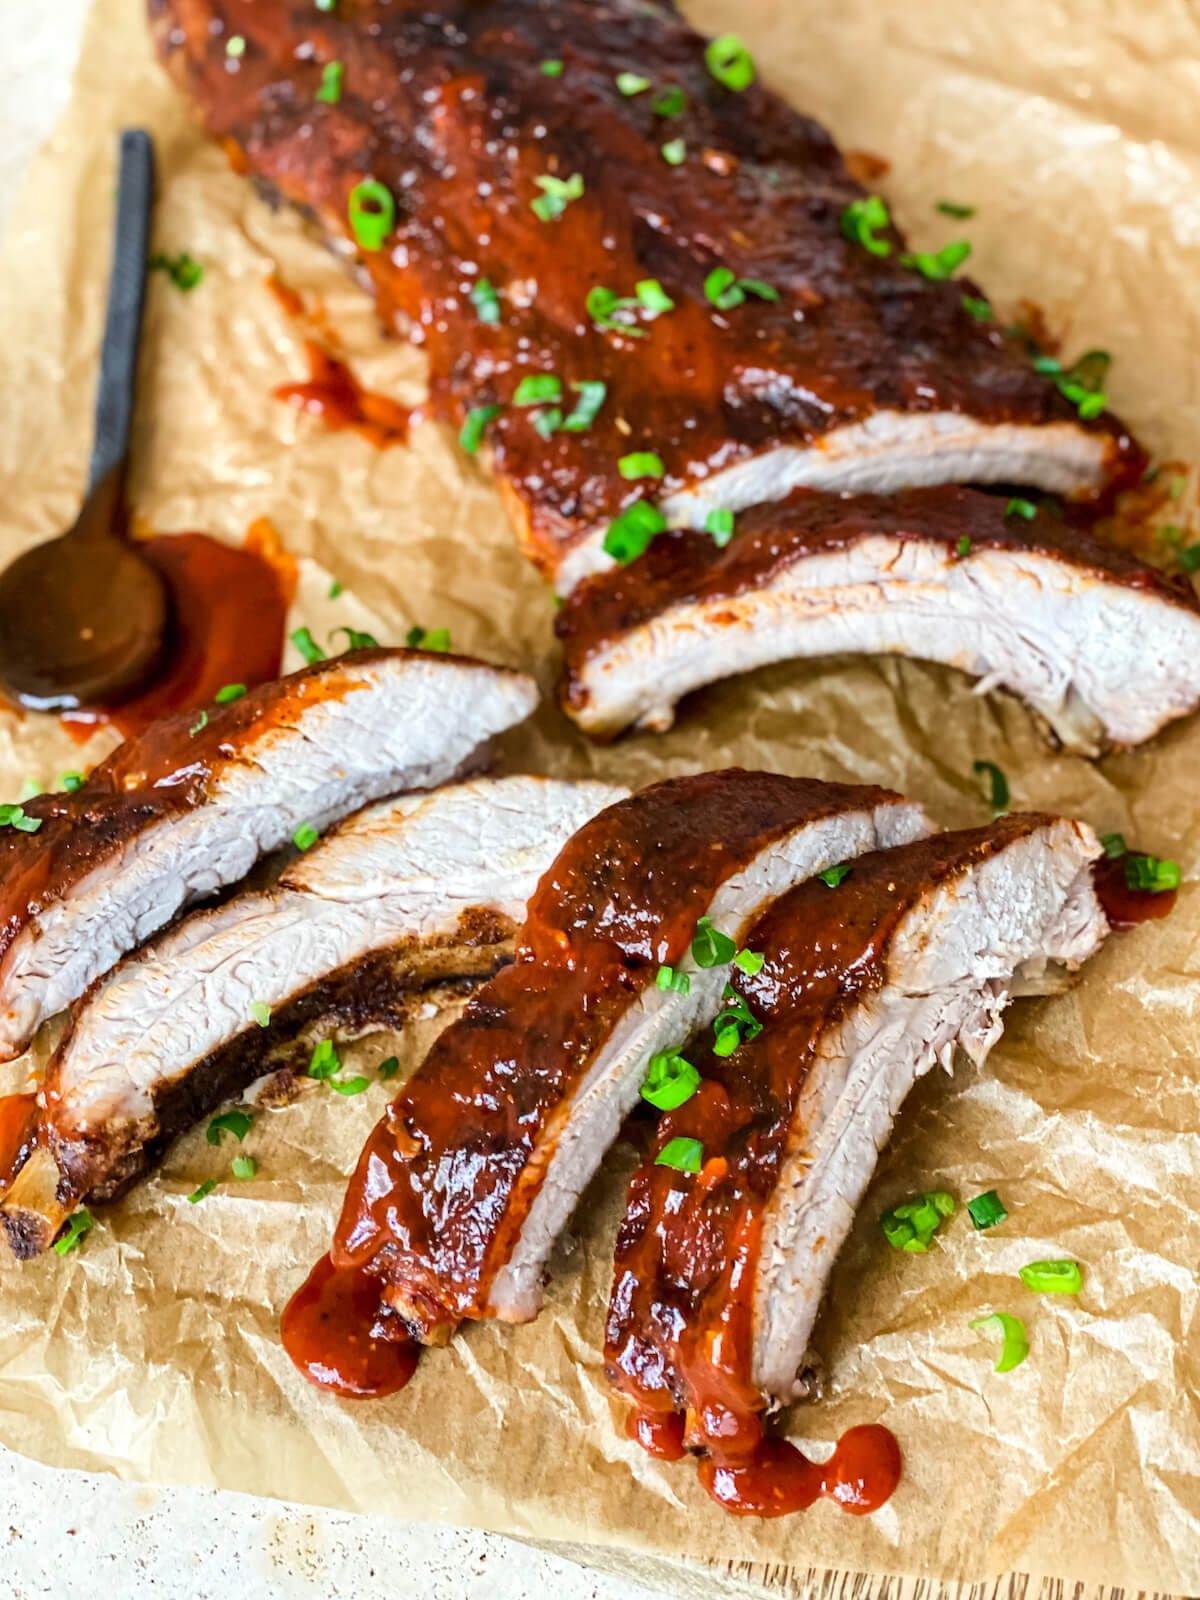
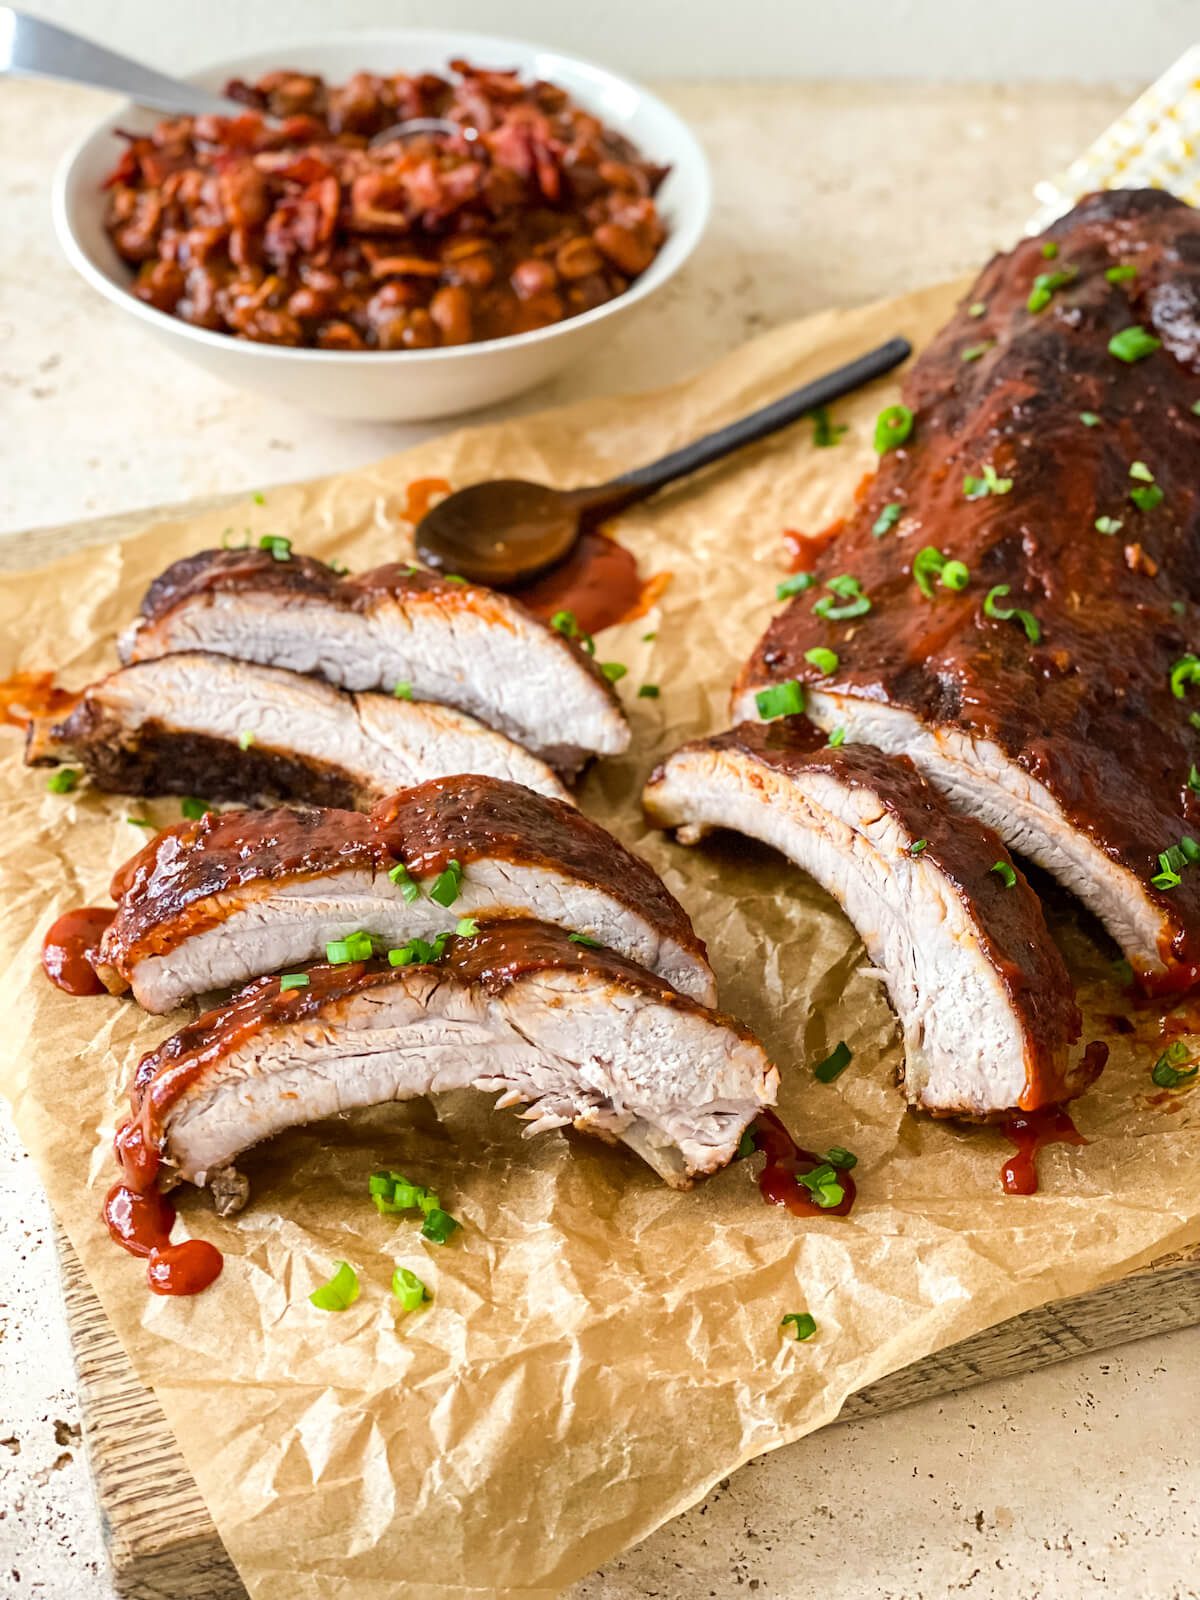
- Slice ribs apart, garnish with scallions or herbs, if desired, and serve with extra BBQ sauce.
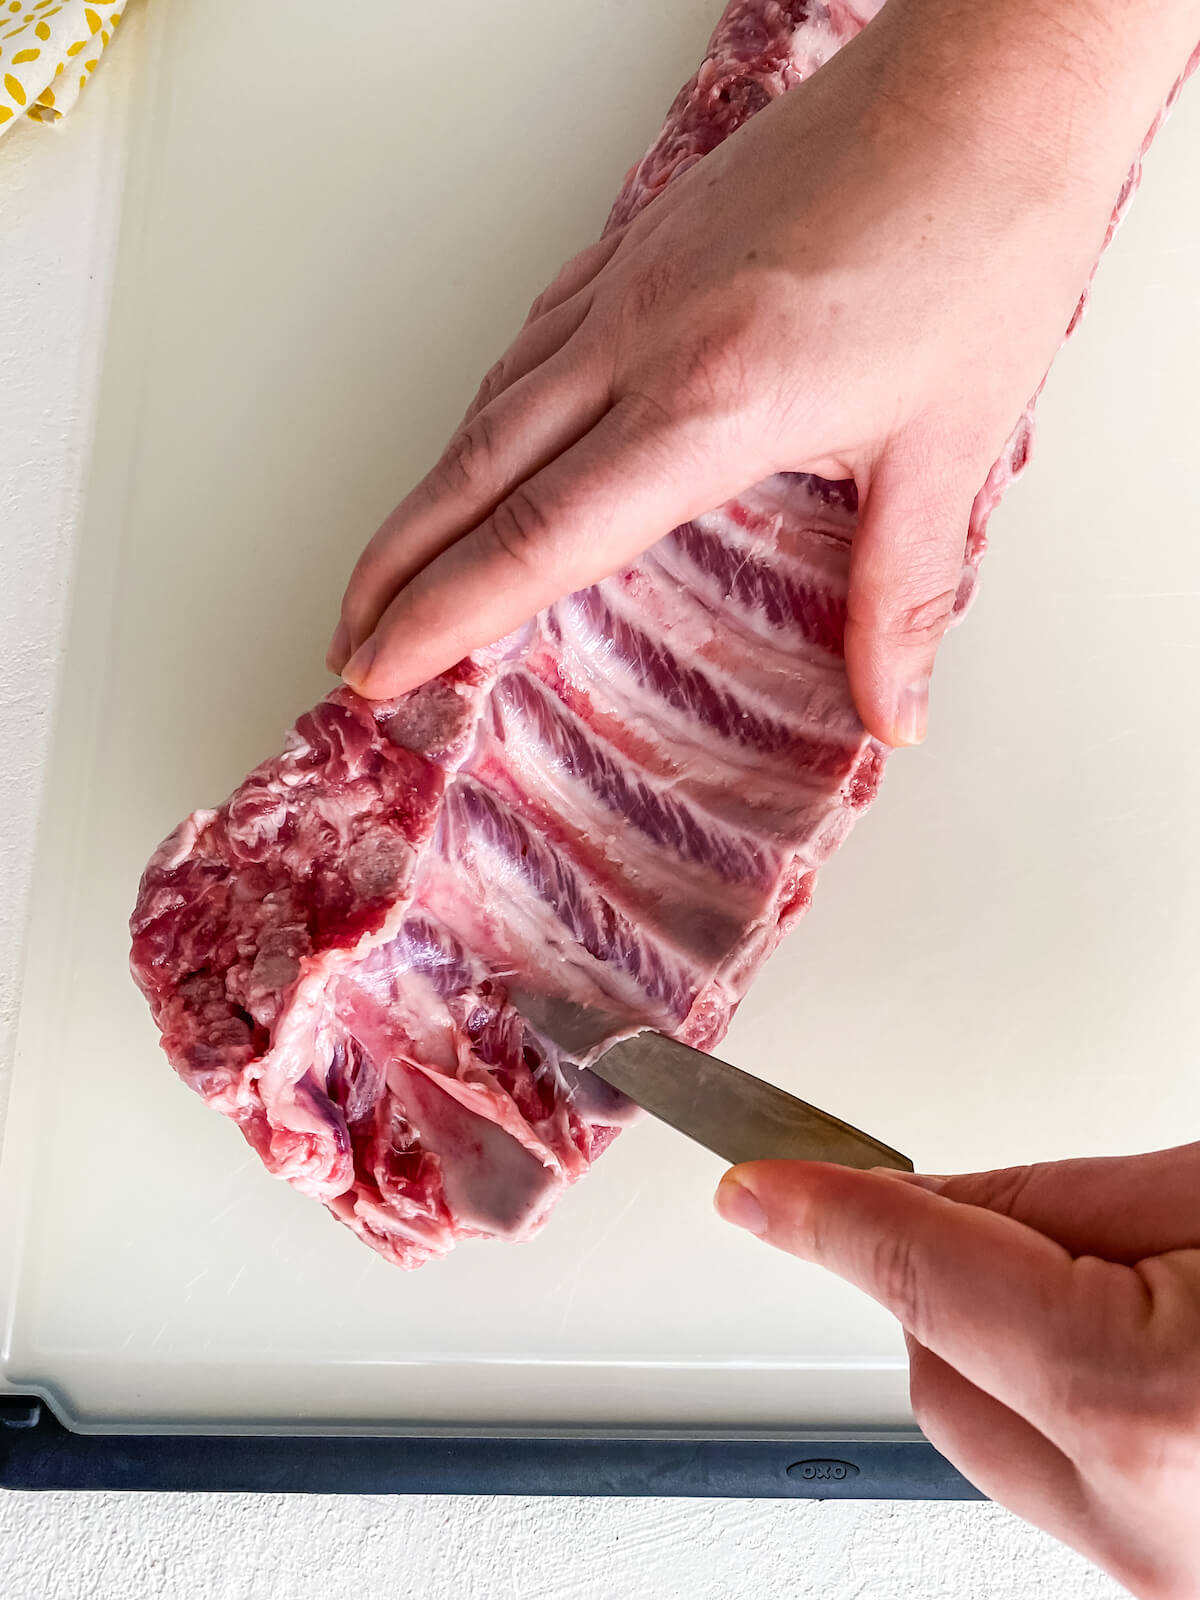
- Step 1: Remove membrane from the bottom of the ribs using a paring knife.
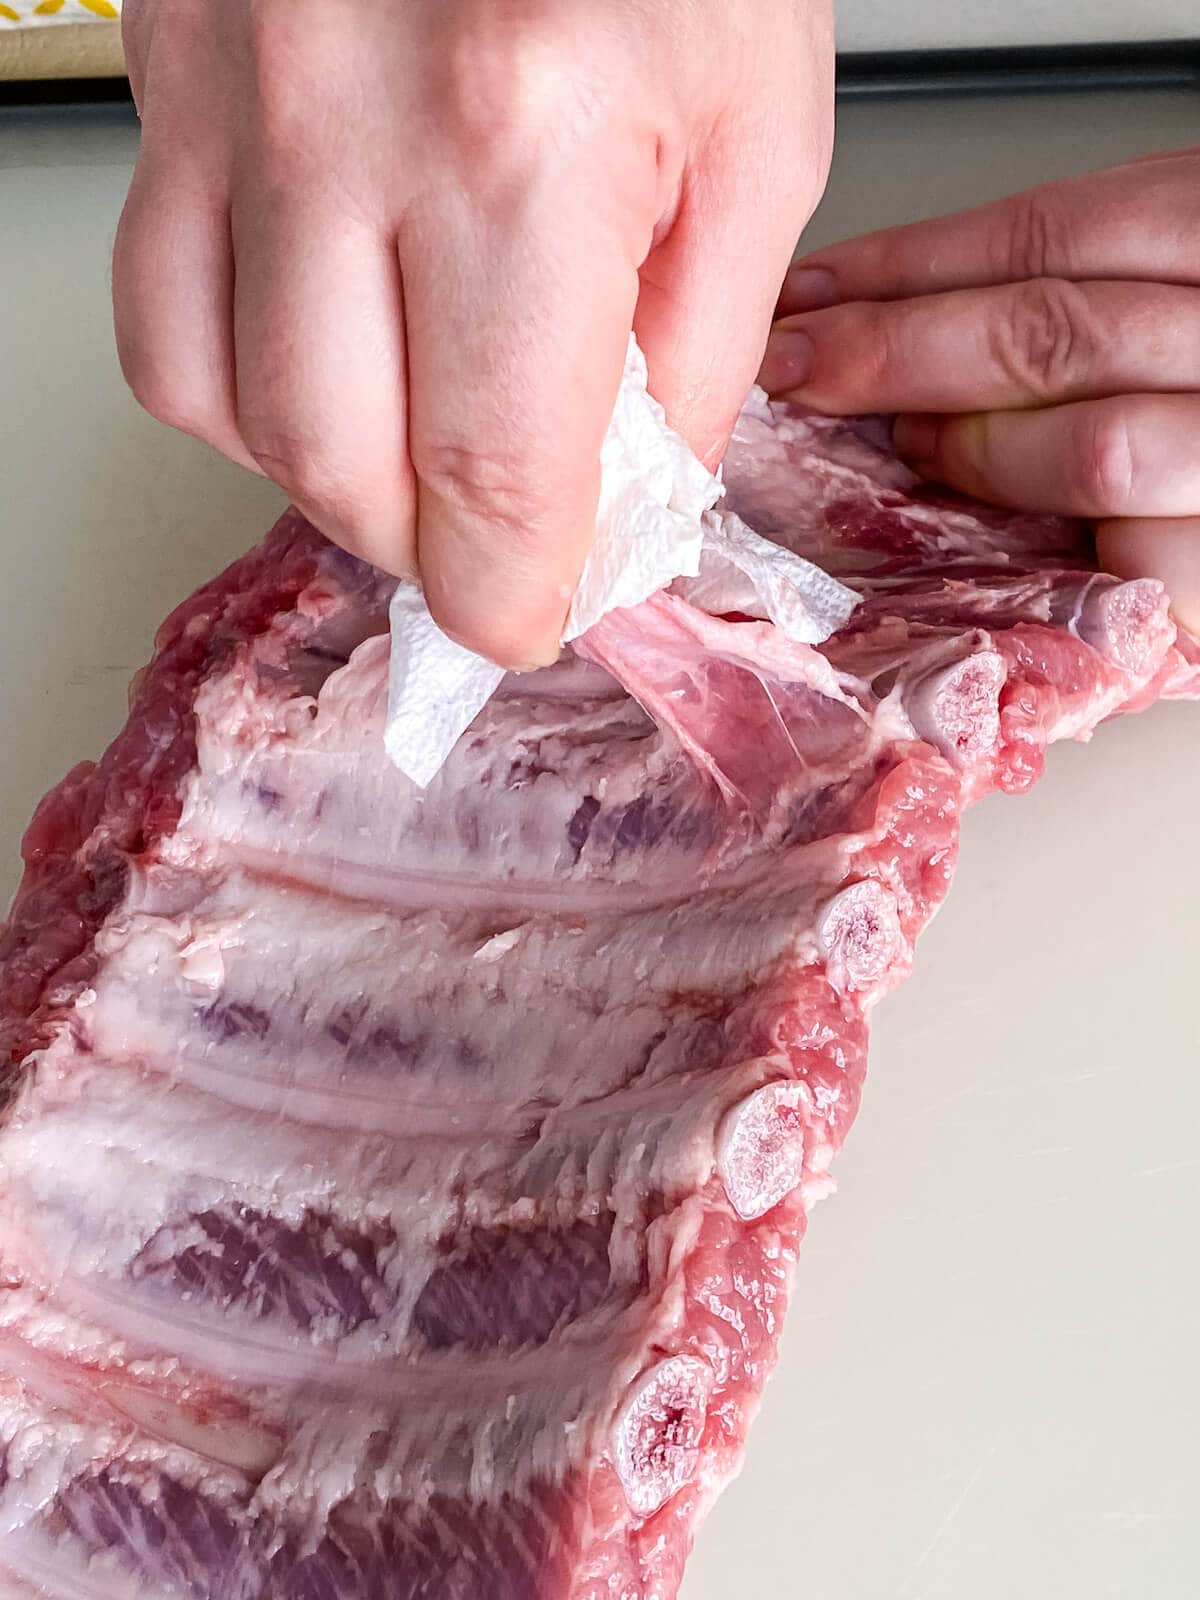
- Step 2: Alternatively remove membrane from ribs using a paper towel to grasp it and pull away.
- Step 3: Lay each rack on a large piece of foil and rub with seasonings on both sides. Wrap and bake.
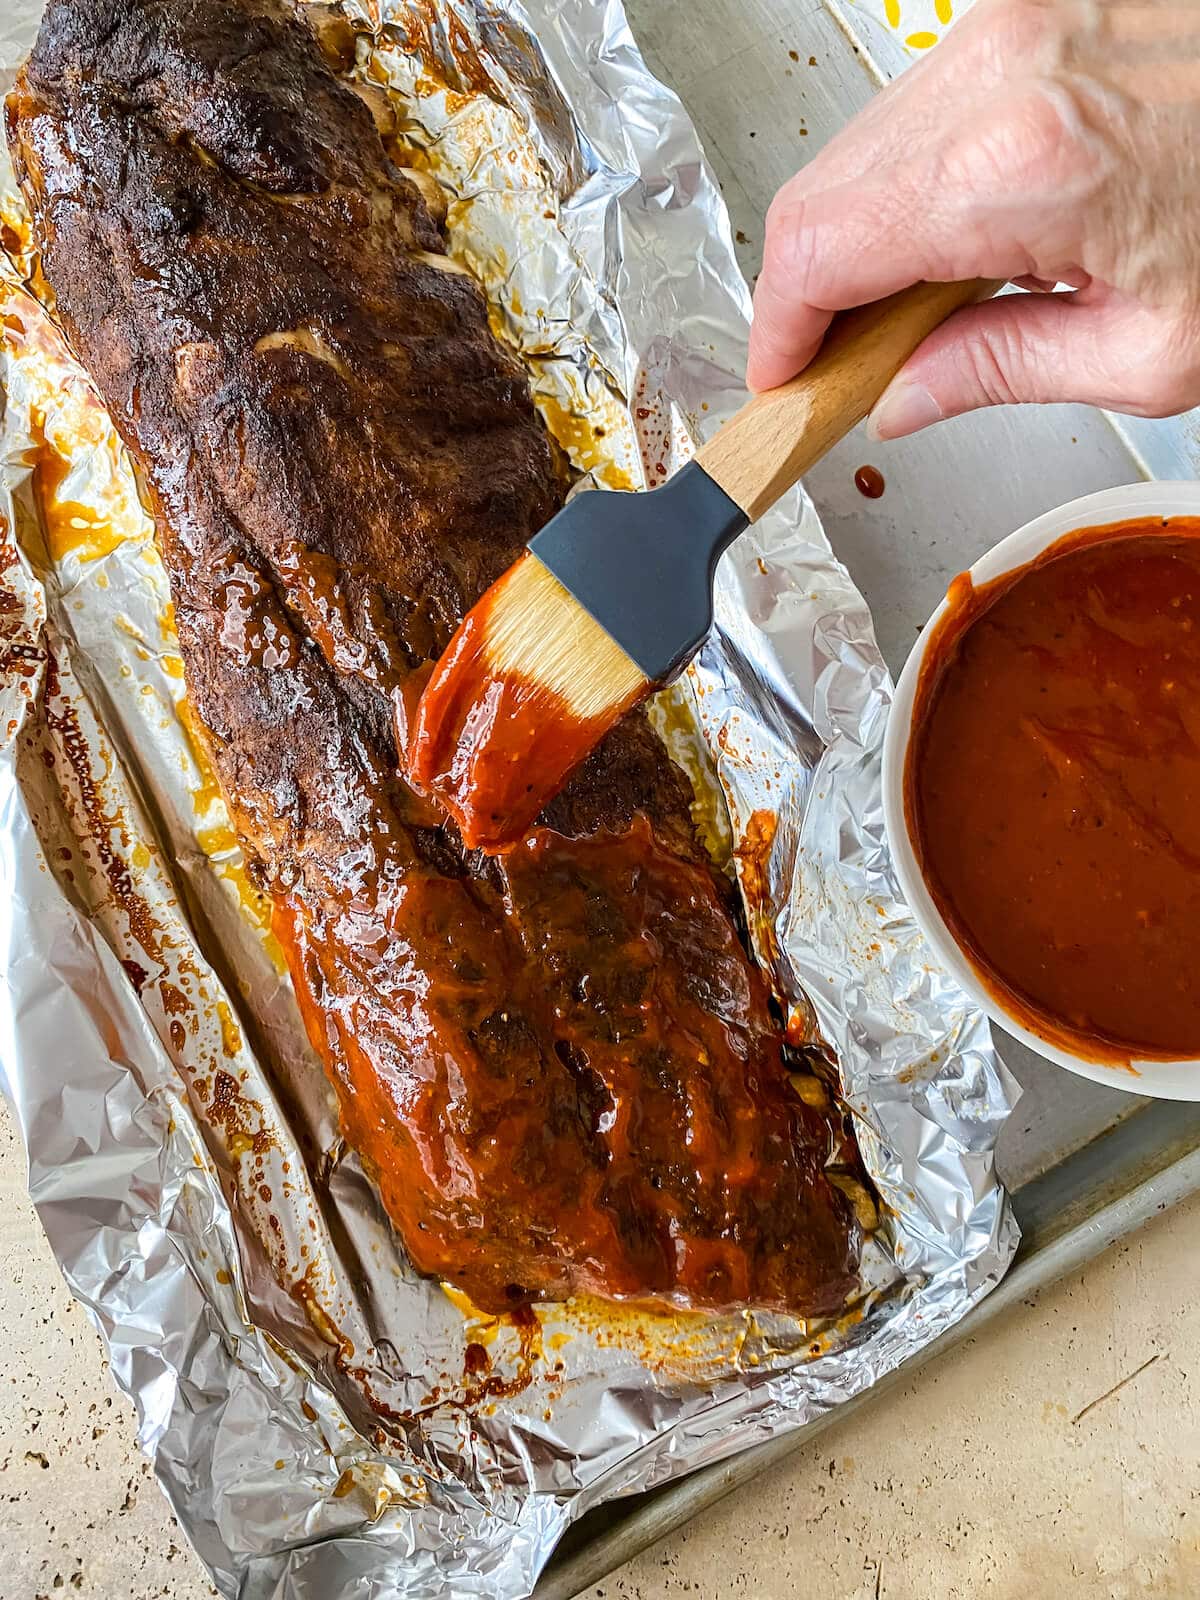
- Step 4: When cooked and tender, unwrap ribs and brush with BBQ sauce.
Tara's favorite rubs and BBQ sauces
The key to making the best oven-baked ribs is choosing the right rub and BBQ sauce.
Rub: The rub goes on before the ribs are cooked and can be as simple as salt and pepper, or as delicious as my homemade Terrific 10-Ingredient BBQ Rub.
You can also use your favorite purchased rub. Look for something with a little spice, or heat. I also recommend rubs that have a touch of garlic powder or hint of sugar.
Sauce: The BBQ sauce goes on once the ribs have finished cooking to give each bite a tangy zip. It can be sweet, spicy, thick, or thin. Your choice!
Try making a homemade sauce like my Memphis BBQ Sauce, use your favorite store-bought BBQ sauce/hot sauce, or check out my recipe for sprucing up store-bought BBQ sauce. This fantastic semi-homemade sauce uses a few pantry staples to boost the flavor power of whatever sauce you decide to use. You'll love it!
Tara's top tips
Remove the membranes: Removing the membranes makes eating ribs much nicer. It doesn't break down when cooked so your guests would need to remove it before enjoying the ribs. I usually use a pairing knife to get under the membranes and then use a paper towel to tug and remove them.
Finish the ribs on the grill: For a smoky flair, these ribs can be finished on the grill. Remove them from the foil and roast over medium-high heat for 3 to 4 minutes until just starting to char.
Use heavy duty foil: It's really important to get a good seal on the foil packets used for cooking the ribs. In essence, the ribs will be braised in the packets (cooked by the heat of the oven and the steam trapped inside the the foil). I find that using a heavy duty foil makes a big difference in creating a tight seal. It also prevents accidental rips in the packet that could release the steam and juices.
Make-ahead and storage
Make-ahead: You can fully cook the ribs up to 4 days ahead and store in the fridge. Just make sure to cool them quickly before re-wrapping in plastic wrap and refrigerating. Reheat fully before serving.
Refrigerate: Place leftover ribs in an airtight container and keep them refrigerated for up to 5 days.
Reheat: If needed, baste the ribs with additional sauce and then warm them in a low temperature oven. Make sure to cover them with foil so they retain their moisture. The ribs can also be reheated without foil in the microwave until heated through.

What to serve with baby back ribs
You will love serving oven-baked ribs with my Homemade BBQ Baked Beans–a classic barbecue side dish. And, don't forget the Honey Cornbread Muffins!
Get more side dish inspiration with these recipes:
FAQ
For this recipe you do not need to put water in the bottom of the baking pan. Once seasoned, the baby back ribs will be wrapped and sealed in thick aluminum foil packets and cooked at high temperature (400ºF). Steam from the cooking ribs will be trapped inside the packet and will keep the meat moist as it cooks and tenderizes.
To get the most tender ribs, you typically want to bake the ribs bone-side down. When wrapped in foil they technically braise, cooking at a higher heat because of the steam that is created inside the foil packet. Placing the ribs bone-side down helps to trap some of the steam under the bones and breaks down the tough proteins more quickly.
You will need an 1 hour and 30 minutes to 2 hours to cook baby back ribs in the oven. After the first 1 hour and 30 minutes, carefully open a foil packet (be careful of hot steam!). Use a fork to pull at the meat on the ribs. The meat should pull away easily; it should literally fall off the bone. If the meat doesn't pull away, reseal the foil and continue baking to the desired tenderness, up to 30 more minutes.
More delicious barbeque recipes
Rate this recipe! ⭐⭐⭐⭐⭐
Scroll to the bottom of the page to rate and comment on this recipe. Leaving comments, questions, and ratings helps other too!
📖 Full Recipe
Oven-Baked Baby Back Ribs
Ingredients
- 2 racks baby back pork ribs (about 5 pounds total)
- 2 teaspoons EACH kosher salt and pepper (- OR -)
- 5 tablespoons BBQ dry rub (use either the rub or salt & pepper to season the ribs)
- 1½ cups BBQ sauce
- Sliced scallions or herbs (for garnish)
Instructions
- Heat oven to 400ºF. Place oven rack in the lower third of the oven.
- Pat ribs dry. Remove any large pieces of excess fat on the top of the ribs. Remove the membrane from the bottom of the ribs by pulling it off with a paper towel if needed.
- Place each rack of ribs on a sheet of heavy-duty (or double layer of regular) aluminum foil large enough to wrap around the ribs.
- Sprinkle each rib rack with salt and pepper. OR, if not using salt and pepper, sprinkle all over generously with the BBQ dry rub.
- Wrap each rack of ribs in foil making an air tight seal. Transfer racks to rimmed baking sheet and place them side by side (they can be overlapping if needed).
- Bake for 1 hour and 30 minutes. Check for tenderness by carefully opening a packet and using a fork to pull the meat on the ribs. The meat should fall off the bone. If you'd like them a little more tender, bake them up to 30 more minutes.
- Remove from the oven and unwrap the ribs. Brush with some of the BBQ sauce. Transfer to a cutting board and slice into ribs. Garnish with sliced scallions or herbs if desired and serve with extra BBQ sauce.
Notes
Nutrition Per Serving

Tara Teaspoon
I’ve been in food publishing for over 25 years, creating recipes & food-styling for magazines, books, television, food brands, & advertising. With two cookbooks under my belt and thousands of my recipes at your fingertips, I hope you'll be inspired to spend more time in the kitchen!
Sam says
Can you adapt this recipe for boneless pork ribs? Thanks so much.
Tara Teaspoon says
Sam, just simply make the recipe as is with boneless pork ribs. They still need the same type of long, slow, moist cooking. You should be good to go.