
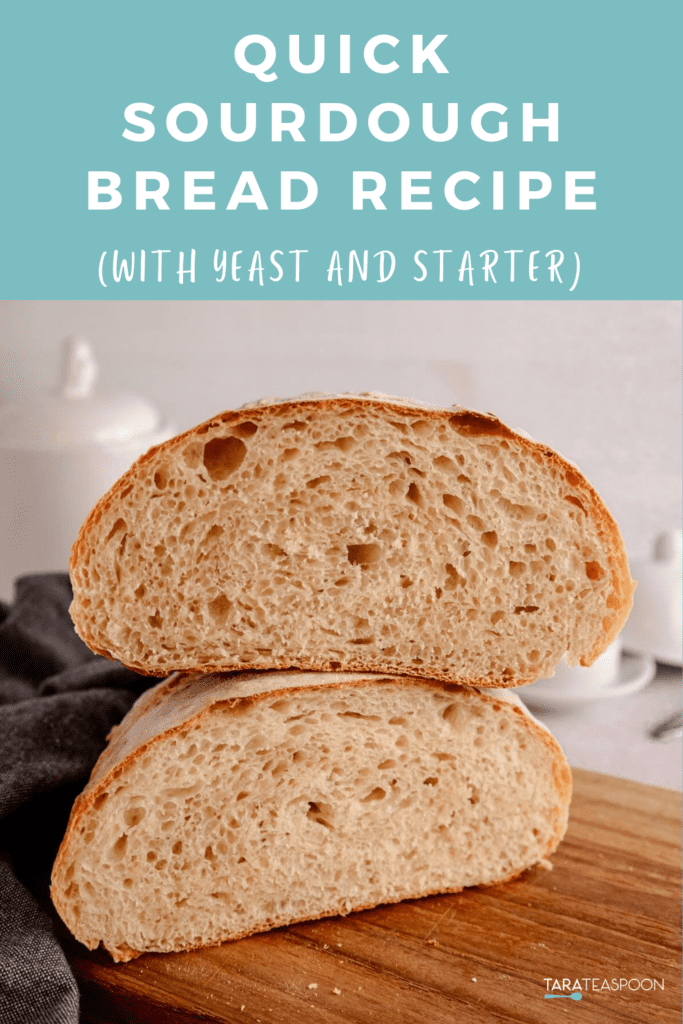

This quick sourdough bread recipe has both yeast and starter! If you're short on time, or a beginner baker, I break down every step of the process for fail-proof sourdough bread. You'll have true sourdough flavor in a fraction of the time.
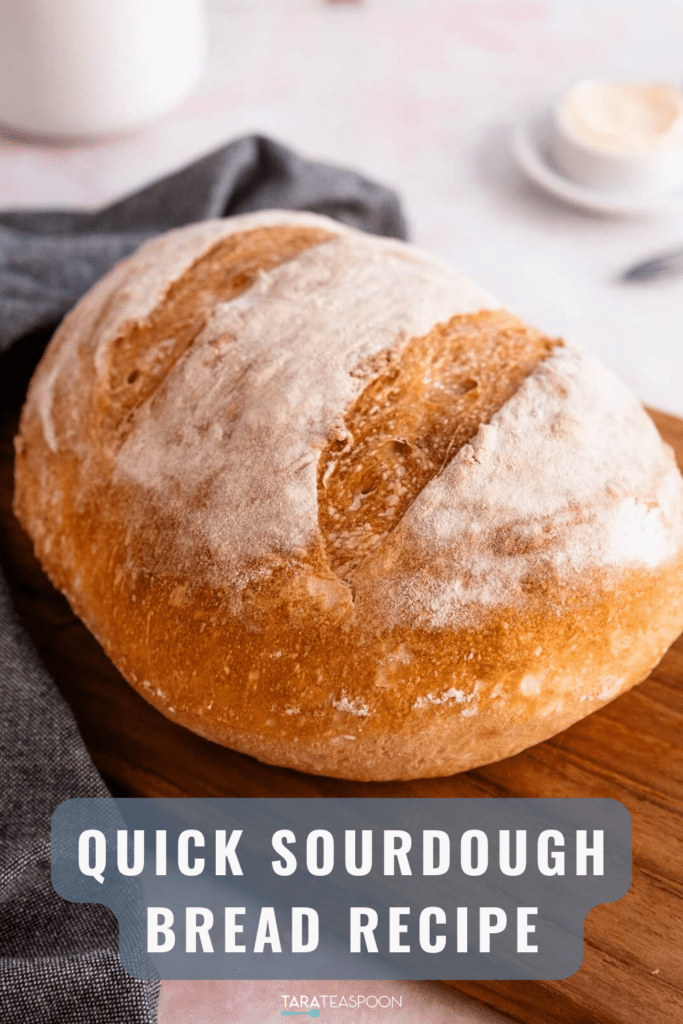
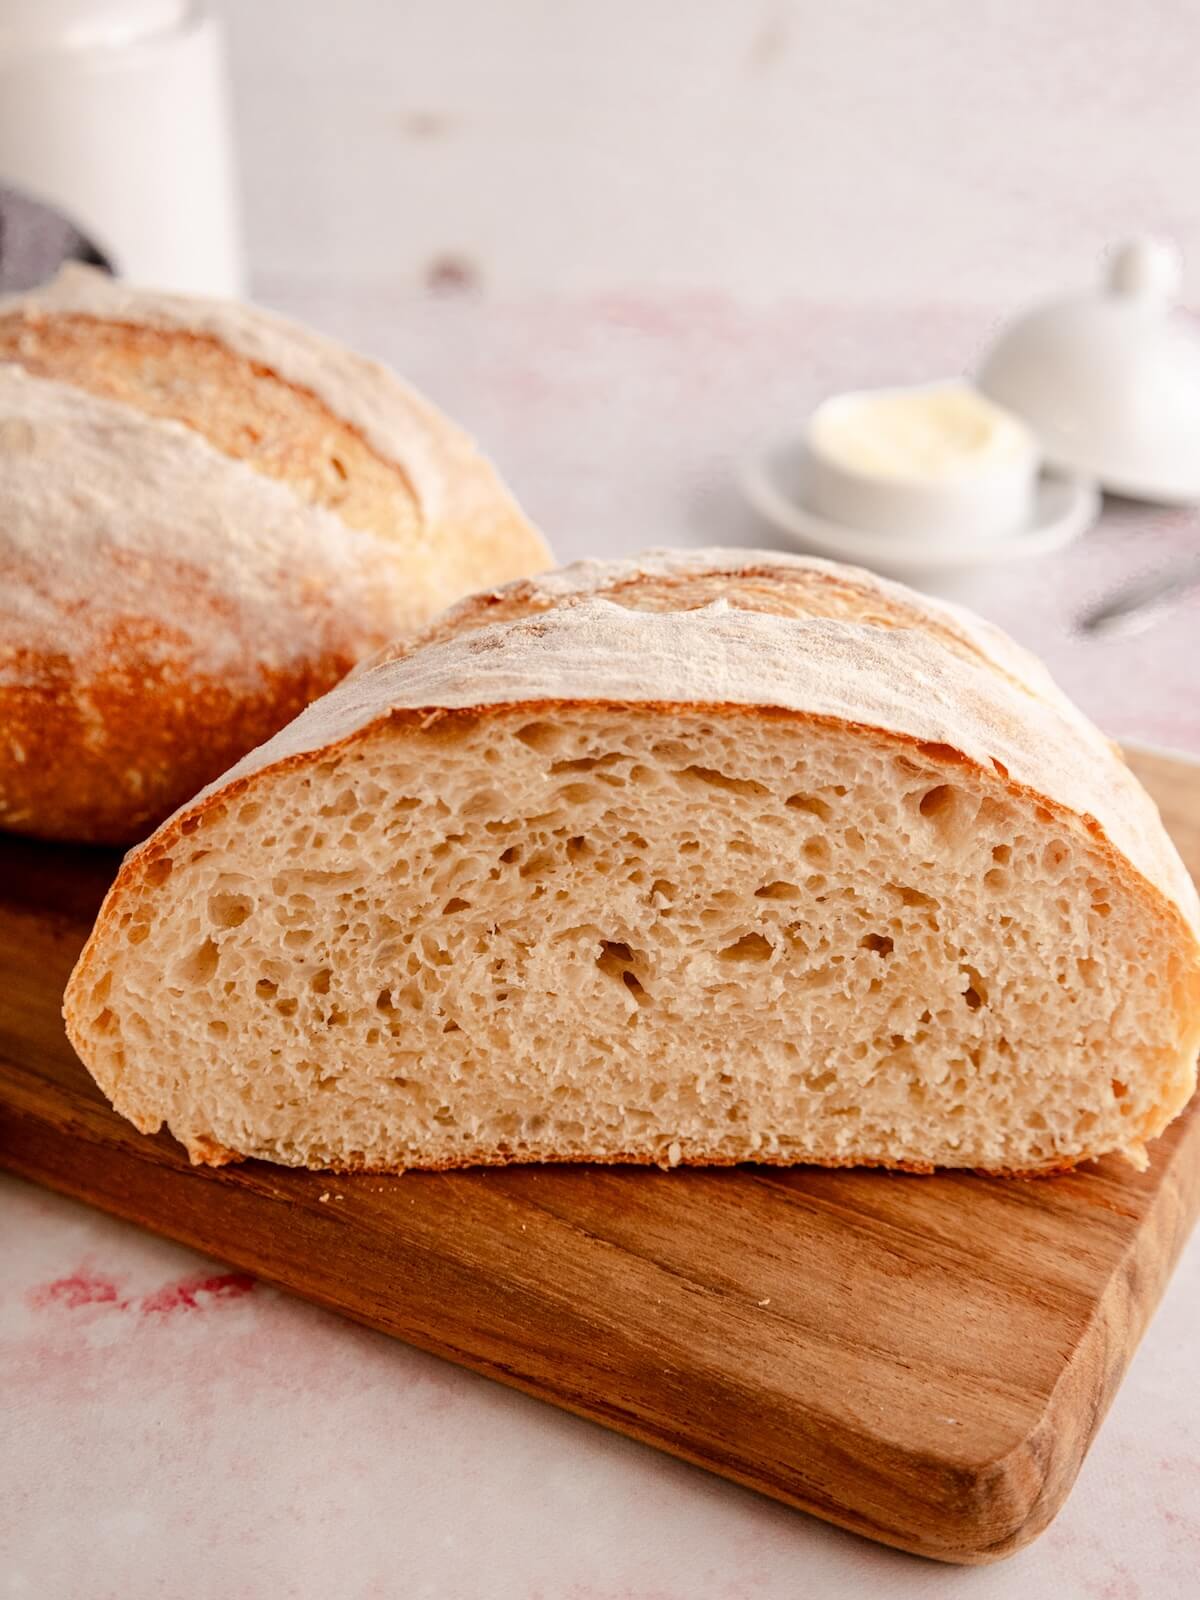
This delicious, rustic loaf of authentic sourdough bread comes together in a matter of hours instead of several days. The combination of starter and yeast provides a reliable rise.
Get the flavor and texture of a classic sourdough loaf in only a few hours with a little boost from yeast.
I'll break down how to feed and keep a sourdough starter, then how to use it in a foolproof loaf of real sourdough bread.
Jump to:
- Tools For Easy Sourdough Bread Making
- What Is Sourdough Bread?
- How This Sourdough Recipe Is Different
- Making Sourdough Bread With Starter And Yeast
- How To Take Care Of A Sourdough Starter
- Activating A Sourdough Starter For Baking
- Ingredients
- How To Make Sourdough Bread With Yeast
- Storage
- What To Serve With Sourdough Bread
- FAQs
- More Easy Bread Recipes
- 📖 Full Recipe
- 💬 Comments & Reviews
Homemade bread isn't fancy, but it's absolutely rewarding and delicious. My top yeast bread is a classic Soft and Fluffy White Bread recipe, and I use a tangzhong to make the texture extra soft.
One of my most popular holiday yeast breads is Pulla Bread, a classic Finnish cardamom loaf, that truly I make all year.
Here I'll teach you how to make a sourdough loaf you'll absolutely love, but so easy you'll be making it often.
Tools For Easy Sourdough Bread Making
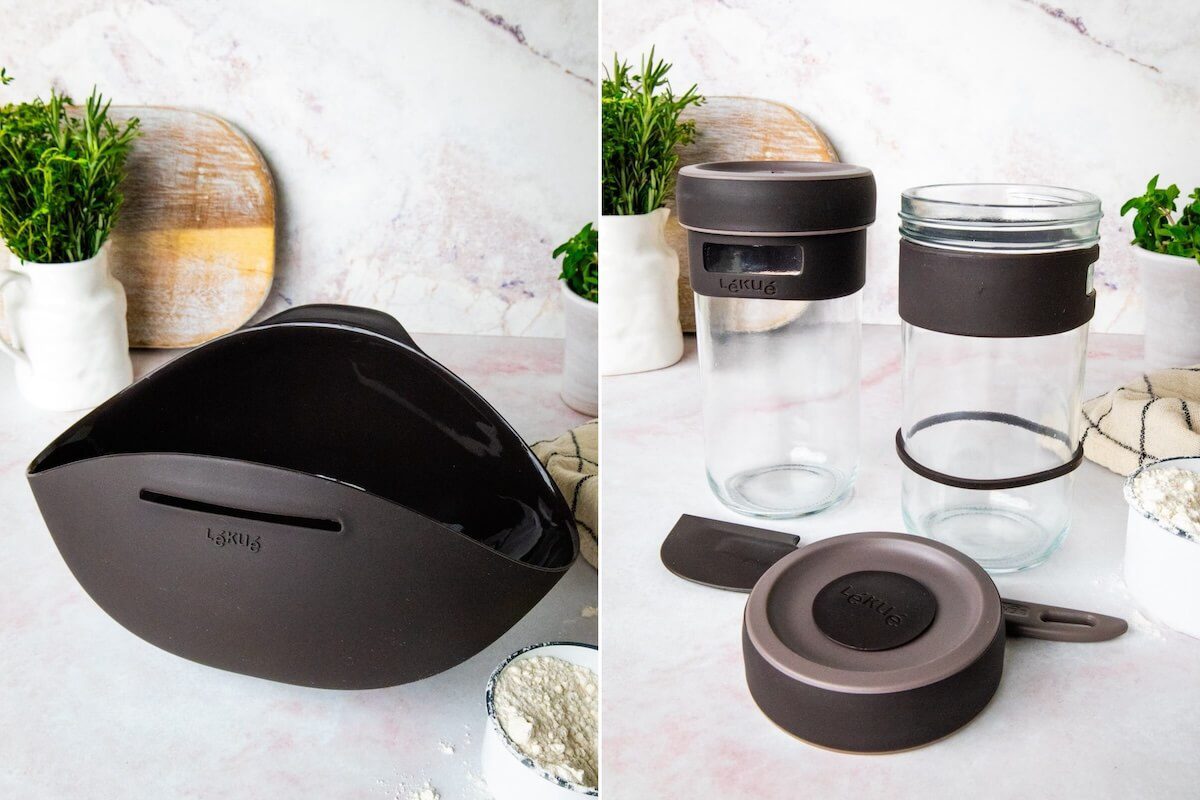
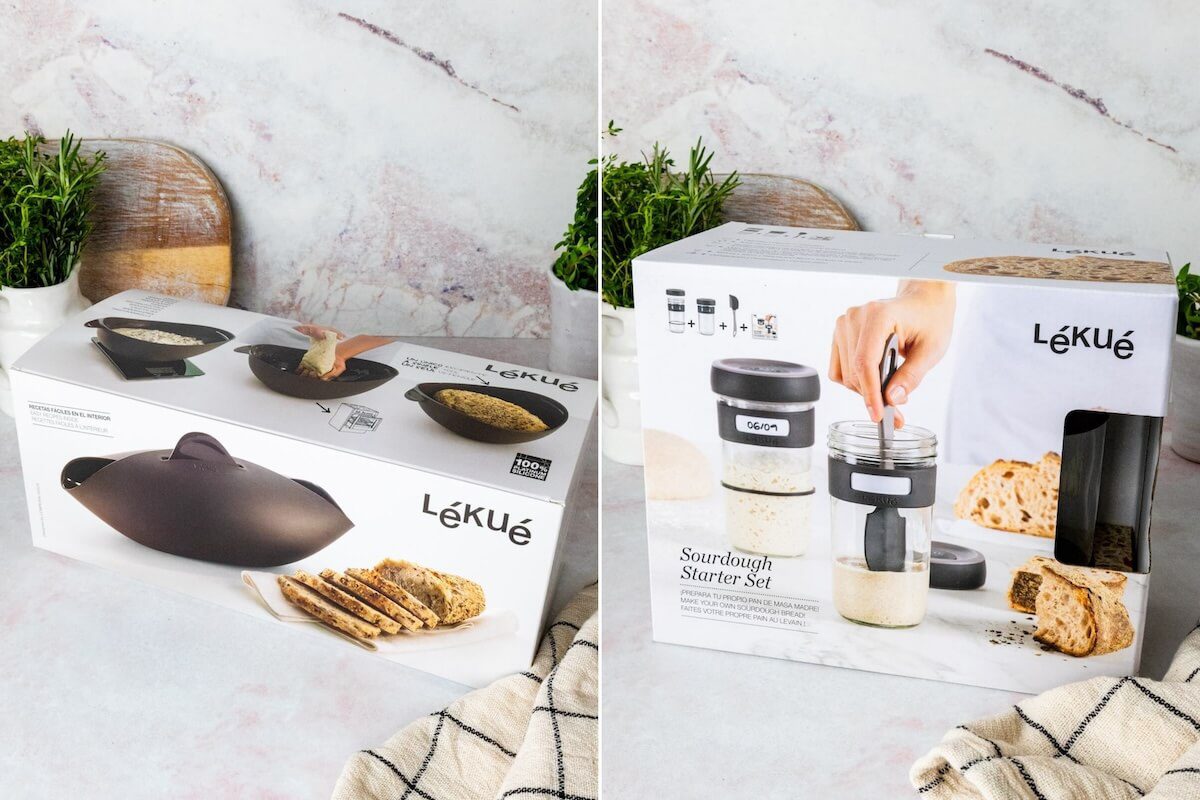
I start with the right tools for sourdough bread making, and the Lékué Bread Maker and Lékué sourdough starter jars to keep my process sleek and efficient.
You'll love the innovative bread tools from Lékué. I use quite a few of their silicone kitchen tools including a microwave grill, reusable storage bags, and to-go containers.
When I use the Lékué tools there’s no need for specialty equipment like a banneton or Dutch oven–you can mix the dough and bake the loaf right in the flexible, silicone Lékué Bread Maker.
Here is the list of simple tools I like to have on hand to make my sourdough loaf with yeast:
- Lékué sourdough starter jars, and bread maker
- Digital kitchen scale
- Measuring tools like a good set of cups and spoons
- Dough scraper
- Plastic wrap or kitchen towels
- Lame, razor blade, or sharp knife
- Oven thermometer
- Cooling rack
Notice I DIDN'T list a slew of things like banneton or proofing basket, Dutch oven or bread cloche, or even parchment paper! Lékué tools keep it simple. Read how below.
What Is Sourdough Bread?
True sourdough bread is leavened naturally, using wild yeast and lactobacillus bacteria for fermentation. The difference is regular bread relies on commercial yeast, sourdough utilizes a starter – a fermented mixture of flour and water.
There are a few great benefits of sourdough bread. A sourdough starter, if fed and kept active, imparts a distinctive tangy flavor. This is also achieved through an extended fermentation process of the dough.
Beyond flavor, the prolonged fermentation also aids in gluten breakdown, potentially increasing digestibility! So some gluten intolerant people can eat sourdough without issues. (But those with Celiac disease should still not consume sourdough bread made with wheat flour).
How This Sourdough Recipe Is Different
This sourdough recipe is different because it takes a fraction of the time as a traditional sourdough loaf.
Making a sourdough loaf is a slow-paced journey. Unlike quick-rise commercial yeast, sourdough relies on long hours of fermentation.
From developing a starter to allowing the dough to rest, ferment, and proof, with each phase contributing to its unique texture and tanginess, it can take two to more days.
I added a little instant yeast to this recipe to speed the process and help leaven the bread without the long hours. You'll still get a great sourdough flavor because of the added starter.
Tools You'll Need For Quick Sourdough Bread
The Lékué bread maker simplifies the bread-making process by streamlining it and minimizing the need for additional tools.
Its design integrates mixing, kneading, proofing, and baking functions, allowing you to handle the entire bread-making journey in one container! This eliminates the necessity for a separate mixing bowl, a banneton, and Dutch oven, and reduces cleanup.
The silicone material of the Lékué bread maker offers a non-stick surface, making it easier to work with the dough and eliminating the need for excessive flour or parchment paper.
With its all-in-one functionality, this tool becomes especially beneficial for those who want to get into bread making without accumulating an arsenal of specialized equipment.
Making Sourdough Bread With Starter And Yeast
The combination of a sourdough starter and yeast adds depth to the flavor profile while providing a reliable rise.
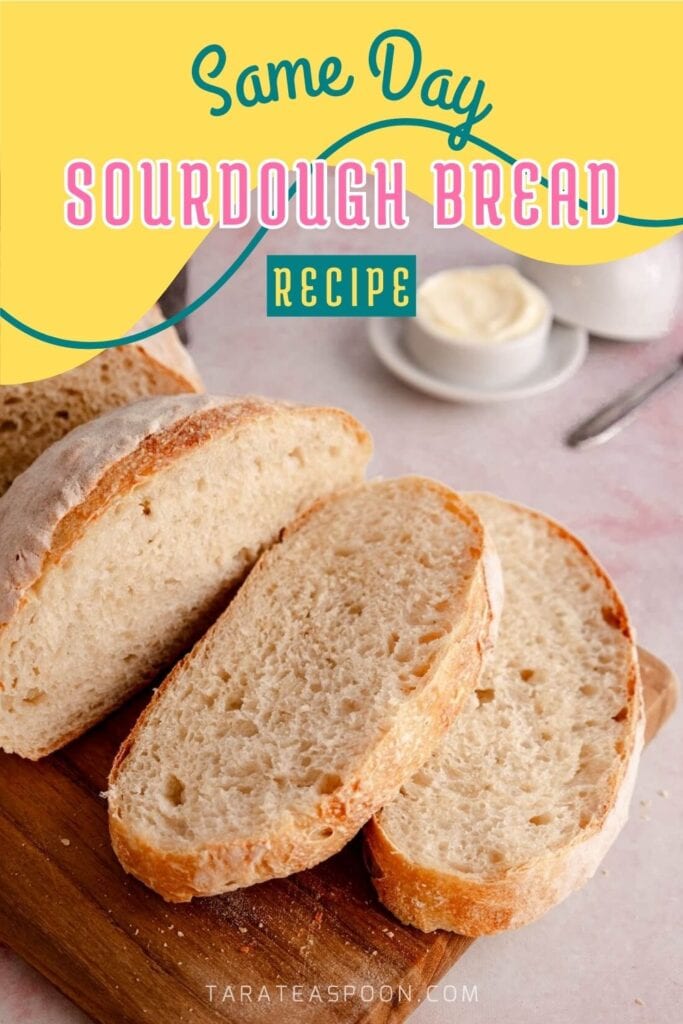
This method ensures a consistent and amazing homemade bread with minimal fuss. The resulting loaf has the characteristic tanginess of sourdough, complemented by the reliability of instant yeast, making it something beginner, and experienced bakers can enjoy.
Simply add yeast to the recipe at the same time you add the active, ripe starter.
How To Take Care Of A Sourdough Starter
Taking care of a sourdough starter is simple, but requires an easy yet consistent routine. Store it in a glass container with a loose lid to allow for airflow.
You'll also need to feed it regularly if you plan to use it. This is called keeping an ACTIVE starter. An active starter will get to the "ripe" stage faster, and leaven your bread better.
You'll discard a portion, leaving only a small amount, and replenish with equal parts flour and water. Keep it at room temperature, ideally between 70-75°F (21-24°C), to encourage growth activity.
Now, if you're not baking frequently, refrigerate the starter, remembering to bring it back to room temperature before use. The starter will stay alive in the fridge without feeding for weeks or months.
Activating A Sourdough Starter For Baking
Here's how to prepare a sourdough starter to bake. You want to create a "ripe" starter. A starter is ripe when it has been fed, risen (and almost doubled in size), is bubbly on top and has a sour smell and looser consistency.
This means the yeasts have activated and are ready to be mixed into a loaf of bread.
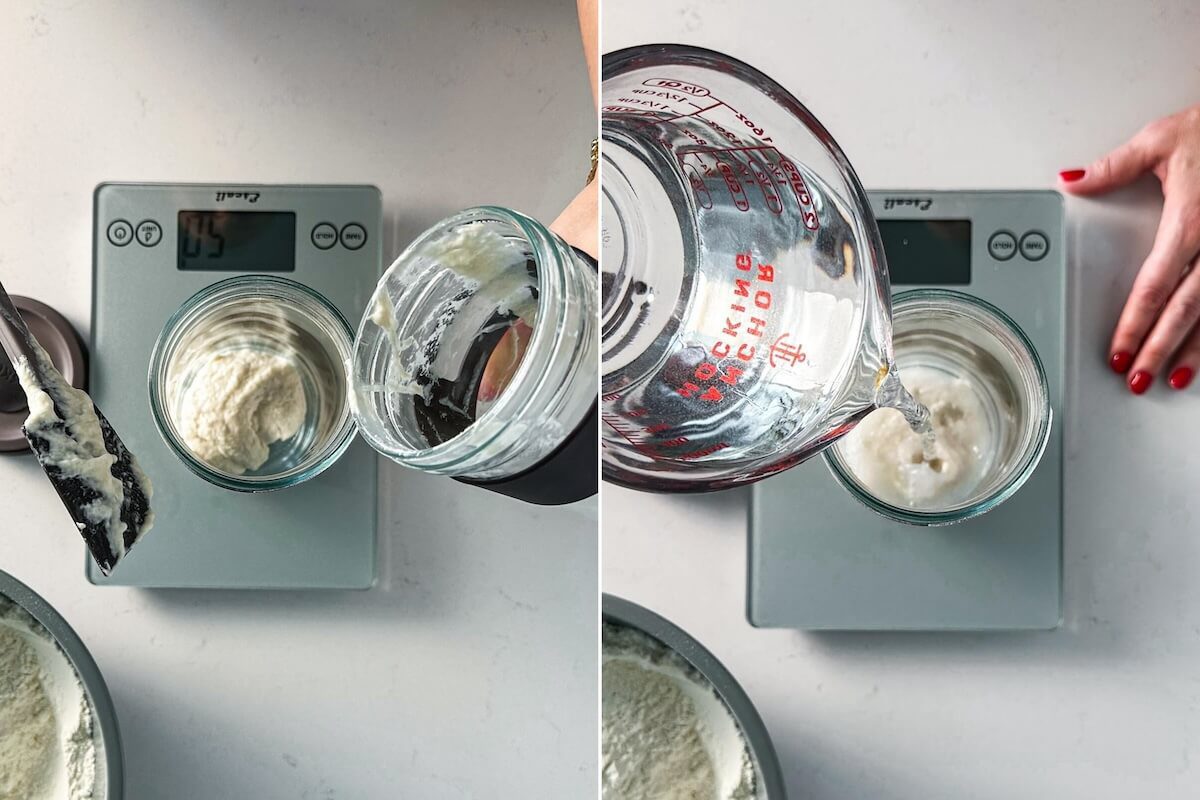
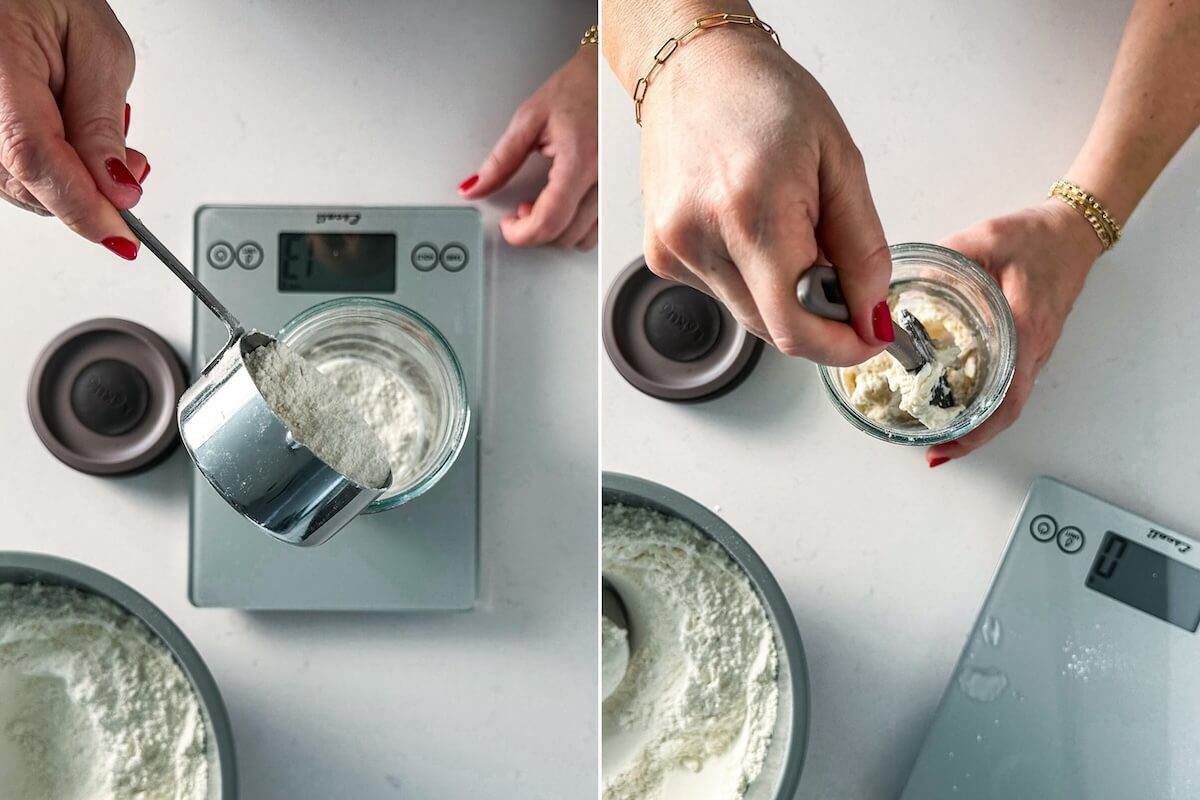
- Add active starter into a clean jar. (It's helpful to have at least 50 grams or about ½ cup when starting a loaf).
- Reset (tare) the scale then add the same weight of room temperature water to the jar.
- Reset the scale and add the same weight of flour to the jar. (My starter is all-purpose flour so use the same flour as your starter)
- Stir to combine into a sticky mixture and cover the jar.
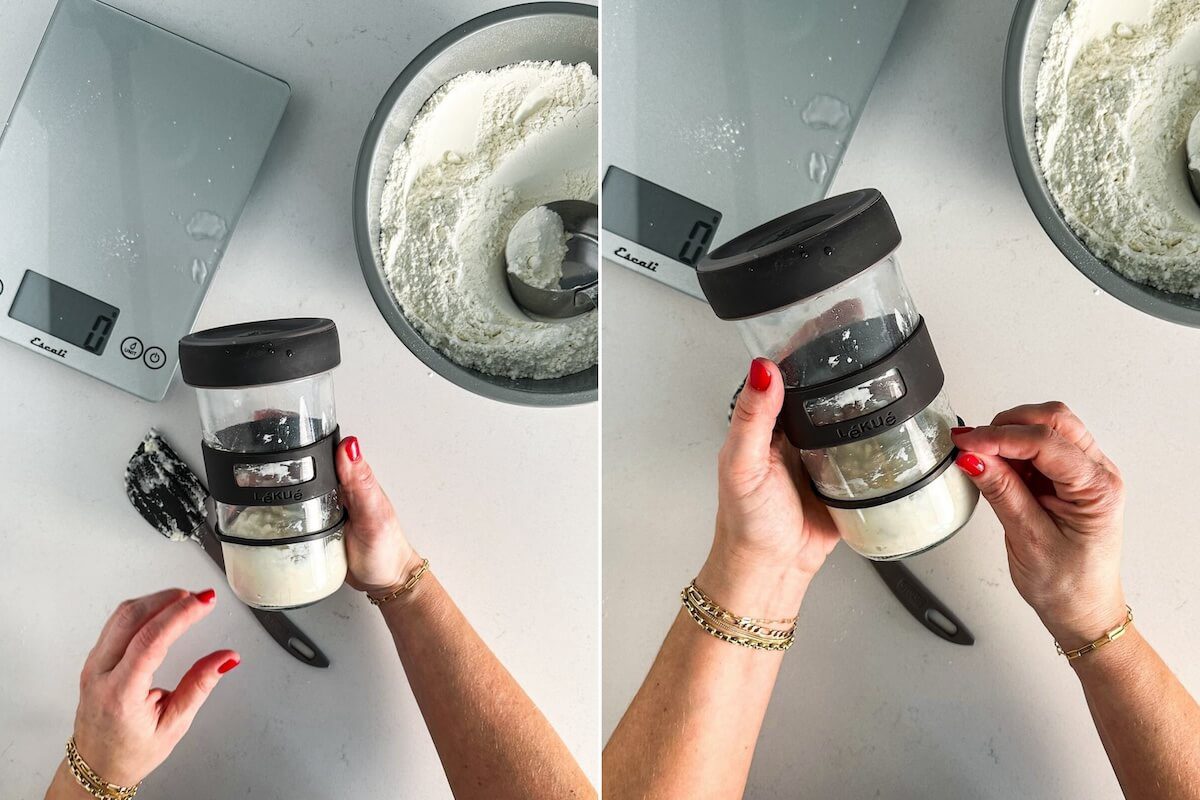
- Mark the level of the mixture in the jar and let sit at room temperature.
- After 2 to 4 hours the starter should be "ripe." Doubled in size and bubbling. It's ready to use in a recipe.
With the Lékué Sourdough Starter Kit jars, you can have one for discard and one for fresh starter. With two jars it's easy to have starter in one and clean and sanitize the other to have ready.
The Lékué jars have a rubber marker that moves on the jar so you can set the level to watch your starter grow.
Ingredients
- Sourdough starter
- Yeast
- Water
- Flour (all-purpose flour)
- Salt
Tools You'll Need
If you DON'T have the Lékué sourdough tools mentioned above, plus a digital scale, here are the tools you'll need to make sourdough bread with yeast.
- Digital kitchen scale: for weighing ingredients precisely.
- Large mixing bowl: for combining ingredients and initial mixing.
- Measuring spoons: to measure the salt!
- Dough scraper: this flexible spatula is useful for handling and shaping the dough.
- Plastic wrap or a kitchen towel: cover the dough during proofing and rising stages.
- Banneton or proofing bowl: provides a place for the final loaf to proof and holds the shape of the formed loaf.
- Parchment paper: to bake the loaf on so there is no sticking.
- Sharp knife or lame: score the top of the loaf before baking.
- Dutch oven or baking pan: A heavy gauge pan or vessel is best for baking the loaf.
- Cooling rack: cools the bread evenly after baking.
How To Make Sourdough Bread With Yeast
If you aren't using a Lékué bread maker, use similar equipment in your kitchen.
- Feed sourdough starter 2 to 3 hours before using. When ripe, begin bread making.

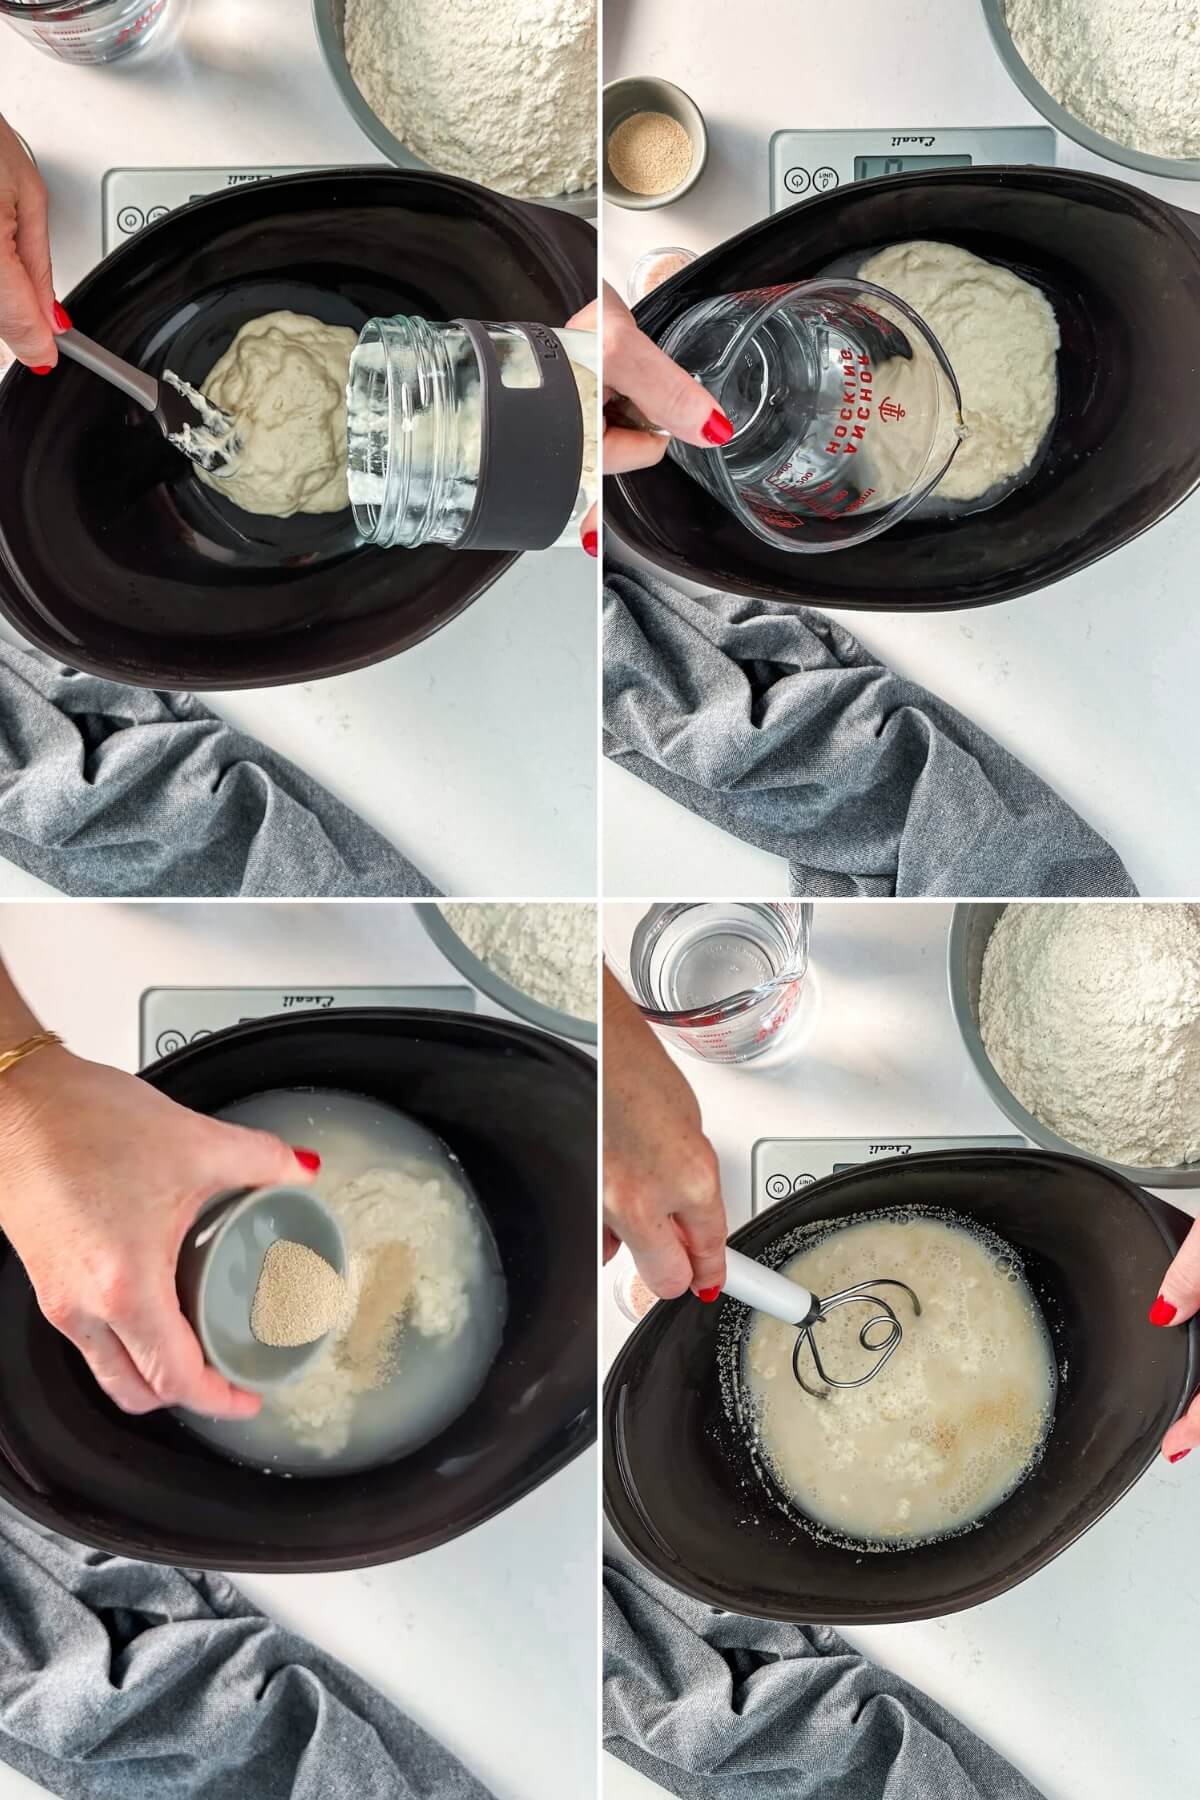
- In a bowl or the Lékué Bread Maker combine the sourdough starter, water, and yeast. Stir with clean hands or a dough whisk to combine.
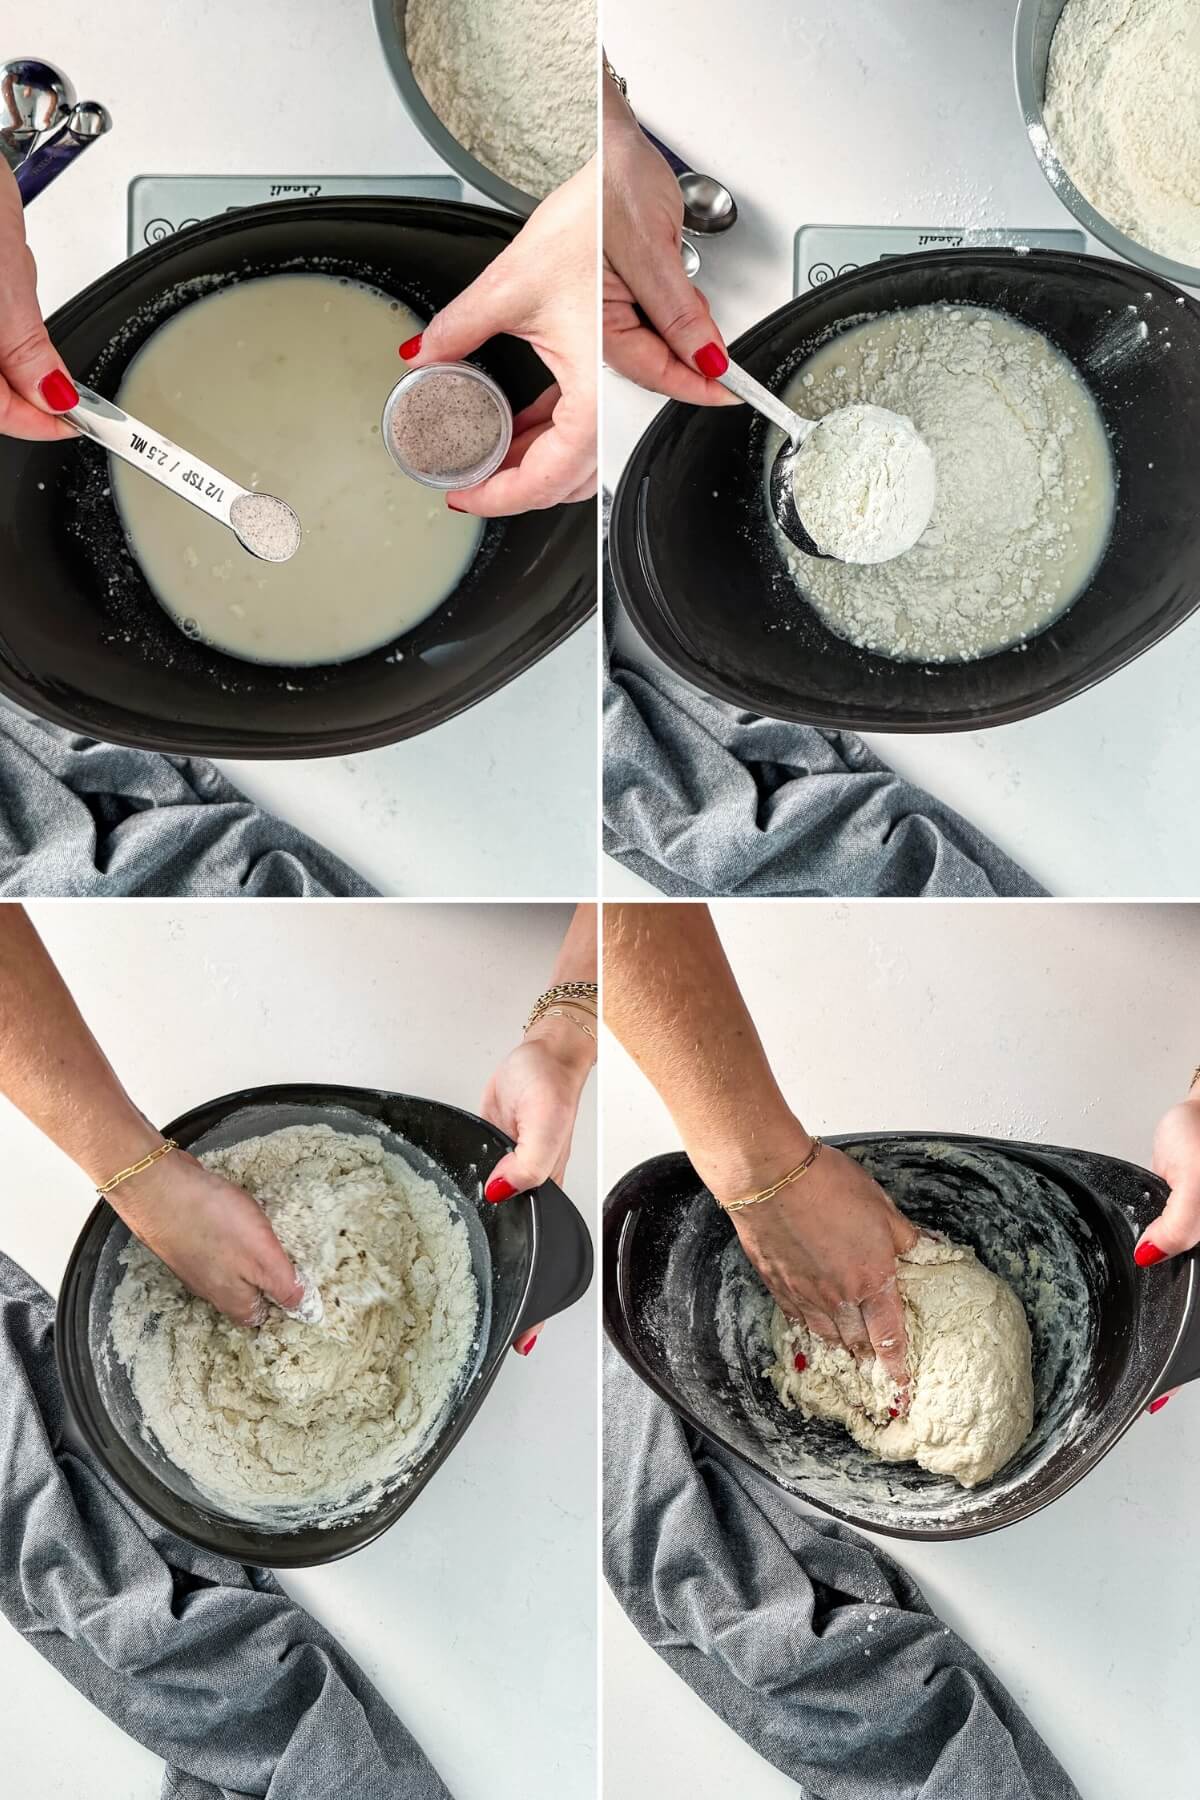
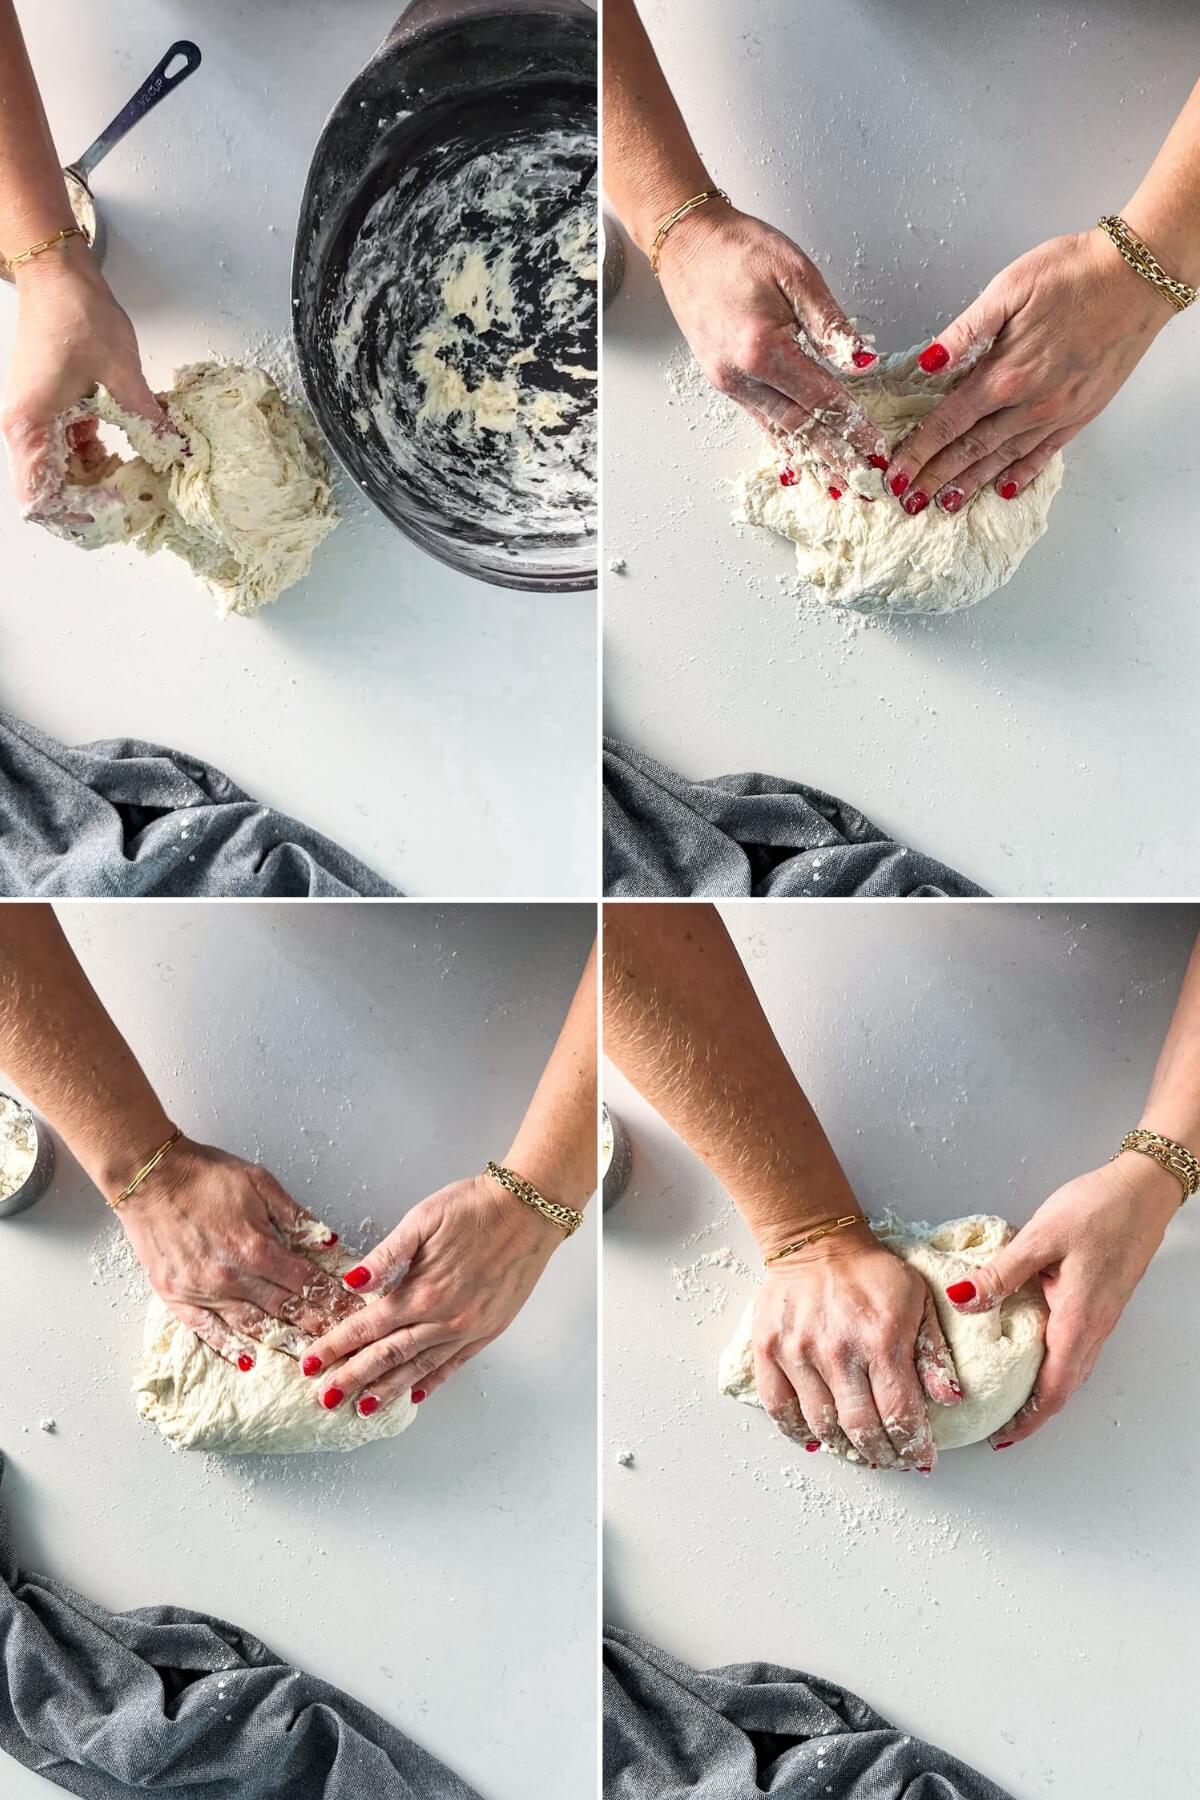
- Add the salt and flour and stir to create a shaggy dough.
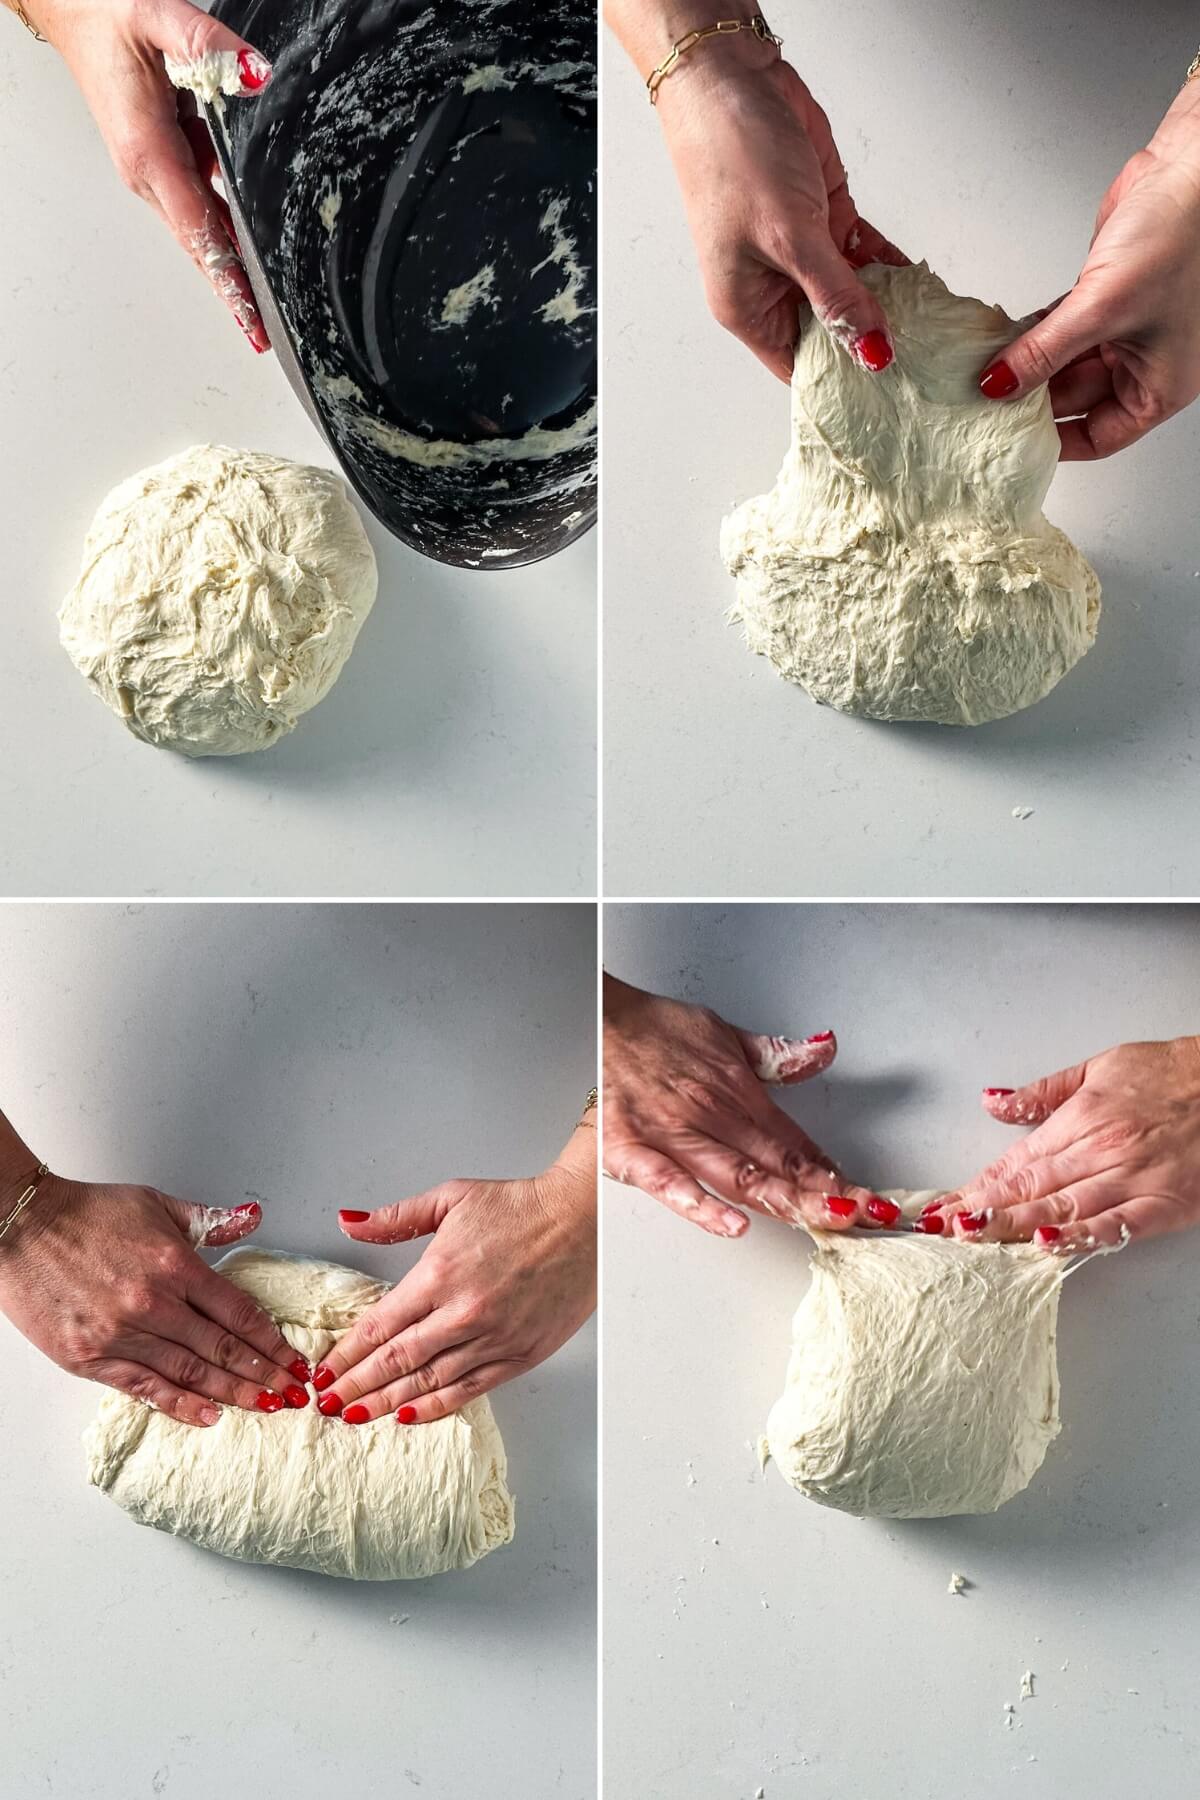
- Turn the dough out onto a lightly floured surface and knead until dough becomes more smooth and less sticky.
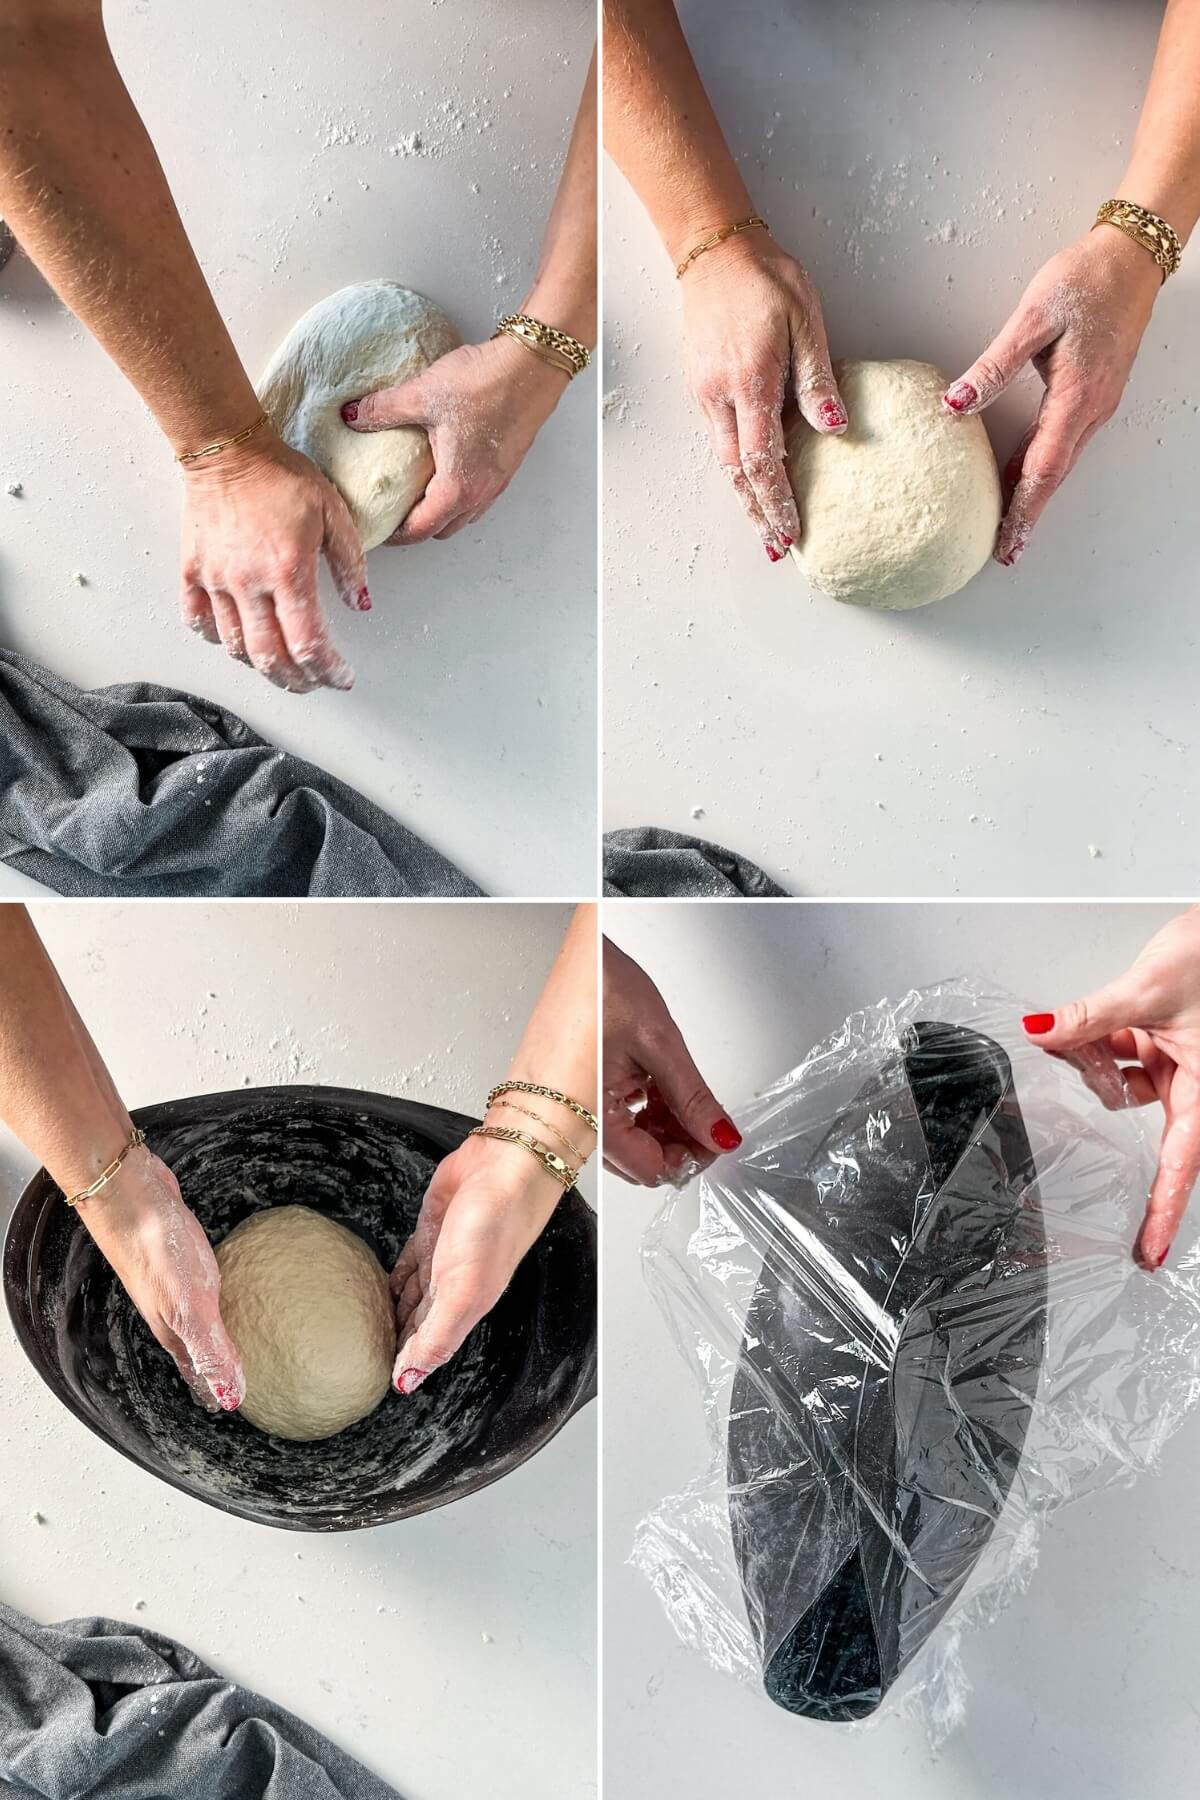
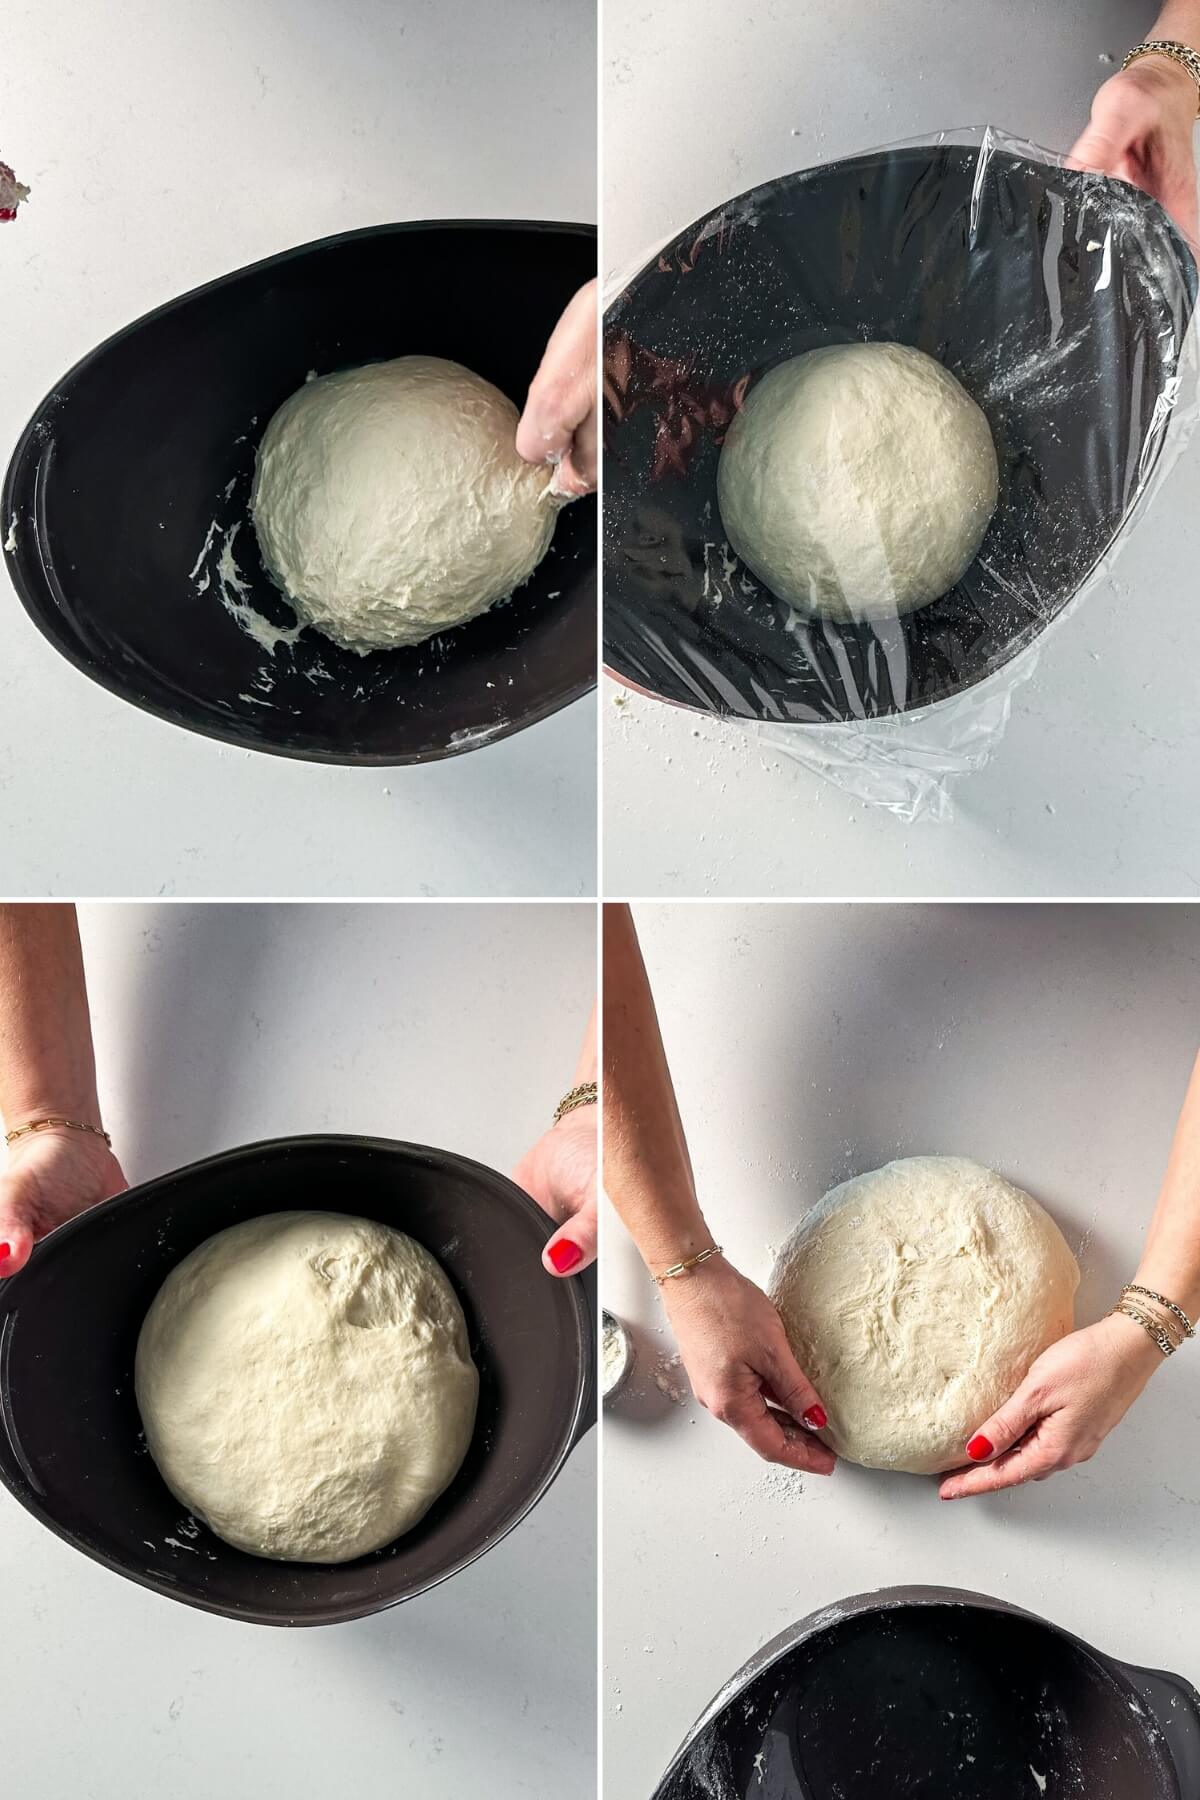
- Transfer the dough back to the Lékué Bread Maker or the bowl, close bread maker clasp and cover with plastic wrap. Let sit in a warm place for 30 minutes.
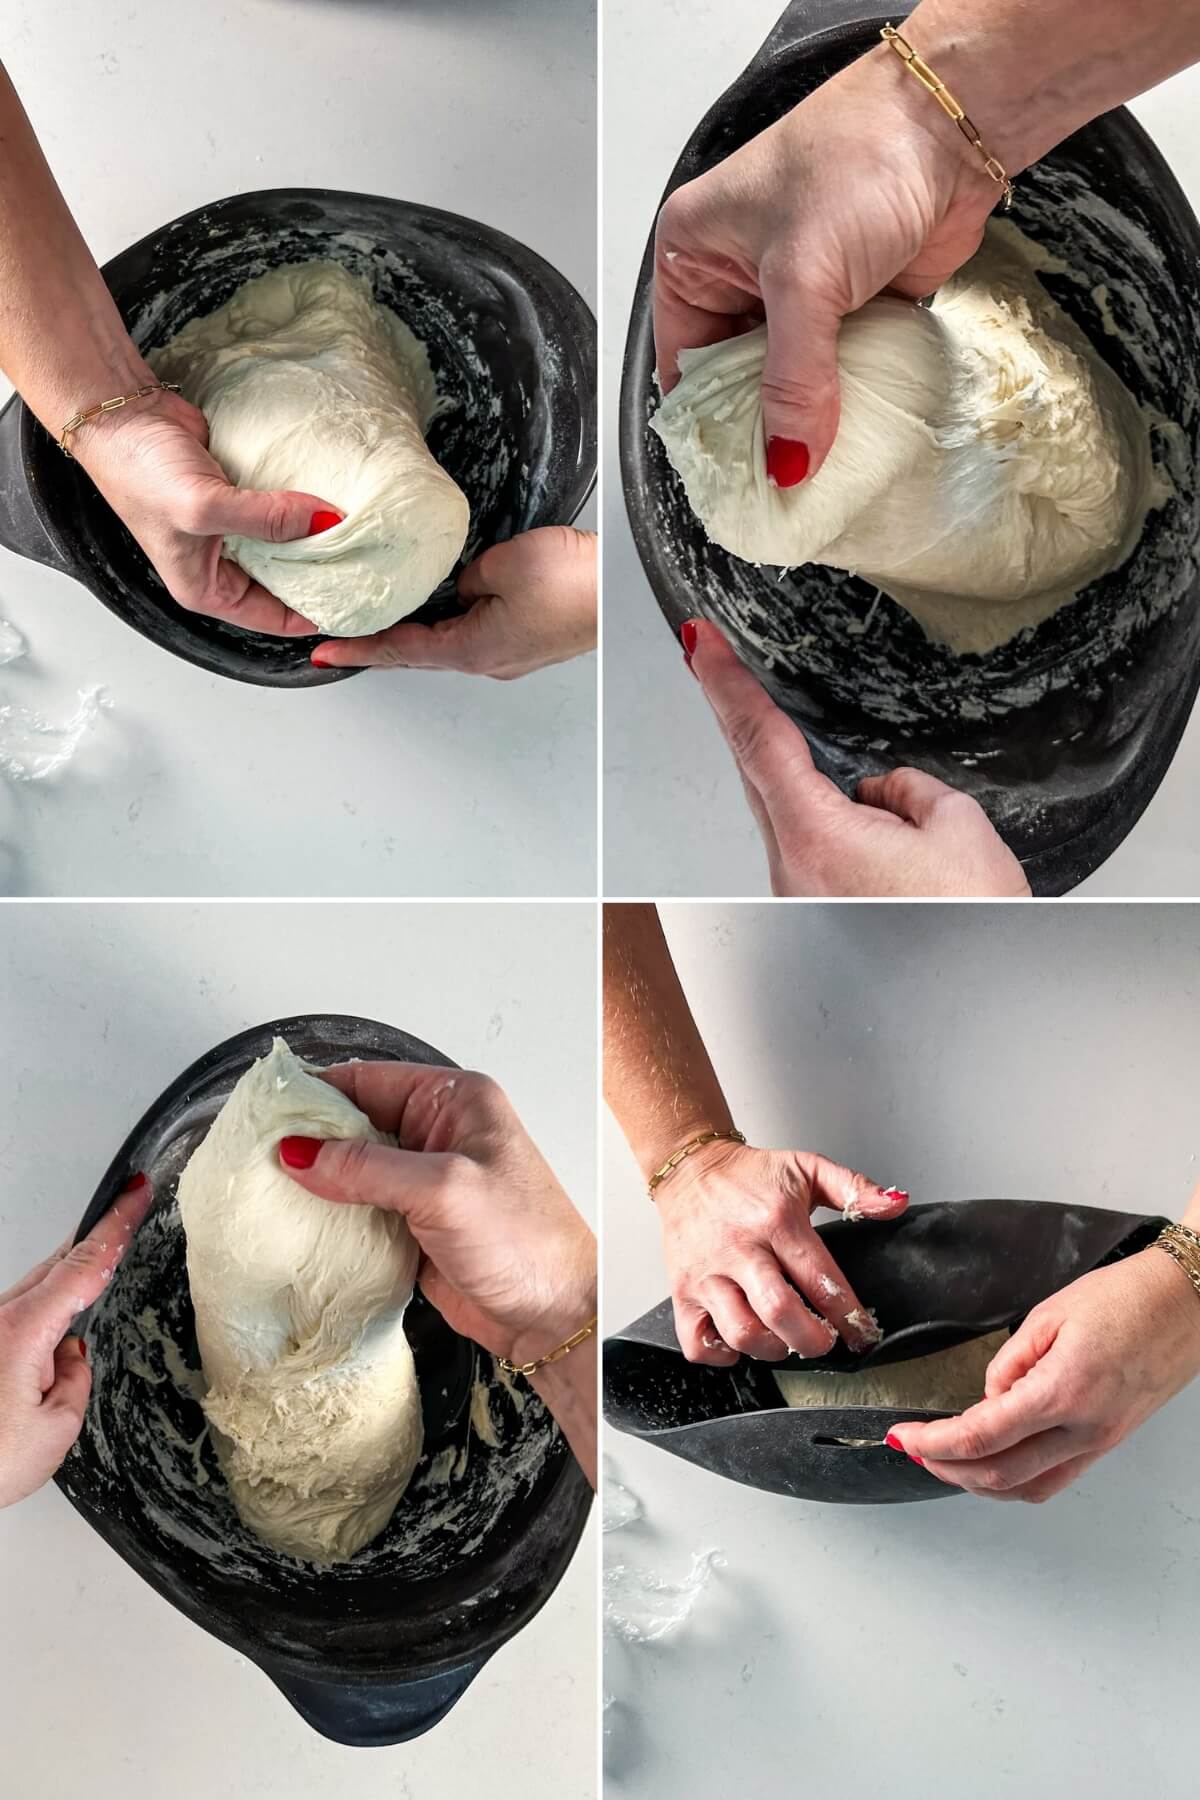
- Uncover bowl and stretch and fold dough on 4 sides.
- Cover again and let rest 30 minutes. Stretch and fold and clasp and cover bowl again (second time). After 30 minutes more, stretch and fold for a total of 3 stretch-and-fold actions resting 30 minutes each.
- The dough will begin to change texture and look more smooth. After the third stretch and fold, cover dough, let rest 30 more minutes and then pre-shape the loaf.
- Turn dough out of the bowl and onto a clean work surface. You can wash and dry the Lékué Bread Maker at this point if desired.
- Pre-shape the loaf and create tension in the dough by doing a tri-fold: stretching the top of the ball about ⅔ over the center then pulling the bottom up to the center. Turn dough a quarter turn so the seam is perpendicular to you.
- You can pre-shape the loaf at this point by "stitching" the dough together: pulling small portions of the edges in, over the center seam all the way down. Turn over, seam side down on the work surface, cover and let rest 30 minutes.
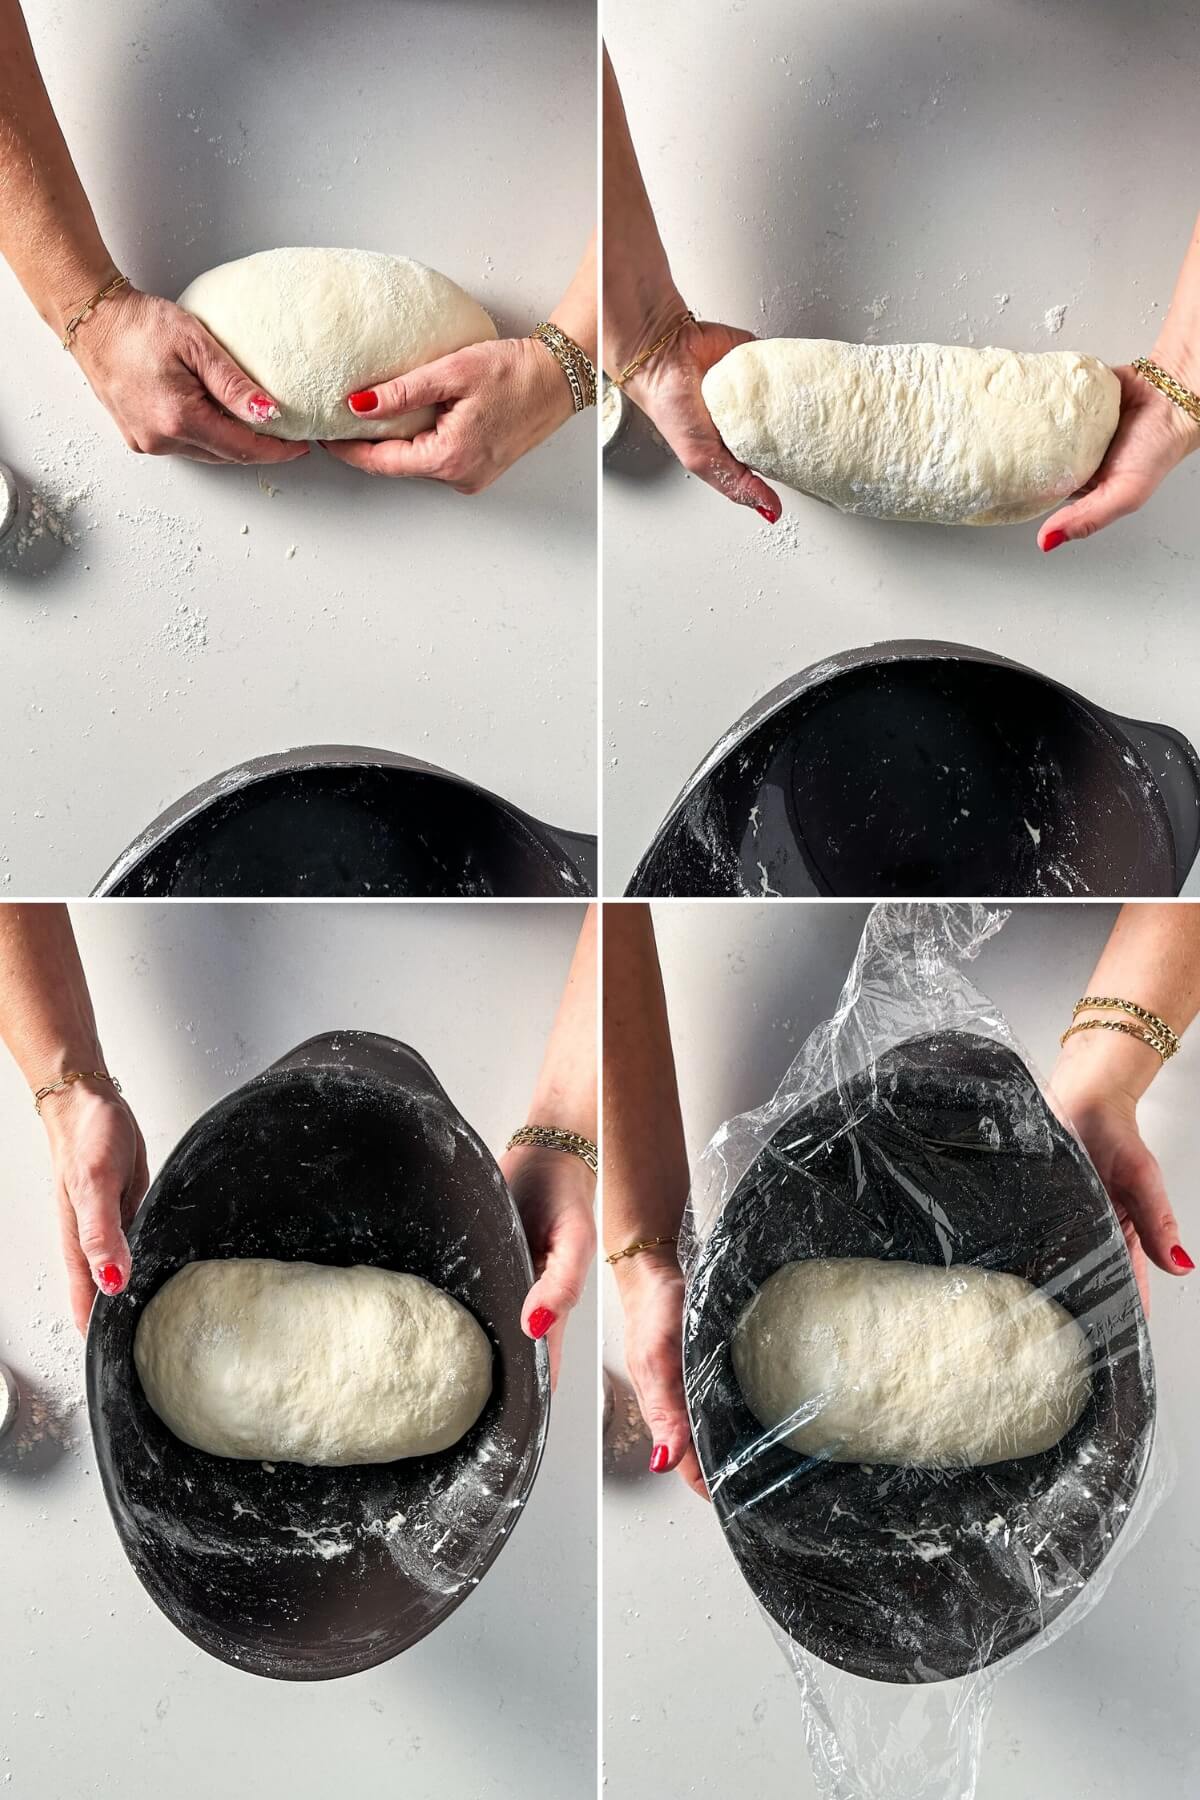
- Shape the loaf by gently rolling it towards you under your cupped hands to form a tight ball.
- Form an oval, keeping tension on the dough by pinching the bottom seam closed before placing the loaf, seam side down, in the Lékué Bread Maker or seam side up in a floured banneton basket.
- Cover, but do not close the bowl clasp, and let rise until very puffy, 45 minutes to 1 hour.
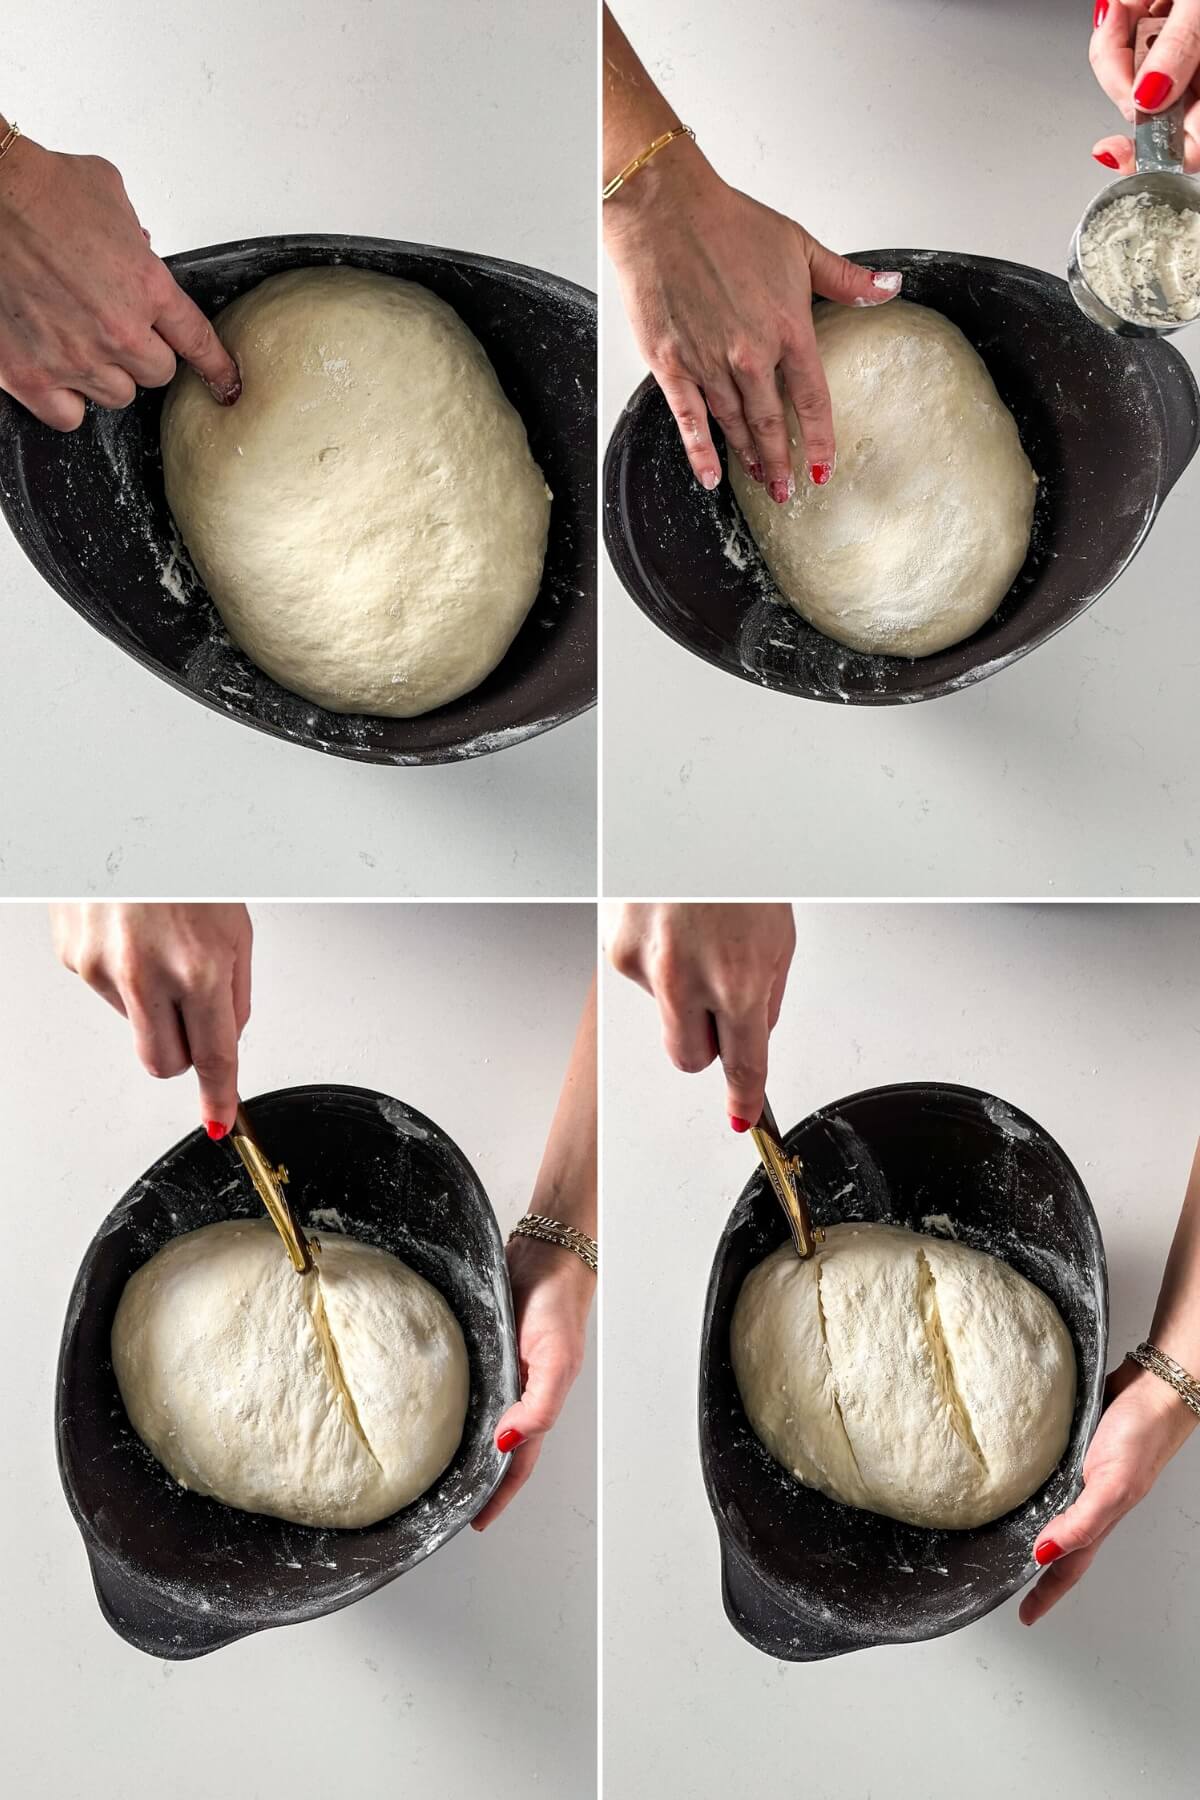
- (Use the poke test to check proofing. A floured finger pushed into the dough should leave a mark and move very slowly or not at all.)
- About 30 minutes into proofing time, heat oven to 425ºF with rack in the lower third.
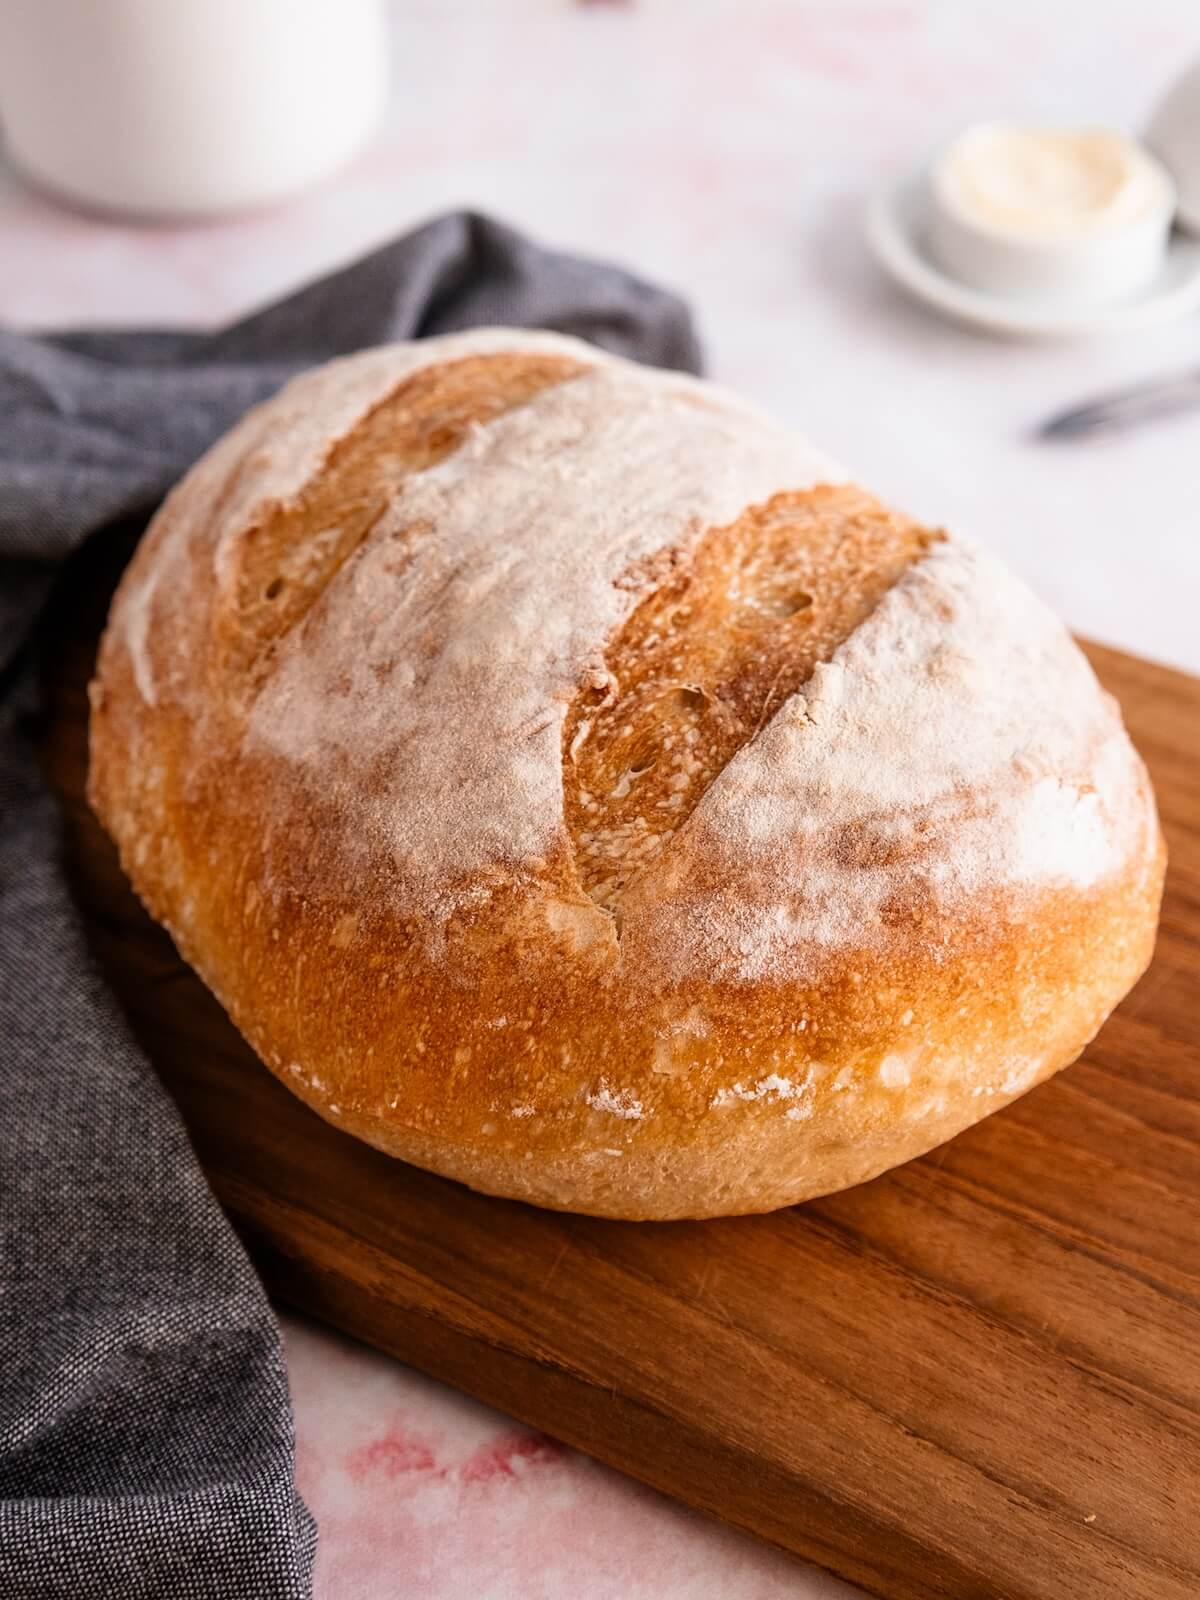
- If desired for a rustic look, dust loaf lightly with flour. Make two deep diagonal slashes on top with a serrated knife or lame. (IF YOU DON'T HAVE THE SILICONE BOWL, gently turn proofed loaf onto a sheet of parchment paper so the seam is down)
- Transfer loaf, still in Lékué Bread Maker, to the oven and bake until golden brown and an internal temperature is 200ºF on an instant read thermometer, 25 to 30 minutes. (IF YOU DON'T HAVE THE SILICONE BOWL transfer the loaf on parchment to a Dutch oven or baking sheet.)
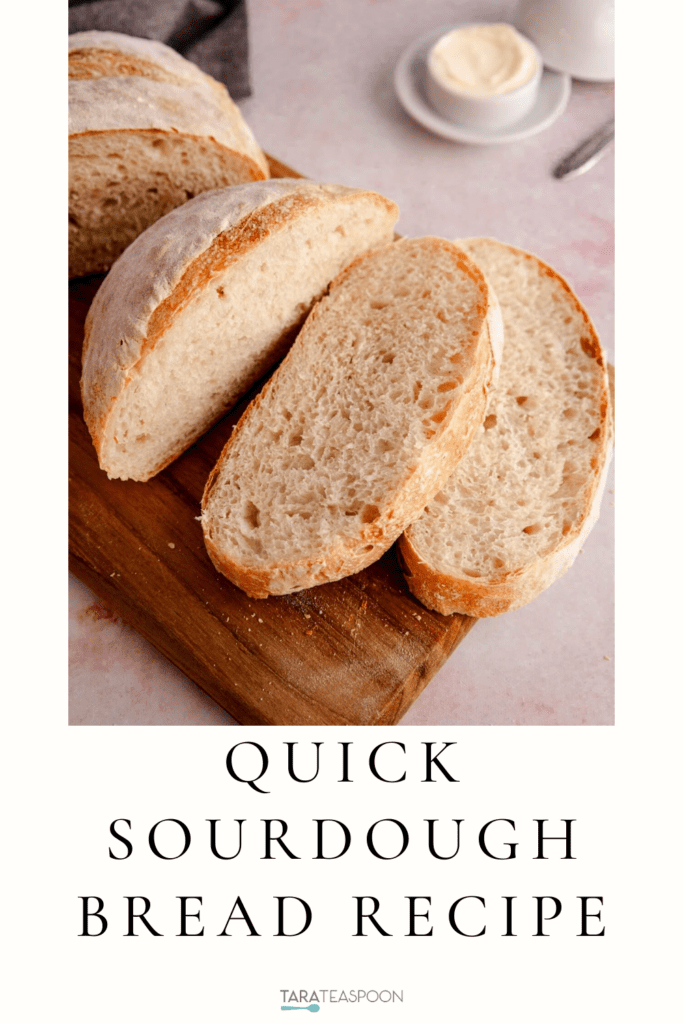
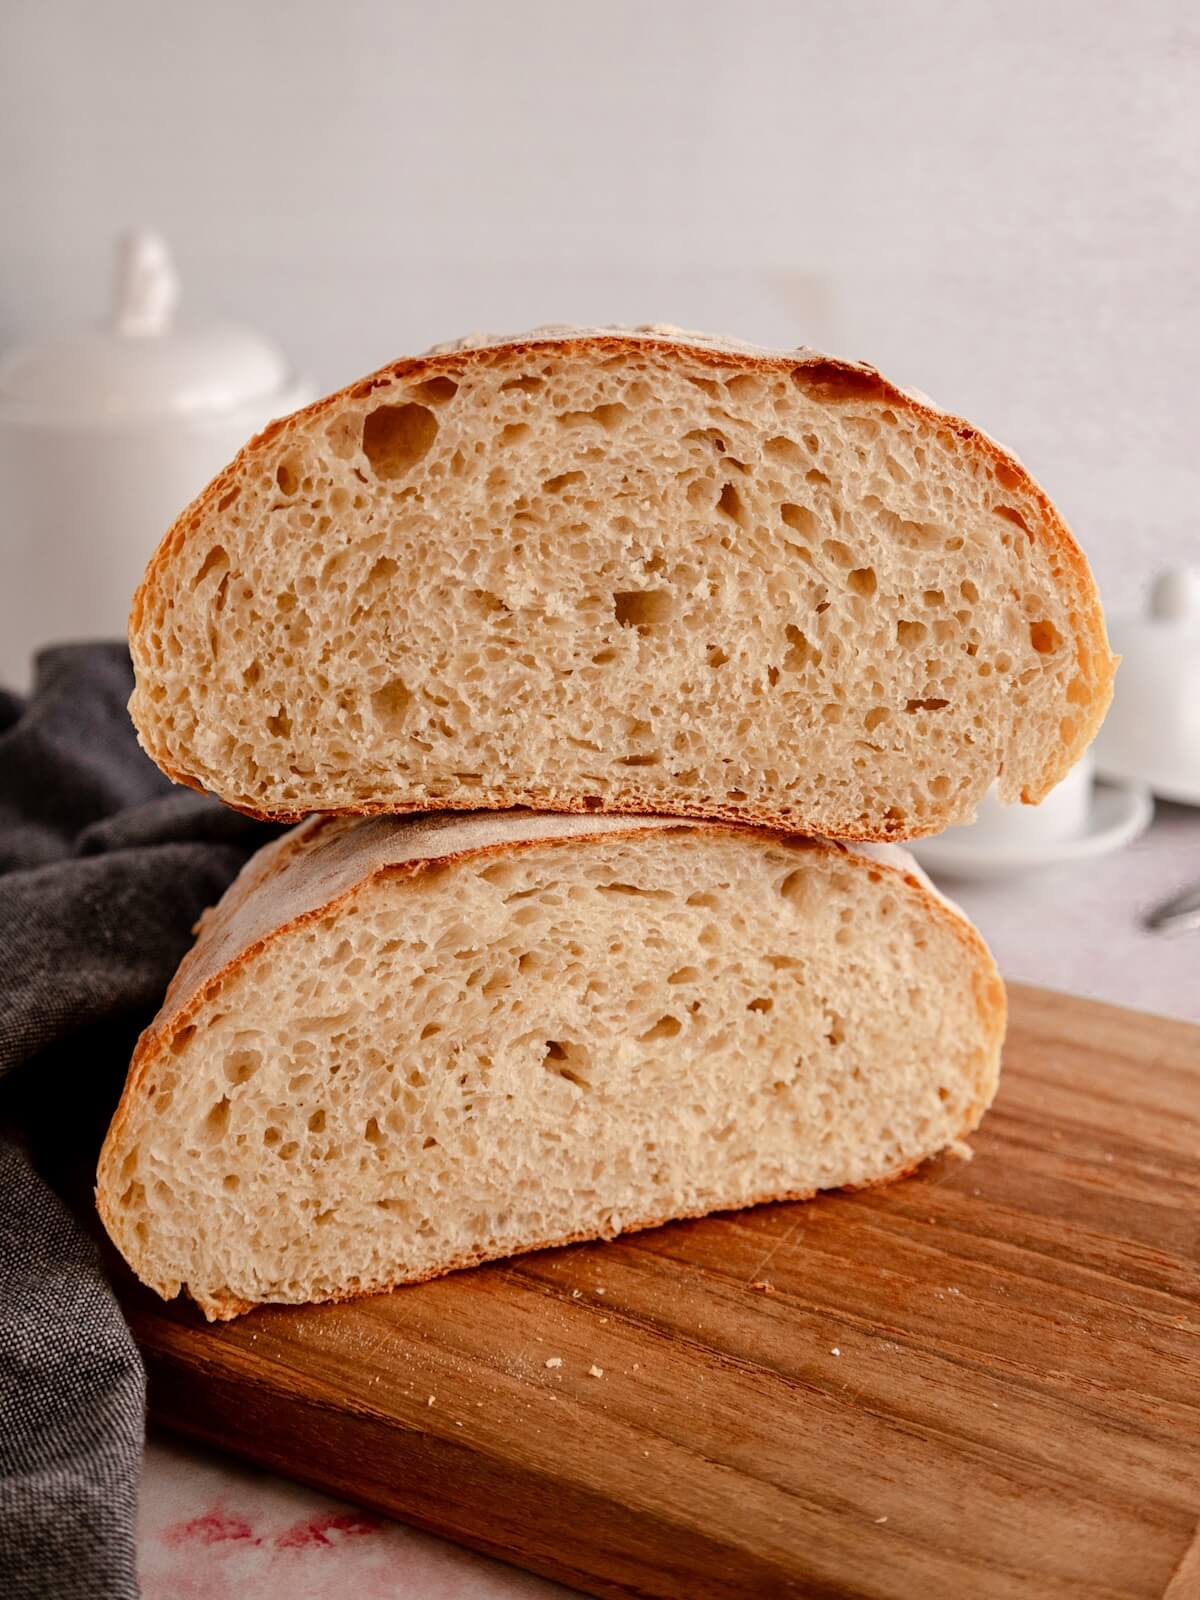
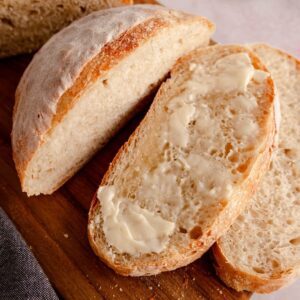
- Remove from oven and, using a clean towel of oven mitts, transfer out of the Lékué Bread Maker to a cooling rack. Let cool at least 30 minutes before slicing.

Storage
Room Temperature Storage: Store sourdough bread with yeast at room temperature wrapped in a plastic bag for 2 to 3 days.
Freezer Storage: For longer storage, freeze the loaf in a plastic bag or wrap tightly with plastic wrap. The loaf will stay fresh for up to 3 months in the freezer.
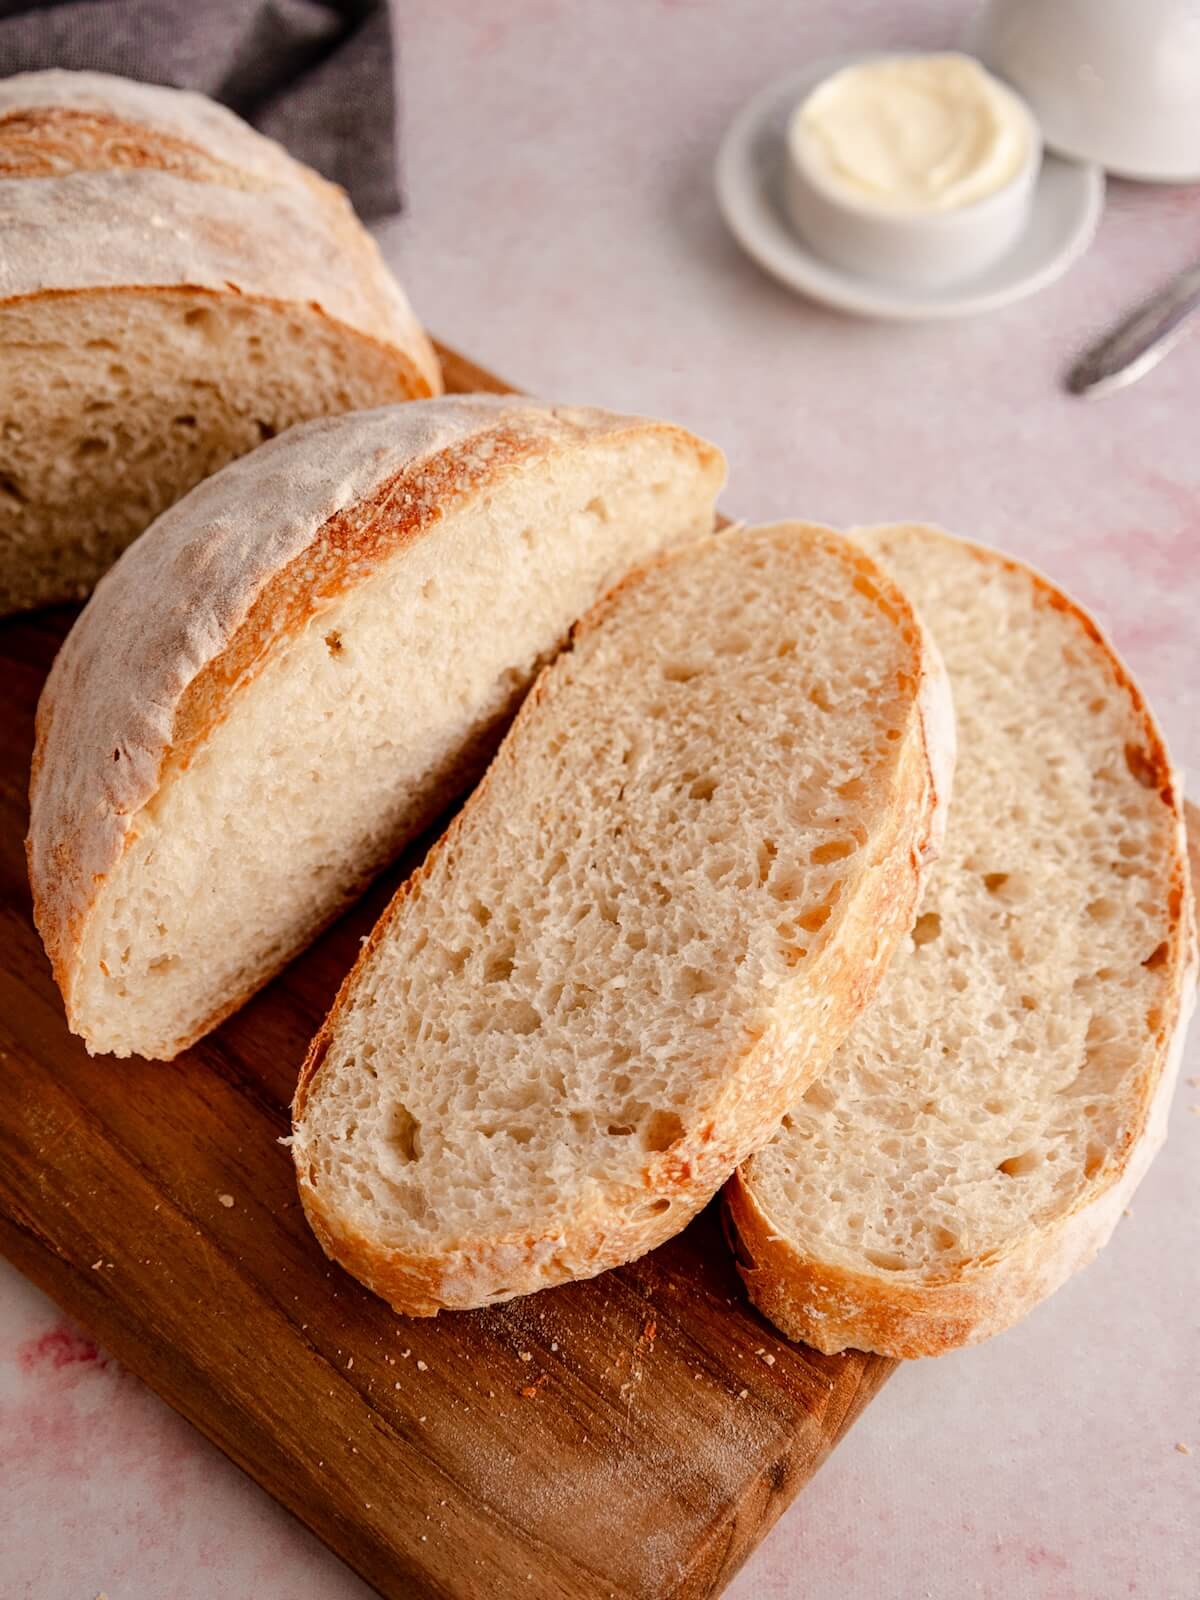
Expert tip: I like to slice half the loaf into even slices, then wrap them tightly together and freeze. When I'm ready for a slice or two, I just take out a few and use them for toast or a grilled sandwich.
What To Serve With Sourdough Bread
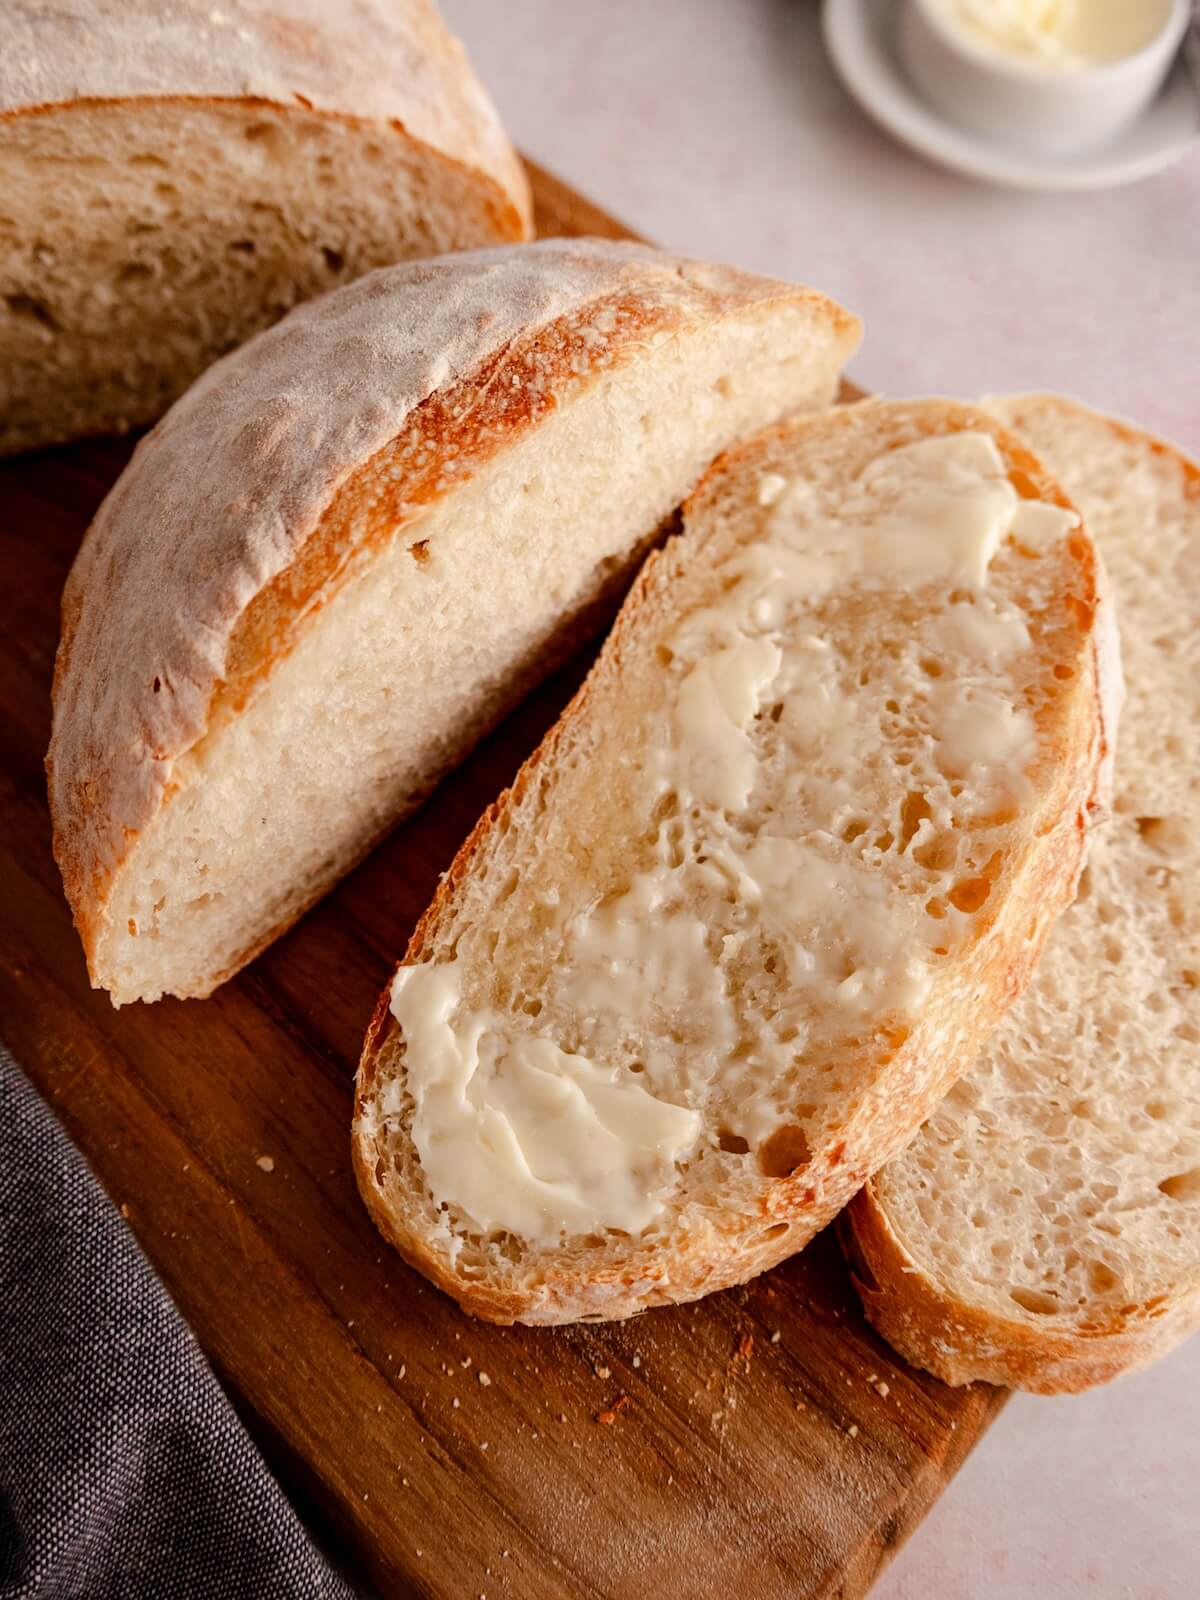
Pair your sourdough bread with cheeses, olive oil and balsamic vinegar, or just enjoy it with a bowl of delicious soup, as sandwich bread, or on the side with pasta. If you are looking for a simple sourdough roll recipe that is similar, check out these sourdough crescent rolls.
Here are some of my favorite recipes that pair well with sourdough:
- Broccoli Cheddar Soup
- Creamy Tomato Soup with Chicken
- Chipotle Sweet Potato Soup
- Sausage Lasagna with Pesto
- Ravioli Pasta Bake with Spinach
FAQs
I don't recommend making your own. There's no gaurantee the viability of the yeast strains you will pick up in your environment.
I highly suggest getting a bit of active starter from a friend!
Yes and no. Kneading the dough helps activate the gluten formation and is a step I encourage in this recipe. Long proof sourdough bread can go without kneading, but benefits from occasional stretch-and-fold moments, because the gluten loves to be massaged!
I use all-purpose flour for it's accessibility here. You most likely have it on hand and don't need to purchase a special flour. You can use bread flour in the recipe but you don't need to.
The best flour for classic sourdough is variable and each recipe is different.
I offer suggestions for mixing and baking vessels in the article. You can use regular mixing bowls for mixing, a bannaton or bowl for proofing, and a Dutch oven or baking sheet for cooking.
No, this recipe is not for whole wheat flour as the formula would need to be adjusted for liquid percentages, and rising time.
More Easy Bread Recipes
- Orange Nut Swirled Bread Using Frozen Dough
- One Banana Banana Bread
- Super Soft Classic Dinner Rolls
- Dinner Rolls With Seed Topping
Rate this recipe! ⭐⭐⭐⭐⭐
Scroll to the bottom of the page to rate and comment on this recipe. Leaving comments, questions, and ratings helps other too!
📖 Full Recipe
Homemade Sourdough Bread with Yeast
Video
Ingredients
- ¾ cup (168g) ripe (fed) sourdough starter
- ¾ cup (200g) warm water
- 1 teaspoon instant yeast*
- 1¼ teaspoons (8g) salt
- 2½ cups (300g) all-purpose flour
Instructions
- Feed sourdough starter 2 to 3 hours before using. Place in a warm environment to speed the process of growing double in size.
- When starter is ripe (doubled in size and active) begin bread making. In the bowl of the Lékué Bread Maker combine the ¾ cup ripe sourdough starter, water, and yeast. Stir with clean hands or a dough whisk to combine. Add the salt and flour and stir to create a shaggy dough.
- Turn the dough out onto a lightly floured surface and knead until dough becomes more smooth and less sticky, 5 to 7 minutes. Transfer the dough back to the Lékué Bread Maker or bowl, close bread maker clasp and cover with plastic wrap. Let sit in a warm place for 30 minutes.
- Uncover bowl and stretch and fold dough on 4 sides. Cover again and let rest 30 minutes. Stretch and fold and clasp and cover bowl again (second stretch). After 30 minutes more, stretch and fold for a total of 3 stretch-and-fold actions. Cover, let rest 30 more minutes and then pre-shape the loaf. You'll see the texture and shape change at this point. It will look more smooth and robust.
- Turn dough out of the bowl and onto a clean work surface. You can wash and dry the Lékué Bread Maker at this point if desired.
- Pre-shape the loaf and create tension in the dough by doing a tri-fold: stretching the top of the ball about ⅔ over the center then pulling the bottom up to the center. Turn dough a quarter turn so the seam is perpendicular to you.
- Now stitch the dough together by pulling small portions of the edges in, over the center seam all the way down. Turn over, seam side down on the work surface, cover and let rest 30 minutes.
- Shape the loaf by gently rolling it towards you under your cupped hands to form a tight ball. Form a circle or an oval, keeping tension on the dough by pinching the bottom seam closed before placing the loaf, seam side down, in the Lékué Bread Maker. (Or place it seam side up in a floured banneton.)
- Cover, but do not close the bowl clasp, and let rise until very puffy, 45 minutes to 1 hour. (Use the poke test to check proofing. A floured finger pushed into the dough should leave a mark and move very slowly or not at all.)
- About 30 minutes into proofing time, heat oven to 425ºF with rack in the lower third.
- If desired for a rustic look, dust loaf lightly with flour. Make two deep diagonal slashes on top with a serrated knife or lame. (If in a banneton, turn loaf out onto a piece of parchment).
- Transfer loaf, still in Lékué Bread Maker, to the oven and bake until golden brown and an internal temperature is 200ºF on an instant read thermometer, 25 to 30 minutes. (If on parchment, transfer on parchment to a Dutch oven or baking sheet).
- Remove from oven and, using a clean towel of oven mitts, transfer out of the Lékué Bread Maker to a cooling rack. Let cool at least 30 minutes before slicing.
Notes
Nutrition Per Serving
Delicious Bread and Quick-Bread Recipes

Tara Teaspoon
I’ve been in food publishing for over 25 years, creating recipes & food-styling for magazines, books, television, food brands, & advertising. With two cookbooks under my belt and thousands of my recipes at your fingertips, I hope you'll be inspired to spend more time in the kitchen!
Teresa says
Omg this was amazing. Easy and wow at the flavor with some salty butter. My sourdough rose well in it and it puffed up well. The crust was crunchy and crispy and the inside was bouncy soft and mmmmmm mmmmm good...this will be my go to bread from now on!!
Tara Teaspoon Admin says
This makes me so happy! Thank you so much for sharing your review of the recipe. I hope you'll get to enjoy it for years to come.
Florence Stanish says
C can I cold proff this bread before baking
Tara Teaspoon Admin says
Hello Florence! You can cold proof the bread before baking it. I haven't tested the recipe that way so you'll just need to check the bread as it bakes to make sure it gets enough time in the oven. You'll likely need to add a few minutes to the cooking time since it's starting out cold. I hope that helps. Best of luck.
natalie says
Hi! What is that black bowl clotche your are using? so cute! must have
Tara T. says
Hi! It’s talked about in the article! It’s the Lekue bread maker. Here’s a link: https://amzn.to/4j6Brx6
Tara
JaneG says
Hello! I'm beyond excited! This is the first loaf of sourdough that I'm pleased with. I don't work w/my starter enough to build it up and this recipe which allows yeast is perfect for me. I definitely will be using it again.
Thank you!
Kellie says
This dough is so wet that I feel like it's missing at least two cups of flour. And never did form a solid dough ball because it's so sloppy wet. I used kitchen scales and measured everything to perfection. I don't recommend this recipe on the best day
Tara Teaspoon says
Hi Kellie, there are extensive process images throughout the article. At the point at which you felt it was too wet, you could always add more flour to create the consistency matching the process steps. I'm sorry you weren't able to get a successful loaf on your first try with this recipe. Perhaps try it again, as bread making can vary depending on altitude, humidity, and your flour brand. That's why I included very detailed pictures.
Kay says
I used 1/2 bread flour and 1/2 ww flour instead of all purpose and I used a covered bowl and banneton for the rises and my dutch oven for the bake. Also adjusted bake times slightly. Nice loaf. Great to have an alternative when I don't have the patience for my usual sourdough.
Kendra says
This sourdough recipe is WAY better than any of the many sourdough recipes I've tried from the internet. I've tried at least 20 different ones that claim they are the best, but every time my loaves came out as complete garbage. I love how your recipe didn't require any lame magic tricks or any ridiculous unnecessary weird things or expensive tools. I was so close to completely giving up on bread and never trying it again. I'm glad I tried your recipe because it's the only one that worked, and I just made the best loaf of sourdough bread I've ever tasted in my life.
Tara T. says
Kendra this comment made my day. I worked hard on this recipe to make sure it was a delicious loaf of bread and worked every time. I'm so happy you have had success! Tara
Mia says
Fantastic!!! With your detailed instructions, I’m sure I will be successful! Thank you!! I just refreshed my start so I’m ready to go! Looks delicious!
Ellie says
Sourdough bread is such a process to make 😅 I cant believe this recipe is so speedy! I can't wait to try it on my family this week 🙌🏻